Microsoft Defender is well known for its excellence in computer protection and virus/malware scanning. However, some PC users wonder does it function automatically when you insert the USB flash drive into a PC. Feeling at ease, bring your questions and read this post to get a clear answer.
This article also offers you details on how to enable Windows Defender to scan USB drives automatically, and moreover, how to recover lost data with a professional fix is also covered if you encounter any data loss.
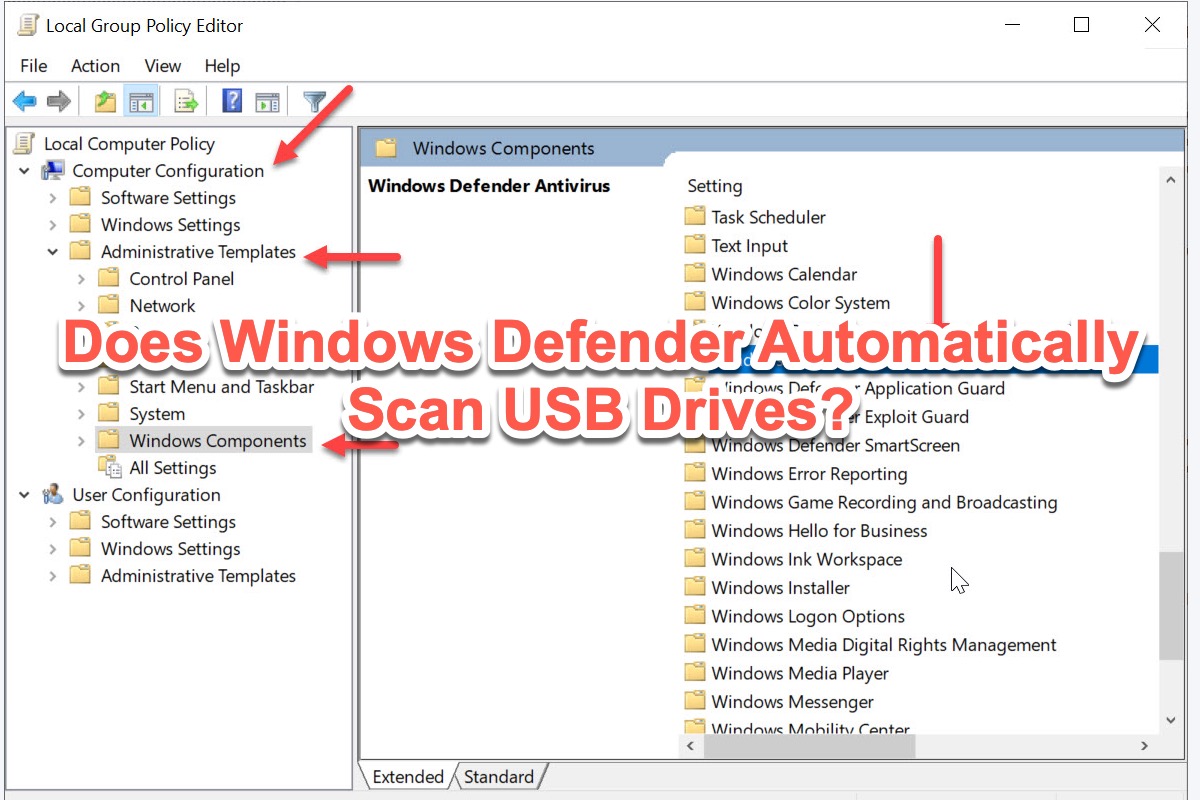
Does Windows Defender automatically scan USB drives?
When asked whether Microsoft Defender automatically scans USB drives, the final answer can be Yes or No. The answer is yes because Microsoft Defender automatically scans USB drives in previous versions of Windows, while the answer is no because this feature has been removed from the Defender functions on recent Windows OS.
Windows made no clear statement about the removal. But I guess it happens due to two reasons. Firstly, Microsoft Defender would disconnect your drive and then performs a full scan which might cause data loss. Secondly, this scan takes several minutes and some people have no patience to wait. Therefore, Windows puts choices in the hands of users.
However, Windows users are allowed to enable Microsoft Defender to scan USB drives automatically as long as they make some tweaks on their computers.
If you think this post is informative, please share it with more people!
Why do you need Microsoft Defender's automatic scanning?
Microsoft Defender is a wonderful security utility that protects computers against viruses, malware, malicious software, and more. It makes your computer less vulnerable to malware that hides on external hard drives and keeps your files and folders on the computer safer and more secure.
It is not false news that some malware hides on USB devices in order to infect Windows hosts. Furthermore, malware disguises itself as normal software in some cases and if you run it without realizing it, your computer is infected. Therefore, enabling Microsoft Defender to automatically scan USB drives is crucial.
Read on to know how to enable Microsoft Defender to scan removal drives automatically and do not share this article to make more people know the importance of enabling Microsoft Defender's automatic scanning.
How to enable Windows Defender to scan USB drives automatically?
With a basic understanding of Microsoft Defender, now let's concentrate on how to make Microsoft Defender scan your USB drives by default. This post walks you through 2 ways in detail and you can try each of them as you like.
Method 1: Enable automatic USB drive scanning via Windows Registry
Registry Editor contains so many significant system files and data of your computer and it even functions when you encounter This Device Cannot Start Code 10 status of your drive. Note that any slight error in the Registry Editor can cause serious problems so you'd better make a full Registry backup before you carry out this method and bring your concentration to perform this work.
- Type Regedit in Windows Search to open Registry Editor.
- Click View and tap on Address Bar if you see no address bar on the main window.
- Copy the following path and paste it into the Address Bar: HKEY_LOCAL_MACHINE\SOFTWARE\Policies\Microsoft\Windows Defender
- Locate Windows Defender and right-click it in the left pane, select New, and select Key to change its name to Scan.

- Select the new key and right-click it in the right pane. Then create a new 32-bit DWORD value.
- Rename the DWORD to DisableRemovableDriveScanning. Make sure the spelling and formatting are completely precise and correct.
- Double-click the new DWORD and make sure the Value Data is 0. Then click OK.
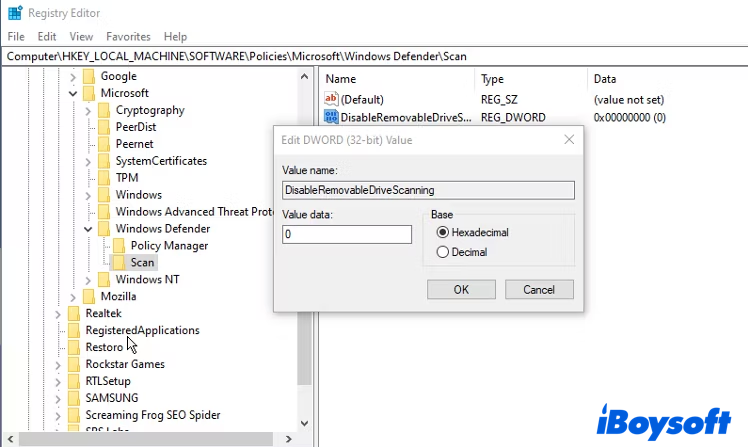
- Close the Registry Editor.
Here Microsoft Defender is enabled successfully and it will scan your inserted USB drives as long as you take it as your default antivirus protection. If you're applying third-party antivirus software, head to check if it offers automatic scanning also.
Method 2: Make a Group Policy to scan USB drives using Microsoft Defender
You can have a look at these steps real quick and then get down to make a Group Policy to scan USB drives by using Microsoft Defender.
- Press the Windows + R keys on your computer keyboard.
- Type gpedit.msc and press the Enter/Return key or OK.
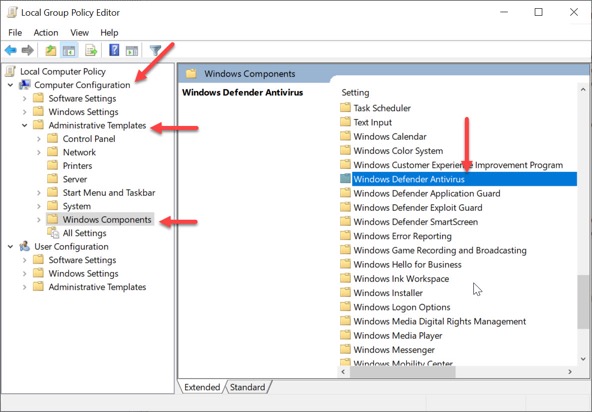
- Locate the Computer Configuration directory and then find the Administrative Templates under it. Then expand the Administrative Templates folder.
- Scroll down to Windows Components and expand it.
- In Windows Components, look for Windows Defender Antivirus and then expand it.
- Navigate to the Scan folder and click it.
- On the right side pane, you can see a slew of setting settings and head to search for Scan removable drives.
- Right-click the Scan removable drives setting which is disabled by default.
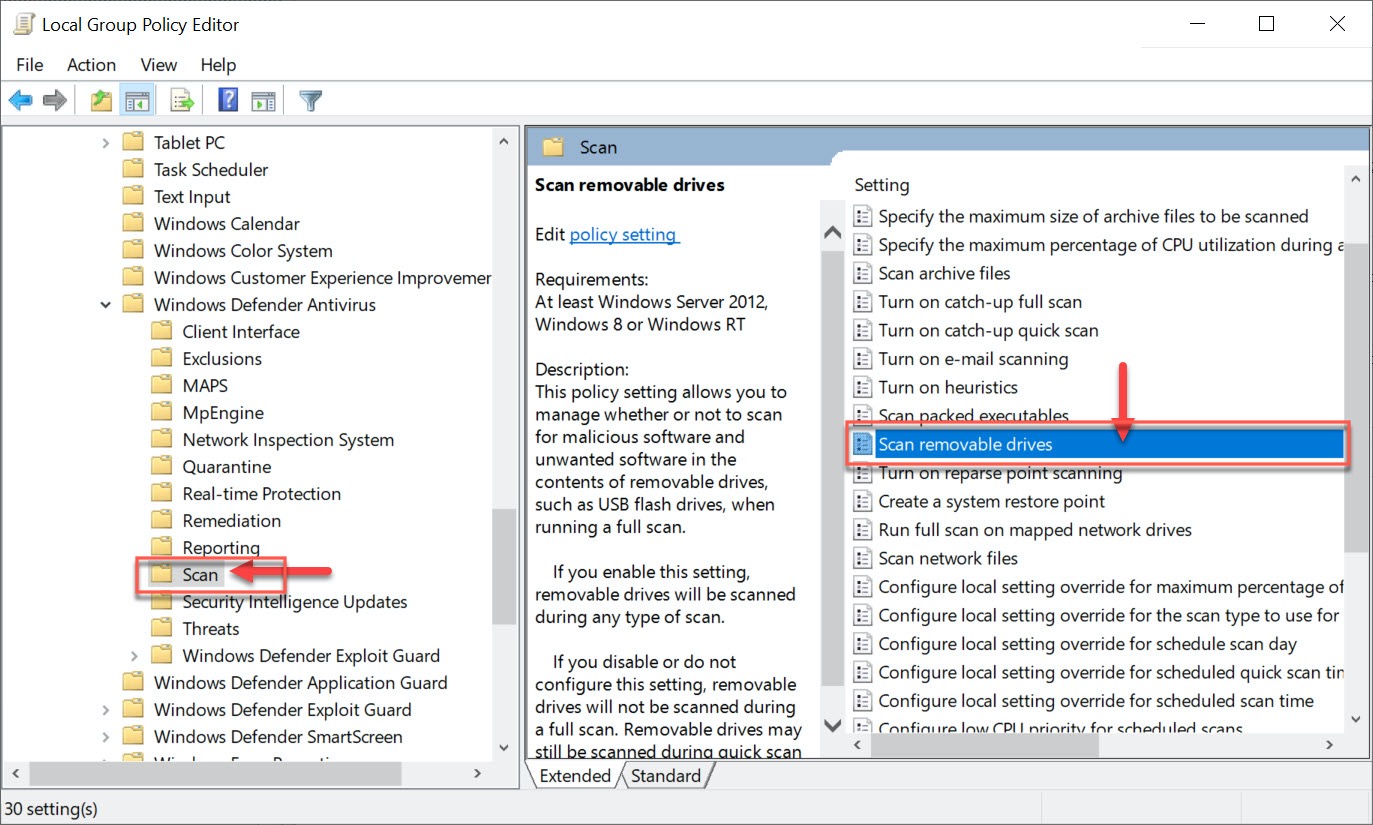
- Click the Enabled option to make it active for your Windows computer.
- Click Apply and then tap on OK to confirm your actions.
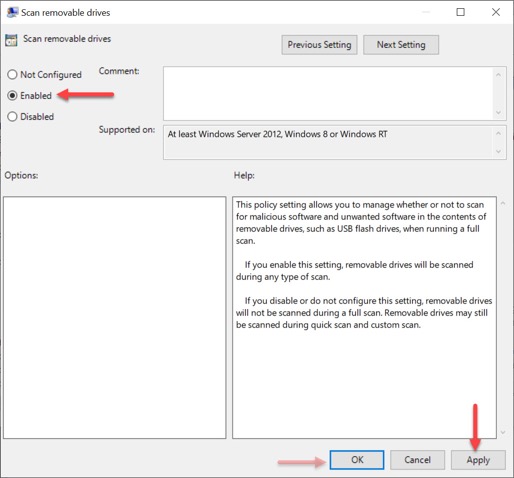
At present, Microsoft Defender will protect your computer from any USB drives and quarantine any viruses and malware. If you don't need the automatic scanning anymore, head to click Disabled.
How to fix data loss caused by Microsoft Defender's scanning?
As mentioned, Microsoft Defender removes your USB devices before performing the full drive scanning. Then it informs you that the USB devices are virus-free so that you can work with them on your computer. However, it's possible that data loss happens sometimes when Microsoft Defender removes your storage device.
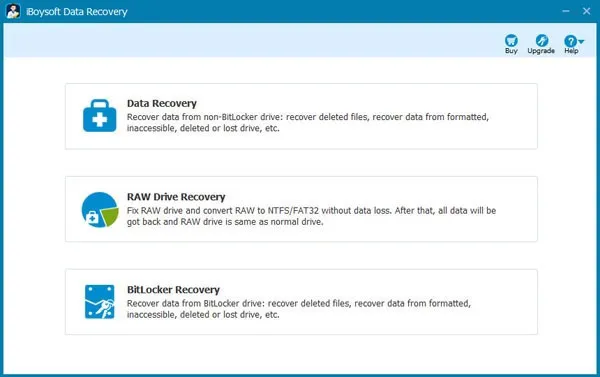
Hence, performing the data recovery work is indispensable. iBoysoft Data Recovery Software is highly suggested because it is designed with advanced disk scanning skills and data recovery algorithms. You can apply it to recover deleted, missing, disappearing, and lost files from unreadable, corrupted, formatted, and failing drives with ease.
Best Deleted/Lost File Recovery Software - iBoysoft Data Recovery for Windows
- Recover deleted photos, documents, audio files, videos, emails, etc.
- Recover deleted files from HDD, SSD, flash drives, SD cards, etc.
- Restore deleted files from BitLocker encrypted hard drives.
- Windows 11/10/8.1/8/7/Vista/XP supported.
- Windows Server 2019/2016/2012/2008/2003 supported.
- Other data recovery.
Read-only & risk-free
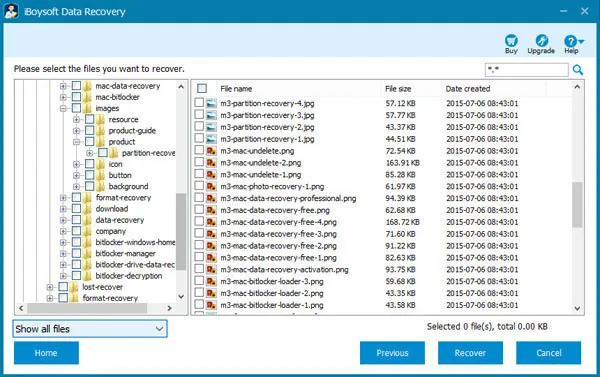
It's simple to recover deleted or lost files on your computer thanks to an intuitive and user-friendly interface. Here I am gonna show you how to recover missing files on your USB devices on a PC:
- Free download and install iBoysoft Data Recovery Software on your Windows computer.
- Gently input your USB device into the computer.
- Launch iBoysoft Data Recovery Software and choose Data Recovery mode on the main window.
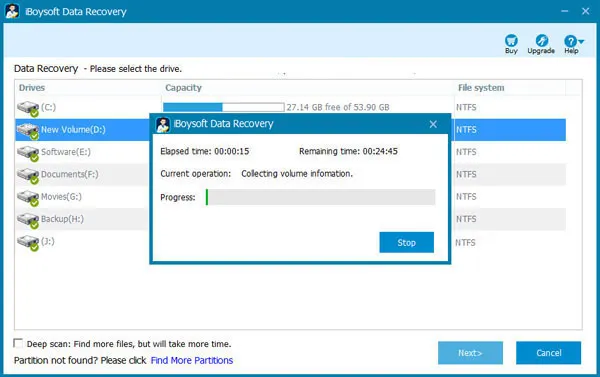
- Select the drive where you lost data and click Next to begin the disk scanning.
- When the scanning process ends, right-click the scanned results and click Preview to check your files.
- Select all the files you want to restore, tap the Recover button, and save the recovered results to other drives to avoid data loss again.
iBoysoft Data Recovery Software will never keep any recording or notes of your files and data, you can rest assured to use it on your computer.
Final words
If you feel unsafe using the removal devices on your computer, then you can give Microsoft Defender a chance to protect your device from a malicious USB device with automatic scanning.
Note that Microsoft Defender's automatic scanning might cause your USB device data loss sometimes. Yet worry is needless, this article offers you professional data recovery software to bring your files back.
If you find this article informative, please share it with more people on your social platform!
FAQ about does Windows Defender automatically scan USB drives
- QDoes Windows Defender automatically scan external devices?
-
A
Windows Defender automatically scans the external drives on the old versions of Windows, but Windows Official removes this feature. If you're interested this feature, you can enable it on your computer manually.
- QHow do I stop Windows Defender from scanning my flash drive on my PC?
-
A
Under the "Virus & threat protection settings" section, click the Manage settings option, and locate Microsoft Defender Antivirus. Double-click the Turn off Microsoft Defender Antivirus policy.