If you are still using a third-party tool to summarize your content, Mac actually has a built-in tool called Summarize to shorten a text document and generate a more concise version of your content. Being part of the macOS, the Summarize feature can perform beyond your expectation.
This post is going to introduce what is Summarize on Mac, how to enable Summarize, and more importantly, how to use it to summarize your daily paperwork.
What is the Summarize tool on Mac
Although many of you are not aware of this tool, Summarize has been on your Mac for quite a while, despite the fact it's turned off by default.
With it enabled, this text summarizer tool can be used to summarize your long texts into shorter sentences. Working with most text documents, say, Pages and TextEdit, it's capable of condensing your content and giving a brief statement of your main points.
Want to know how to turn it on and start minimizing your content without losing its original meaning? Read on to turn on Summarize on your Mac.
Turning on Summarize on your Mac
The process to switch on Summarize is quite simple. Simply follow the steps below and you can make use of this handy feature.
Step 1. Navigate to the Apple icon to bring out the Apple menu. In the drop-down list, click on System Preference to dive into your system settings.
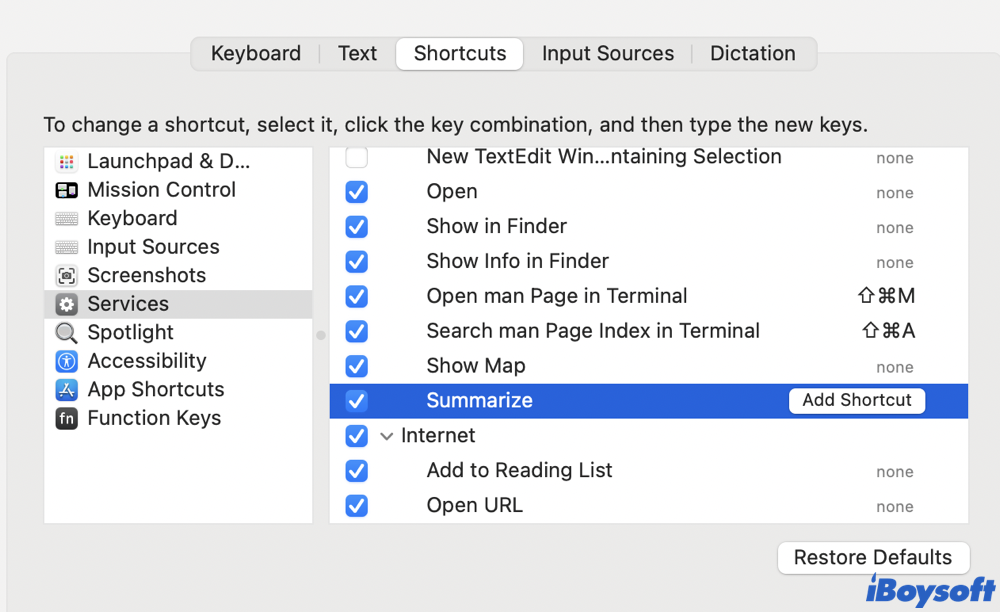
Step 2. Find the Keyboard icon and click on it. When you enter the Keyboard settings, choose Services from the left-side column.
Step 3. A bunch of settings should appear in the right window. Scroll down to find the Summarize option. You can notice it's turned off by default. Tick the checkbox in front of it to make it work. Additionally, you can create a keyboard shortcut to it.
Did you successfully turn on Summarize on your Mac? If so, why not share the methods with your friends?
How to use Summarize to shorten texts on Mac
Summarize can work on Pages, TextEdit, Apple Notes, and content from browsers such as Safari, Firefox, and Chrome. Also, it can shorten texts in the Mail. Unfortunately, this feature doesn't apply to PDF files and some third-party word-processing apps. In this case, you can copy-paste the content to the local text editor. With texts prepared, you can start summarizing them now.
Step 1. Select the text you want to summarize by pressing Command + A or clicking and dragging the mouse. It can be the whole content or several paragraphs.
Step 2. Click on the app name from the menu bar at the top of your screen. Then find and click on Services from the context list.
Step 3. A list of services should appear then. Choose Summarize. A window will pop up and shows the shortened version of your context.
Step 4. If needed, customize your summary by deciding to condense the text into either sentences or paragraphs.
By choosing Sentences, Summarize will pick out important sentences that deliver the main points and remove the rest unnecessary ones. Clicking on Paragraphs will sort out your text on a paragraph-by-paragraph basis.
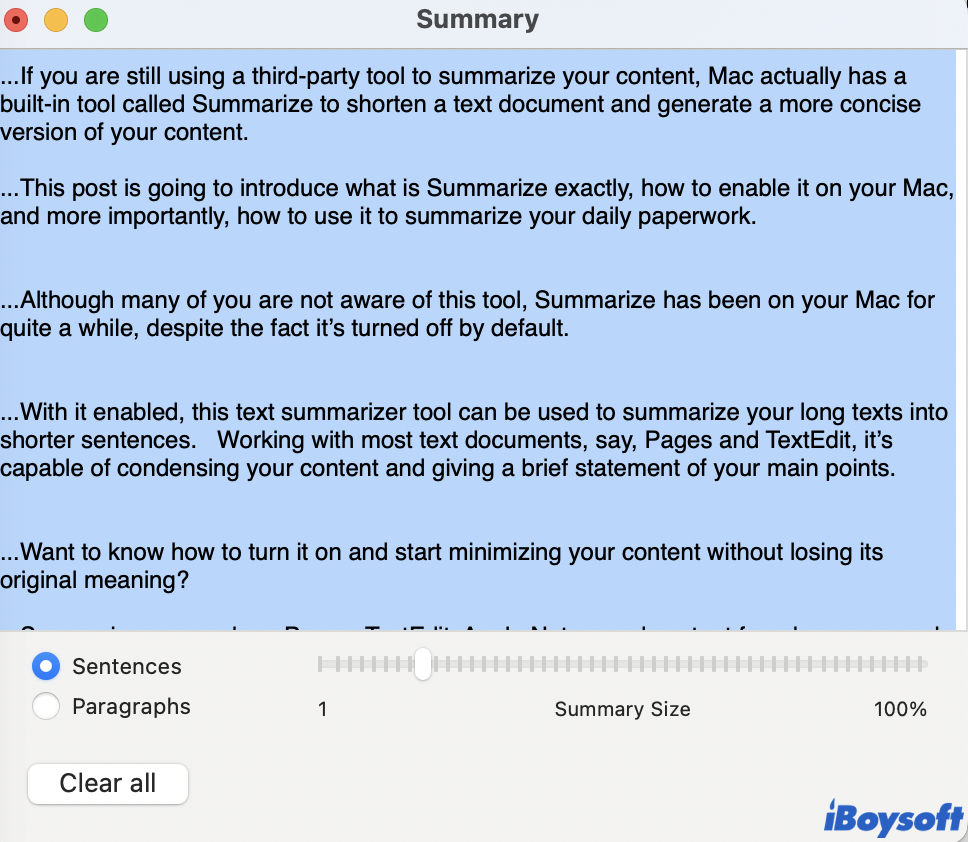
Meanwhile, you can choose the summary size. Simply move the slider left and right to determine how concise you want the summary to be.
Conclusion
Although Summarize can't replace a real editor, it works fine if you just want to roughly go through a long text document. The option to choose a sentence-based or a paragraph-based summary also covers the needs of users with different aims. Turn Summarize on and give it a try.
If you find this post helpful, please share it with more people!