Touch Bar, an OLED multitouch toolbar, was displayed on the keyboard of Apple's 13-inch and 15-inch MacBook Pro between 2016 and 2021. Though Apple announced the touch bar had been removed from MacBook Pros in 2021, many Mac users may still have a MacBook with the touch bar in hand now.
If you are one of the Mac users who don't like the MacBook Touch Bar default options or encounter MacBook Pro Touch Bar flickering, this post should give you some help. It will tell you how to customize the MacBook Pro Touch Bar according to your own preferences and fix Touch Bar misbehavior.
How to edit the touch bar on MacBook Pro
Namely, there are 3 different ways you can customize your MacBook Pro Touch Bar, including how to change the settings for your Touch Bar as a whole, how to customize what buttons appear in the Control Strip, and how to customize what buttons appear in specific apps.
How to change Touch Bar overall settings
- Click the Apple icon on the top left of your screen and select System Preferences.
- Choose Keyboard then navigate to the Keyboard tab.
- Under the Keyboard option, click Touch Bar shows.
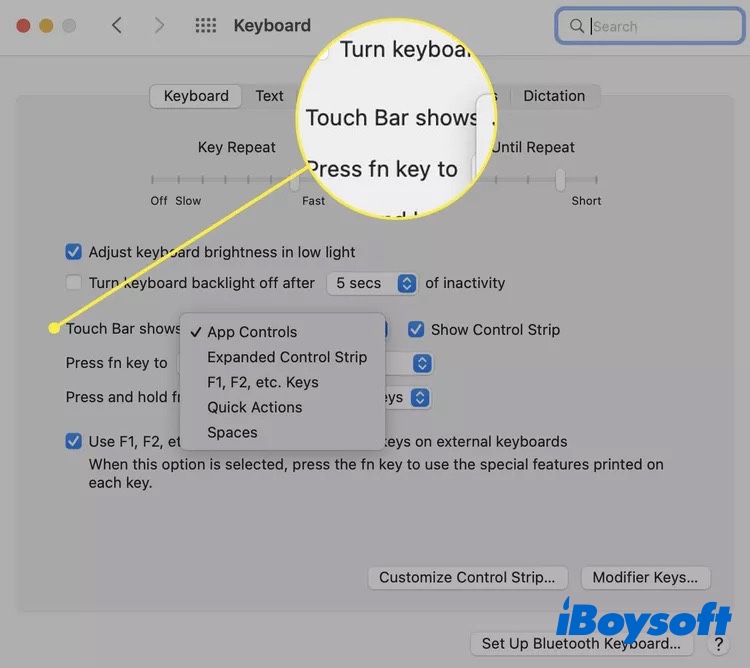
- In this drop-down menu, you can choose the layout and functionality of the Touch Bar. The options are:
- App Controls: Select this to show app-specific shortcuts in the Touch Bar when they're available.
Expanded Control Strip: This always expands the Control Strip and doesn't show app-specific controls.
F1, F2, etc. Keys: Let your Touch Bar act like a traditional keyboard with Function keys above the numbers.
Quick Actions: If you've set up your own automation using Quick Actions, this option makes getting to them faster.
Show Spaces: Get one-touch access to switch between all of your Spaces with the option. - Also, under the Touch Bar options, click Press and hold Fn (or Globe) key to.
- Finally, choose what you want to happen from the menu of options. When all the options you clicked are applied, close the System Preferences window.
Note: If you don't want to see the Control Strip and app-specific buttons at the same time, make sure to leave "Show Control Strip" unchecked.
How to edit the MacBook Pro Touch Bar Control Strip
The Control Strip plays an important role in the MacBook Pro touch bar, which consists of the icons to the right of the Touch Bar. You can also customize them to work the way you want them to. Here's what to do:
- Select System Preferences from your Mac Dock.
- Choose Keyboard, then go to the Keyboard tab.
- Click Customize Control Strip.
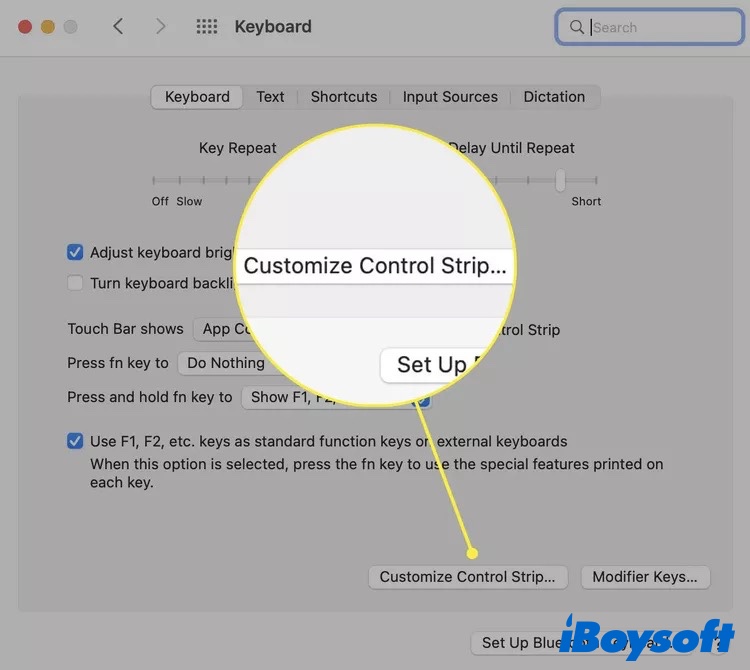
To add buttons: Use your trackpad or mouse to drag the button you want from the screen to the Control Strip. The buttons already in the Control Strip will jiggle slightly as this is being done.
To rearrange buttons: Place your finger directly on the Control Strip and drag the buttons to where you want them to be.
To remove buttons: Use your trackpad or mouse to drag the button you don't want from the Control Strip to the screen. - After you're finished adding, rearranging, and removing Touch Bar buttons, click or tap Done.
How to customize Touch Bar buttons for individual app
Also, you can change how the Touch Bar buttons display for an individual app, here's how to make it:
- Launch Photos or other apps you want to edit its Touch Bar buttons, and click View from the status menu bar.
- Select Customize Touch Bar, if you can't see this option, maybe the app itself does not have the option to customize buttons in the Touch Bar.
To add buttons, use your trackpad or mouse to drag the button you want from the screen to the Touch Bar. The buttons already in the Touch Bar will jiggle slightly as this is being done.
To rearrange buttons, place your finger directly on the Touch Bar and drag the buttons to where you want them to be.
To remove buttons, use your trackpad or mouse to drag the button you don't want from the Touch Bar to the screen. - After you're finished adding, rearranging, and removing buttons for this app, click Done.
See, it's very easy to edit Touch Bar on your Mac notebook. If you think this post is useful, please share it with more people.
MacBook Touch Bar not working, how to fix
Sometimes, you may find Mac Touch Bar not working normally due to lots of reasons, such as temporary software glitches, incorrect settings, or malfunctioning applications. Luckily, no matter what reason cause this circumstance, you can fix this issue by resetting your MacBook Touch Bar. Here's how to reset MacBook Touch Bar with Activity Monitor:
- Open Activity Monitor from Finder > Applications > Utilities.
- Find the process called TouchBarServer. The process is labeled Touch Bar Agent on MacBook Pros running macOS 10.12 Sierra and earlier.
- Select the process and click the X icon to force quit it. Click Force Quit to close the "TouchBarServer" process.
Now your Mac Touch Bar should function normally. And I believe that after reading this post, you've already learned how to customize your MacBook Pro Touch Bar according to your needs. We'd be appreciated if you can share this post with more people.