Battle.net, or Blizzard Battle.net, is an internet-based gaming and social networking platform developed by Blizzard Entertainment and launched on December 31, 1996. Users or fans always download its package and install it on Mac machines for purchasing or accessing games easier and faster.
However, it's not a one-step-done mission if you intend to uninstall Battle.net Desktop from your Mac machine since it includes sorts of files like caches, extensions, launch helpers, junks, etc accumulating on the Mac's internal hard drive.
For better running speed and performance, it's recommended to remove Battle.net from Mac completely once you need it no more. This post walks you through uninstalling Battle.net on Mac completely and you can follow it for thorough uninstall!
How to uninstall Battle.net on Mac with CleanMyApp?
For a complete uninstall, CleanMyApp stands out among all uninstallation methods and other professional app uninstallers. It gathers all associated files of an app before the ultimate uninstall, including user files, caches, preferences, launch helpers, install packages, extensions, root files, junks, etc. in one go, never requiring you to access the files scattered in different folders or directories.
More significantly, CleanMyApp scans any hidden or secret install helpers remaining on the hard drive and allows you to remove them within a few clicks!
Here we'll show you how to uninstall Battle.net on Mac completely with CleanMyApp:
Step 1: Free download to install CleanMyApp on your Mac.
Step 2: Click Grant access to permit CleanMyApp to access the application folder. If the file isn't stored in the Application folder, allow CleanMyApp to access the related folder directly.
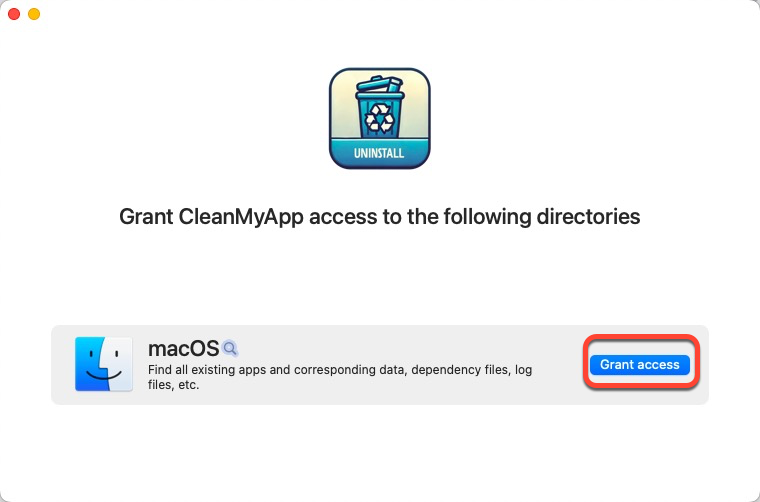
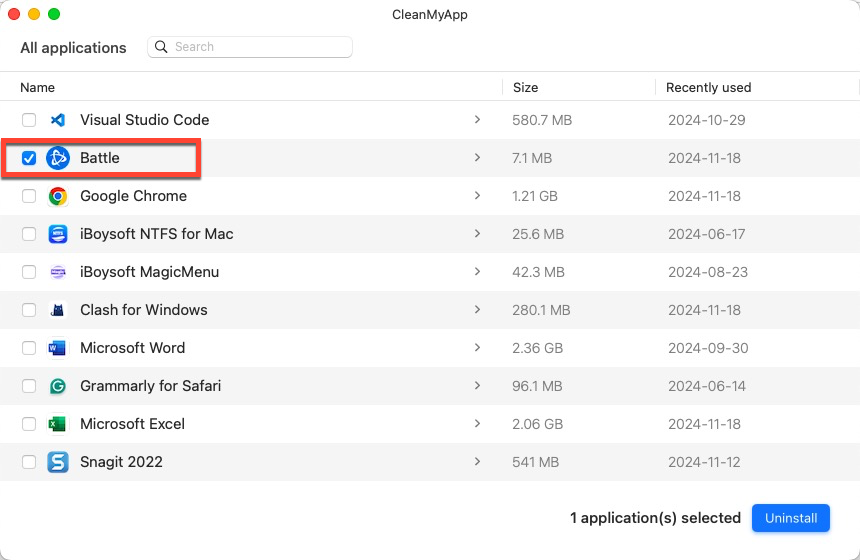
Step 3: Launch this handy app uninstaller and it will show you a list that can be uninstalled from your machine. You can scroll down to find Battle.net or you can navigate this app by typing its name in the search box.
Step 4: Check Battle.net in the app list and click Uninstall on the right bottom corner of the main widow.
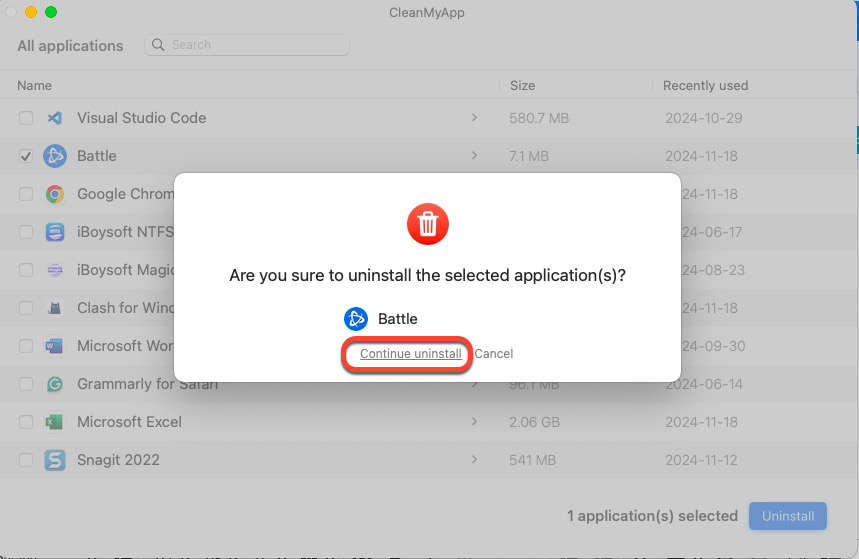
Step 5: Click Continue uninstall to confirm your uninstall plan.
Step 6: Click Finish and then you're completing this uninstall task!
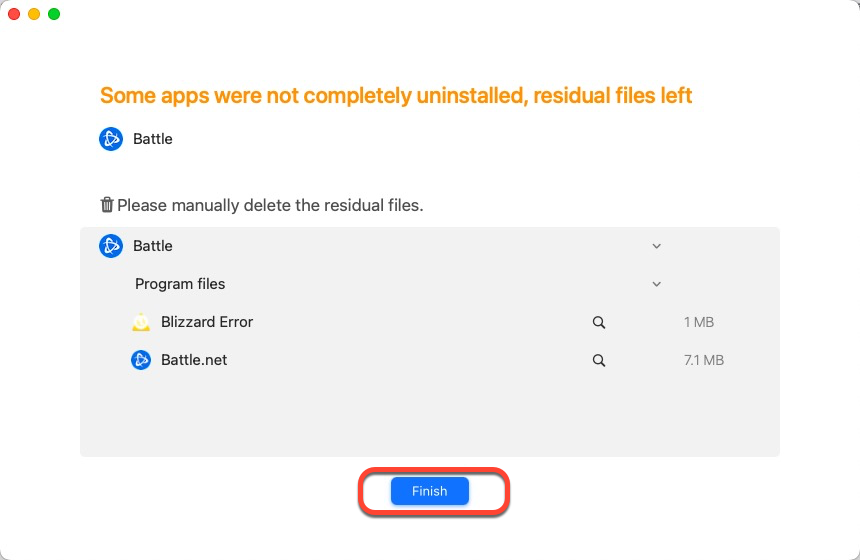
See? It's quite easy and efficient to uninstall Battle.net on Mac with the assistance of CleanMyApp. It also works fine on other third-party apps' uninstall with its excellence in app and file removal! Give it a chance and it always satisfies your demand for an app uninstall!
Kindly share this post with more people if you find this professional app uninstaller helpful!
How to uninstall Battle.net on Mac with Mac Trash?
If you prefer completing this Battle.net uninstallation on Mac by yourself, you can carry on this mission by using Mac Trash.
Mac Trash is a folder that is used to put the files you unwanted. It seems like a trash can, you can throw any unnecessary files into it from your Mac computer. When you delete photos, videos, apps, and documents from Finder, they will be sent to the Trash folder.
You can learn how to uninstall Battle.net on Mac with Mac Trash here:
Step 1: Quit the Battle.net application on your Mac if it's running by pressing the Option + Command + Esc (Escape) keys.
Step 2: Go to Applications > Utilities and open Activity Monitor.
Search for any processes with Battle.net in their name. If you find any, check them and click the 'x' in the toolbar to stop them directly. Then quit Activity Monitor.
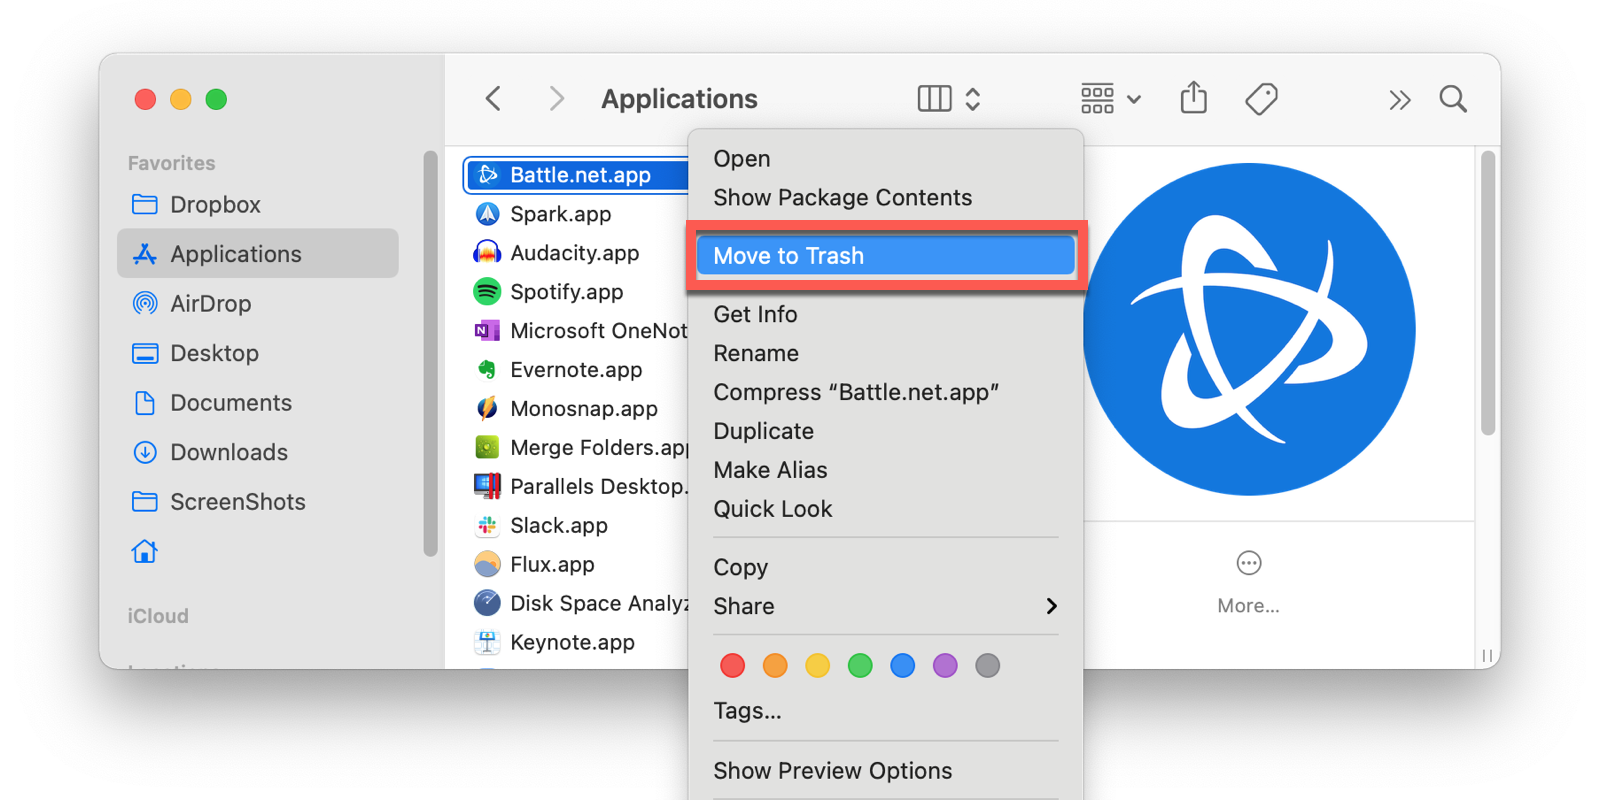
Step 3: Go to Applications and drag Battle.net Desktop to Mac Trash. Or, control-select this app and select Move to Trash in the drop-down menu for the app removal.
Step 4: Open Finder, click Go on the left top menu bar > select Go to Folder in the context menu.
Step 5: Paste this file path into the box and press Return.
~/Library/Application Support/
Drag the Blizzard folder in the application support folder to Mac Trash.
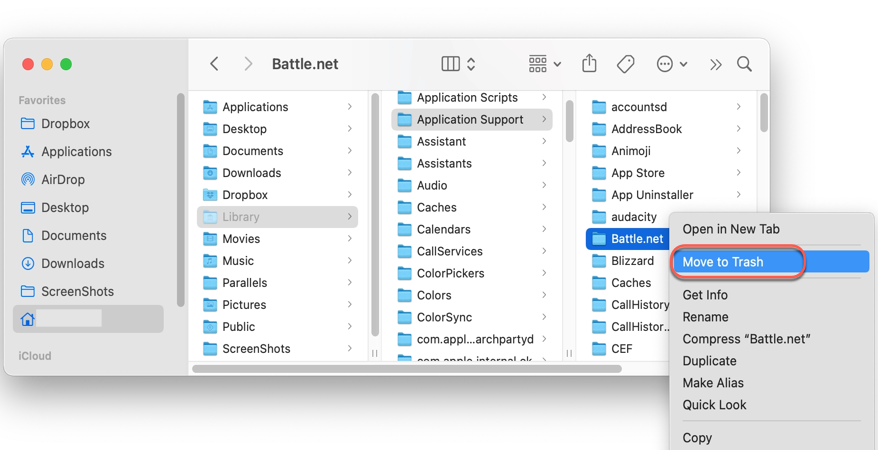
Step 6: Enter this path by pasting and copying the following file path:
~/Library/Preferences
Then, move the following files to Mac Trash one by one:
com.blizzard.errorreporter.plist
com.blizzard.Installer.plist
com.blizzard.launcher.plist
net.battle.net.app.plist
net.battle.Authenticator.prefs
net.battle.Identity.prefs
net.battnet.battle.plist
Step 7: Paste this path into the Go to Folder box, and hit Return to enter it:
/Users/Shared/
Followingly, drag the Battle.net folder to Trash.
Step 8: Paste the paths below one by one in the Go to Folder of Finder and look for the files containing Battle.net or Blizzard in the file names, then, move them to Trash patiently:
~/Library/Saved Application State/
~/Library/Caches/
~/Library/Containers/
~/Library/LaunchAgents/
~/Library/Logs/
Step 9: Empty Mac Trash and restart your Mac machine, then Battle.net and its associated files are removed from your Mac completely!
As we can see, removing Battle.net on Mac by manual operation is much fussy. Hence, you're recommended to switch to the professional uninstaller we provide above, which helps you deal with this app uninstall in a far more convenient and straightforward way!
Share this post if you manually uninstall Battle.net from your Mac!
Why can't I uninstall Battle.net (or other apps)on a Mac?
There are sorts of causes that should be blamed for the failure in uninstalling an app from your Mac device, and this post gathers them all for your reference. Some of these reasons refer to the final success of app removal.
The app is still running on your Mac. Suppose that the app you want to uninstall is still working, you may fail to remove it from your machine. So it's necessary to stop it from working before the uninstall in Activity Monitor.
The app you want to uninstall is included software of Mac. The apps pre-installed on your Mac before shipping cannot be uninstalled as Apple gives you no such permission. Uninstalling these kinds of apps may stop your Mac from working, so Apple shuts down this way out.
Mac Trash or the app uninstaller you count on is problematic. When Mac Trash or the app uninstaller doesn't work, you cannot carry on this app removal as you wish. Facing this, you'd better fix the Mac Trash or troubleshoot the defective uninstaller.
The operating system goes wrong. When the macOS installed on your machine misbehaves, the app uninstall may be blocked by unknown errors. macOS reinstall helps a lot here yet it's worth mentioning to back up the hard drive fully in case any accidents happen.
Conclusion
This post explores how to uninstall Battle.net on Mac with two methods, you can complete this mission with the step-wise tutorial given by this post. If you want to uninstall an app with several clicks, give CleanMyApp a chance and it will never disappoint you!