
It is inevitable for you to make mistakes when editing a document or doing some other operations like deletion on your Mac. So how can you undo your changes if you regret and want to step back?
Apple has provided undo options for users to allow them to change their minds. In this guide, we'll show you how to undo on MacBook with the undo command. And it tells you how to redo your last undone action as well.
How to undo on MacBook?
macOS can receive the undo commands triggered out by the shortcut keys or the Apple menu bar option, giving you chances to change your mind, so you can undo/redo changes in Pages on Mac and other Mac apps.
Undo on MacBook with the keyboard shortcut
Using the undo keyboard shortcut - Command + Z is the easiest and quickest way to revoke your changes.
You can simultaneously press down the Command and Z keys on your keyboard, then the last edited words on the document will be undone, the deleted files in the Trash will be put back to their original location, or your other last changed activity will be canceled on your MacBook.

Notably, if you edit a document on a third-party app like Word, you can use its built-in undo button to recall your latest edition.

Undo on MacBook using the Edit menu
There's also another way to withdraw your operation on your Mac machine - choose 'Undo' from the top Edit menu.
Whether you move a document to a folder or changed a text, the Undo option in the Edit menu can help you back to the previous state.
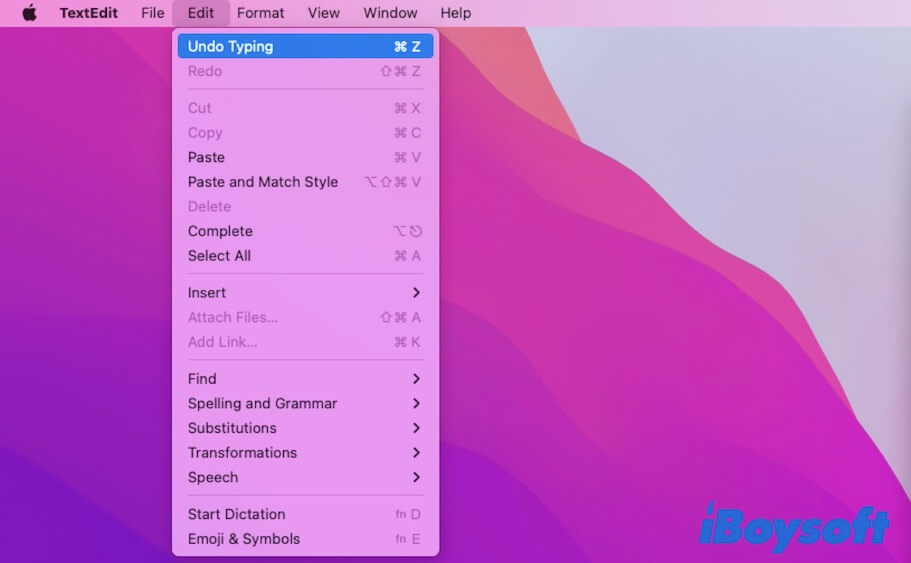
But if want to put back the video, folder, document, picture, or other files that you've moved to Trash just now, the Undo button in the Edit menu is not available. You have to press the Command + Z key combination to repeal your last operation.
How to redo on MacBook?
Perhaps, you eventually choose to keep your changes on Mac after undoing them, you can redo the last undone operation.
Redo on MacBook with keyboard
Similar to undoing an operation, you can use the keyboard shortcut to redo your undone edition or other activities on MacBook Air or MacBook Pro.
Simply hold down the Command + Shift + Z keys together, and the undone content on a document can be restored.

Redo on MacBook with the Edit menu
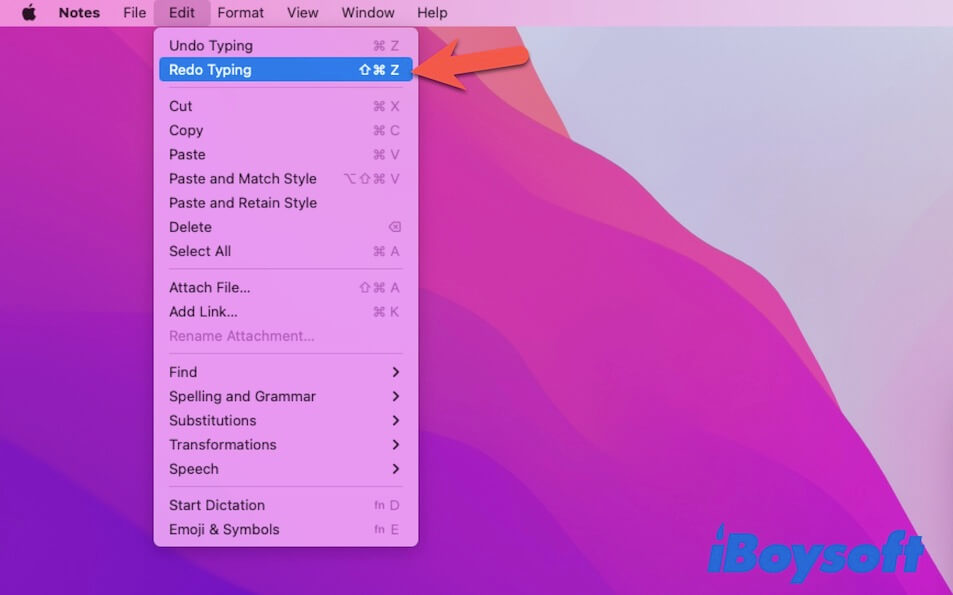
Alternatively, you can use the button in the Apple menu bar to redo your typing. Go to the top Apple menu bar > Edit > Redo Typing.
How to undo permanently deletion on Mac?
Unfortunately, you've permanently deleted your files by directly pressing the Mac delete shortcuts Option + Command + Delete keys or emptying your Trash after moving your files there.
In this situation, you cannot put these permanently deleted files back by pressing the Command - Z shortcut keys, or using the Undo option in the Edit menu.
So, how can you restore the removed files? Here are three ways.
Restore files with Time Machine backup
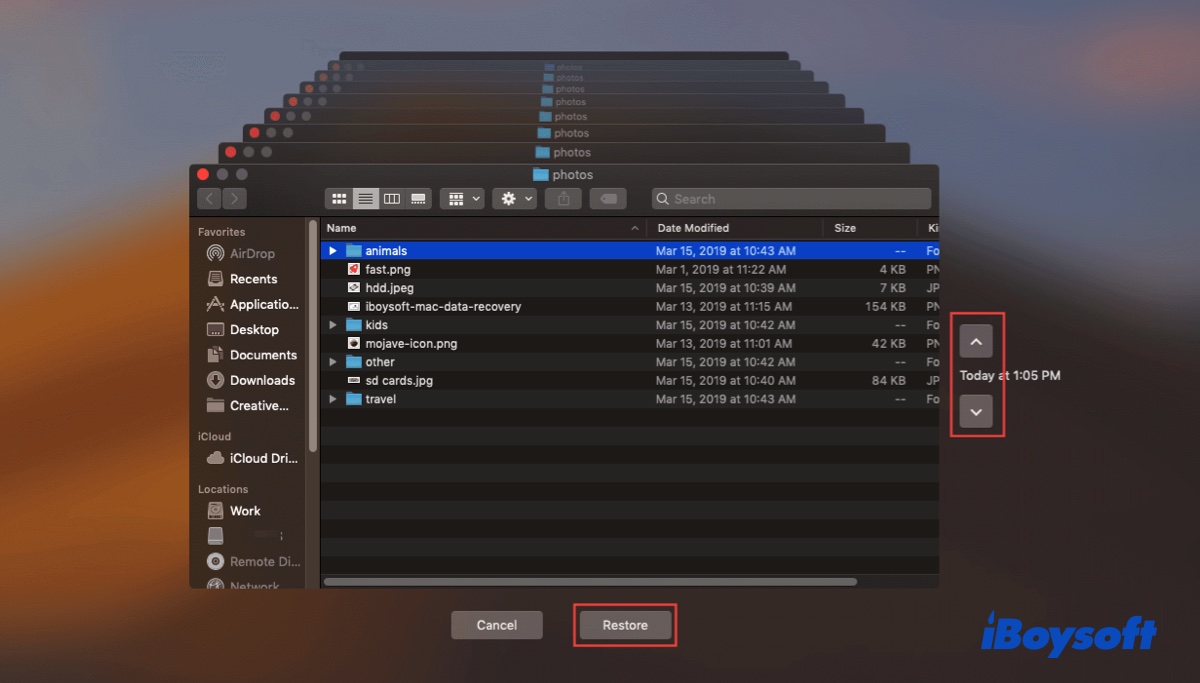
If you have used Time Machine to back up your Mac, you can use your Time Machine backup to restore your lost files. All you can do is connect your Time Machine backup disk to your Mac and find the lost files. Then, click Restore to put them in their original locations on your Mac.
If your backup disk is not here, you can use your local snapshots to restore the deleted files.
- Open Launchpad > Other > Time Machine.
- Scroll down or up the arrow to find your deleted data.
- Select the file and click Restore to recover it.
Restore files from iCloud.com
If you don't have the habit to use Time Machine to back up your Mac data but have synced your files to iCloud, you can undo permanent deletion on the files by finding them on iCloud.com.
- Log into iCloud.com with your account.
- Click Account Settings.

- Scroll down to the bottom of the page and click Restore Files under Advanced.
- Look through the files and restore your desired ones.
Use Mac data recovery software to recover deleted files on Mac
If you have never backed up your Mac with Time Machine and find that your files are not available on iCloud.com, your last try to recover deleted files on Mac is to use a Mac data recovery tool.
As we know, the Trim feature on SSD (the internal hard drive of a Mac) makes it impossible to recover permanently deleted data. But if you are in one of the situations below, you still have a chance to retrieve the permanent files from your Mac with professional data recovery software.
- The Trim feature on your Mac is disabled or appears a delay in work.
- You've immediately stopped using your Mac the time you've emptied your Trash.
Here, iBoysoft Data Recovery for Mac is highly recommended as some users have succeeded in recovering their permanent files with this powerful data recovery program.
Here's how to recover deleted files with iBoysoft Data Recovery for Mac:
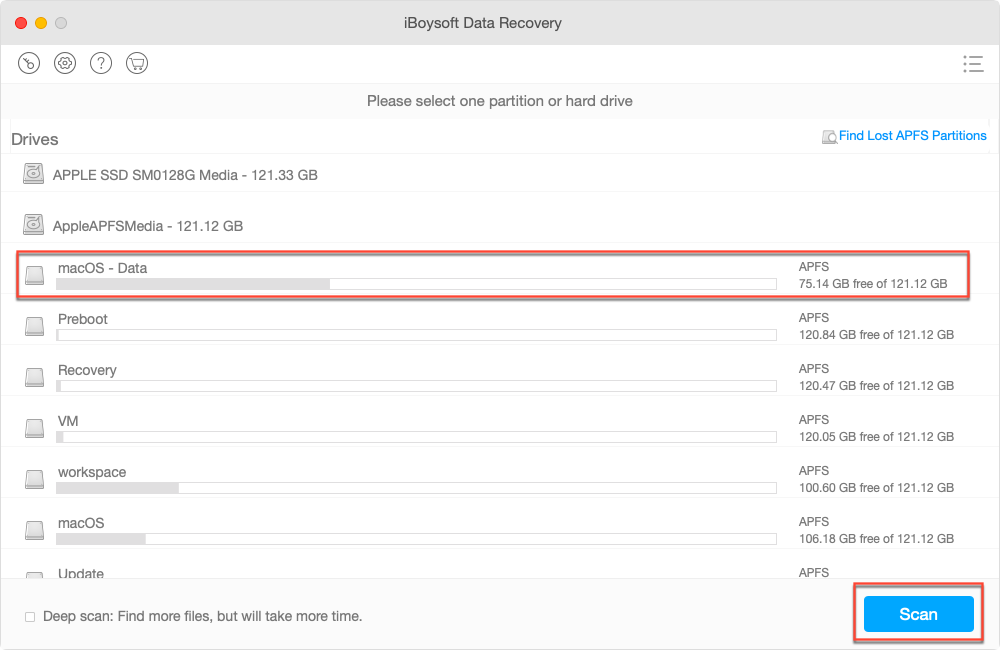
Step 1: Download, install and open iBoysoft Data Recovery for Mac on your Mac.
Step 2: Select your startup partition and click Scan.
Step 3: Preview the scanning results to check if your desired data is recoverable.
Step 4: Select the files and click Recover to save them to a different destination.
Conclusion
It is not complicated to undo on MacBook or make a redo after making an undone operation. This article not only shows you how to undo on Mac using a keyboard shortcut and the Edit menu. The most important is that it tells you how to undo permanent deletion to restore the lost files back.
FAQ about how to undo on MacBook
- Q1. How to undo in Notes on Mac?
-
A
To undo the edited contents on Apple Notes, you can click the Undo Typing option in the top Apple menu bar. Simply go to the top Apple menu bar > Edit > Undo Typing. Or, you press the shortcut key combination - Command + Z to undo your changes.
- Q2. How to undo in pages on Mac?
-
A
You can click Undo Typing from the Edit menu at the top left corner of your screen or hold down Command - Z keys together to cancel your last typing. If you use a third-party document editing software, it always offers a built-in undo function.