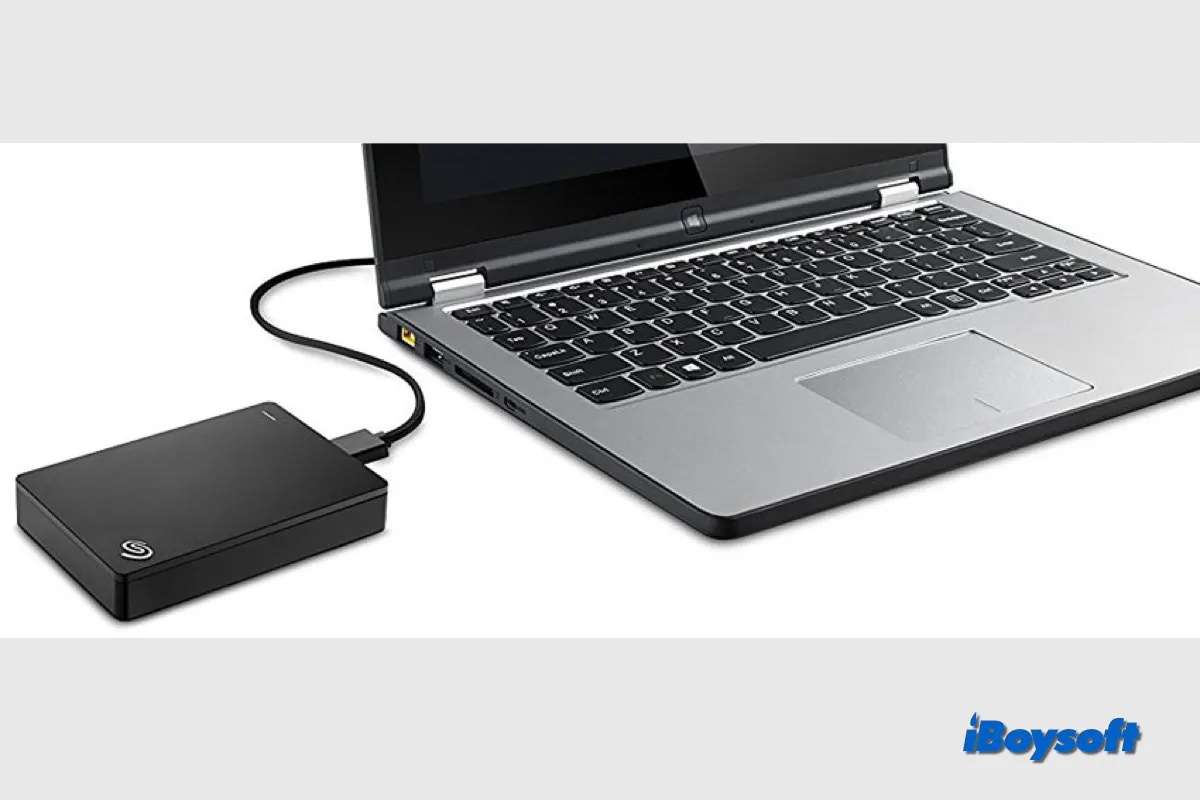
If you're using an external hard drive with Mac, you might eventually run into storage issues. Whether backing up files, storing media, or saving important documents, keeping available free space on your external drive is important.
Running out of space can lead to problems, such as slower performance, data loss, and an inability to store new files. If you want to free up space on your Mac's external hard drive to keep things running smoothly, you can follow this post to manage storage on your Mac's external hard drives.
Generally, to manage storage on internal/external hard drives on Mac, you can delete unwanted or unnecessary items, move large files, and erase all contents on the drive. We will walk you through detailed methods to release space on Mac's external hard drives. Let's start.
Manage external drives via iBoysoft DiskGeeker - the best choice
A third-party disk manager for Mac such as iBoysoft DiskGeeker can meet your needs to delete unwanted files on the target drive with ease. This all-in-one tool provides features such as Space Analyze, it lists all the folders and files on your external hard drive and enables you to collect all unwanted items to delete them at one click, this can include old documents, outdated backups, or any duplicate files.
Free download iBoysoft DiskGeeker to continue managing storage on Mac's external hard drives.
How to analyze disk and clean files with iBoysoft DiskGeeker:
- Connect the external hard drive that you want to free up disk space to Mac.
- Launch iBoysoft DiskGeeker after completing the installation, and wait for it to load drives.
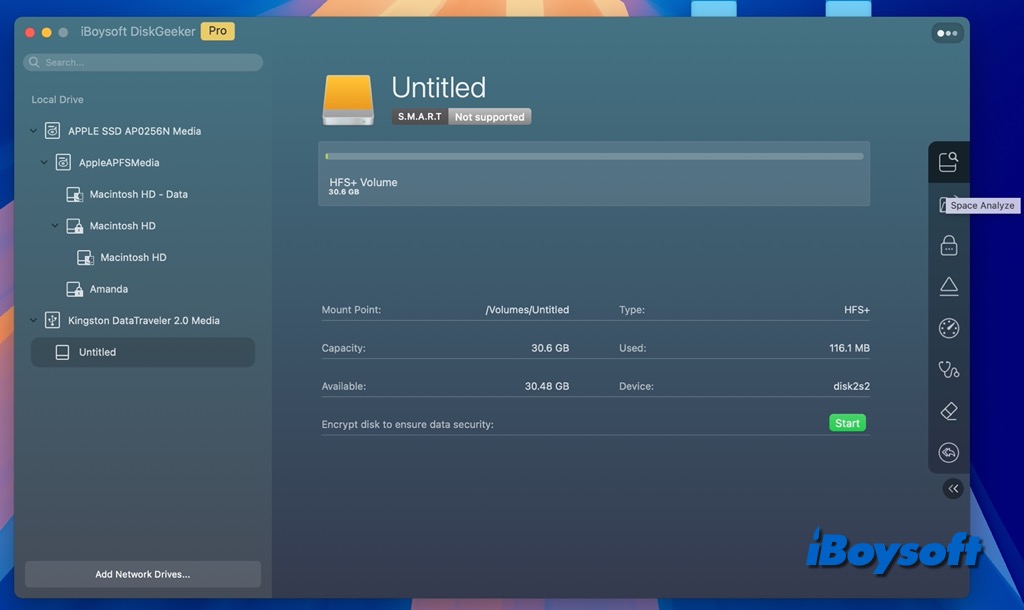
- Select the target external drive from the left sidebar.
- Then tap the Space Analyze icon from the right toolbar.
- It will automatically scan the selected drive and rank the scanned items by size.
- Select the folders and open them to browse the files in them.
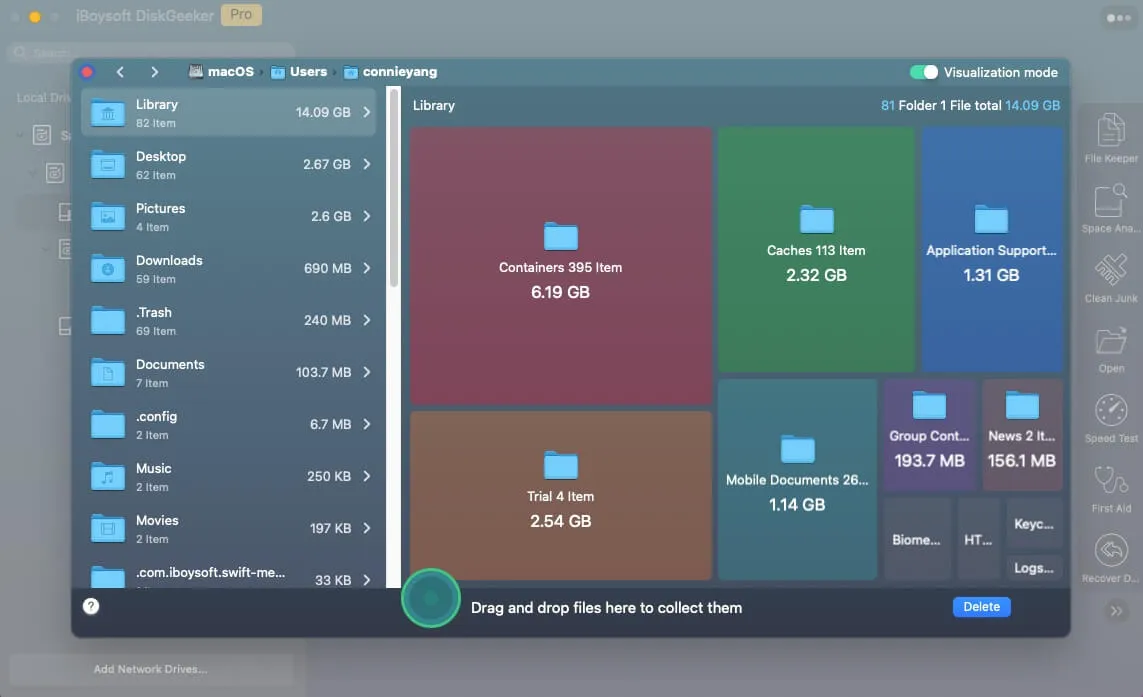
- Drag and drop unwanted files and folders you want to remove to to collect, and click Delete to delete them all together.
For more methods to delete files from an external hard drive on Mac, read the post below:
This post explains how to (permanently) delete files from external hard disk on Mac, why you can't delete files from external hard drive on Mac, and what to do when you can't delete files from (Seagate) external hard drive on Mac.
iBoysoft DiskGeeker is a versatile tool that enables you to analyze disk space and clear junk, format disks, use a BitLocker-encrypted drive and NTFS drive on Mac, check and diagnose disk errors, clone internal and external hard drives, test the read and write speed of disks, and more. It is fully compatible with the latest macOS Sequoia and M1/M2/M3/M4 Macs.
Recommend iBoysoft DiskGeeker to more Mac users!
Transfer files to another drive or cloud storage
Running out of space on your external hard drive can be frustrating, especially when it's filled with multiple folders and large files you no longer need. Fortunately, it's easy to locate and manage these files using your Mac. You can choose to move these files to another drive or upload them to the cloud.
Move large files from one external hard drive to another:
- Plug in both external hard drives to your Mac using USB or Thunderbolt ports.
- Open a Finder window on your Mac. You should see both external drives listed in the "Devices" section on the left sidebar of Finder.
- On the first external hard drive, navigate to the files or folders that you want to transfer.
- Sort the folders and files by size, so you can quickly locate large files on the drive.
- Drag the selected files and drop them onto the second external hard drive listed in Finder.
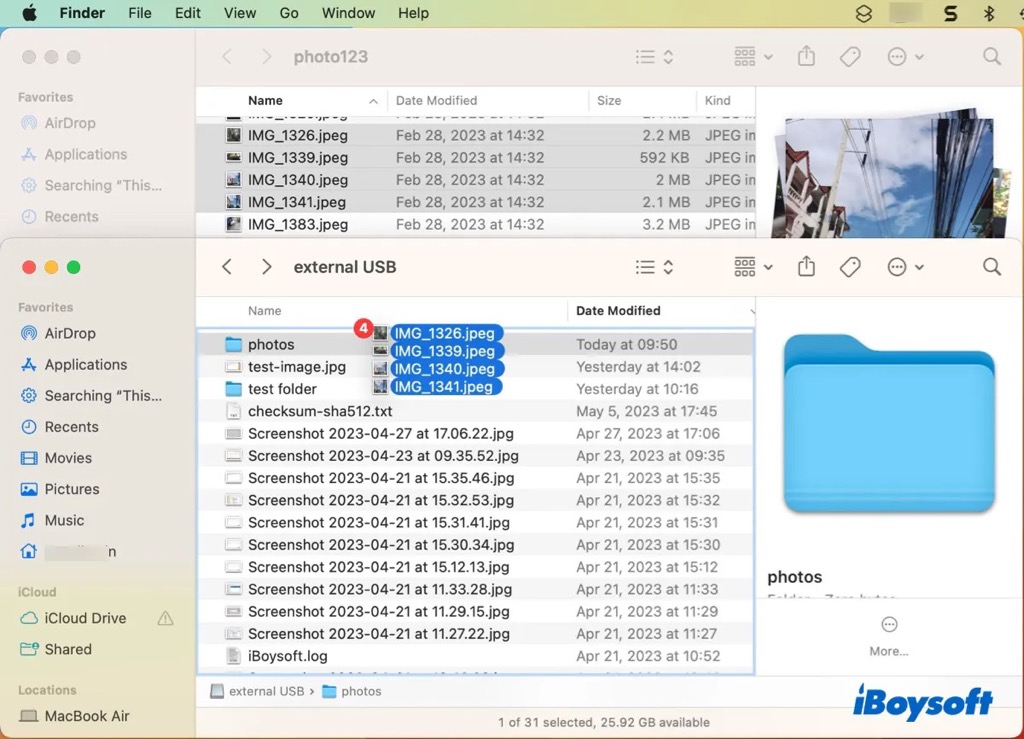
- The transfer will begin, and the progress will be displayed in the Finder window. Large files may take some time depending on the transfer speed.
- Once the transfer is complete, make sure to safely eject both external hard drives by right-clicking on them in Finder and selecting "Eject."
This post guides you to transfer files from one hard drive to another on Mac, you can follow the steps to move some files between two drives or clone the drive via iBoysoft DiskGeeker to move everything from one drive to another.
To upload files from the external hard drive to the cloud:
To upload files from your external hard drive to the cloud on a Mac, you'll need to use a cloud storage service like Google Drive, Dropbox, iCloud, or OneDrive. Here's an example of using iCloud Drive:
- Go to System Settings (Apple logo in the top-left > System Settings).
- Click on Apple ID and ensure iCloud is turned on.
- Make sure iCloud Drive is selected.
- Open Finder and you should see iCloud Drive in the left sidebar under "iCloud."
- Navigate to your external hard drive in Finder.
- Select the files or folders you want to upload.
- Drag them to the iCloud Drive folder in Finder.
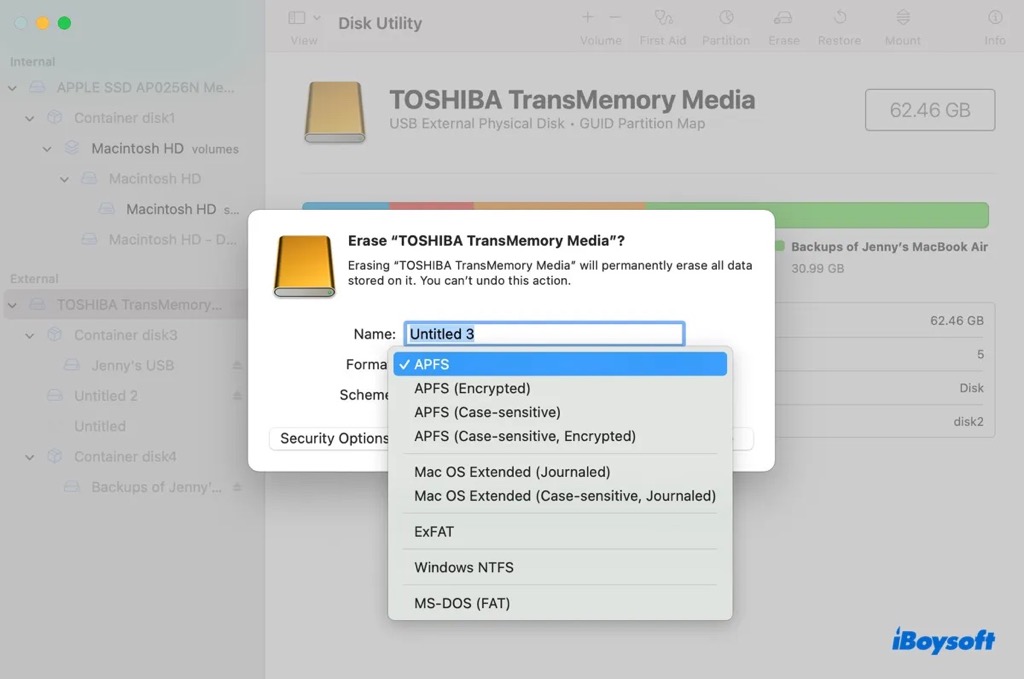
Erase all contents on the external hard drive via Disk Utility
Perhaps, you want to delete all items on the external hard drive to restore the disk to its full capacity, then, formatting the drive is what you need. The built-in macOS tool, Disk Utility, enables you to format external hard drives on Mac. Here's how:
- Connect the external hard drive to your Mac
- Launch Disk Utility from the Applications folder > Utilities.
- Click the View button and choose Show All Devices.
- Select the target external disk from the left list
- Tap the Erase button on the top toolbar.
- Follow the on-screen guide to name it, choose a file system, and select a scheme, then click Erase.
Have you found the solution suitable for your case? If you have, share it with more people!