A Windows 7 bootable USB drive is useful if you need to repair disks, reinstall Windows 7, downgrade to Windows 7, boot up an unbootable Windows PC, install Windows 7 on multiple computers without repeatedly downloading the ISO file, or install Windows 7 on an external drive.
In this article, we'll cover everything you need to know about making a Windows 7 boot USB.
The following table lists the three bootable USB creators for Windows 7 we'll discuss in this article.
| Bootable USB Creators for Windows 7 | Notes |
| iBoysoft DiskGeeker for Windows | - Provide Windows 7 ISO files; - Quickly making a Windows 7 bootable USB from ISO; - Can boot UEFI & BIOS systems. |
| Windows 7 USB/DVD Download Tool | - Only supports booting a PC that has BIOS system; - Has been deprecated by Microsoft long time ago; - Can create a Windows 7 boot disk but doesn't provide the ISO file. |
| Rufus | - Require a Windows PC running Windows 8 or later; - The latest version doesn't support Windows 7. - Allow you to create a Windows 7 bootable USB but doesn't provide the ISO file. |
Tips: To make the bootable USB for Windows 7, you must prepare a USB flash drive with 8 GB or more storage space and back it up. Plug your external drive into the Windows PC, then choose one of the methods below to create a Windows 7 bootable USB from ISO.
Create Windows 7 bootable USB from ISO easily (UEFI & BIOS)
Want to make a bootable USB for Windows 7 easily? You need a tool that provides the Windows 7 ISO file and intuitive guidance to make the bootable USB installer. It should be reliable, actively maintained, and able to create a Windows 7 boot disk that works on both UEFI and BIOS systems.
Fortunately, iBoysoft DiskGeeker for Windows meets all the requirements. Just follow the steps below to create the Windows 7 bootable disk:
Step 1: Free download and install iBoysoft DiskGeeker for Windows.
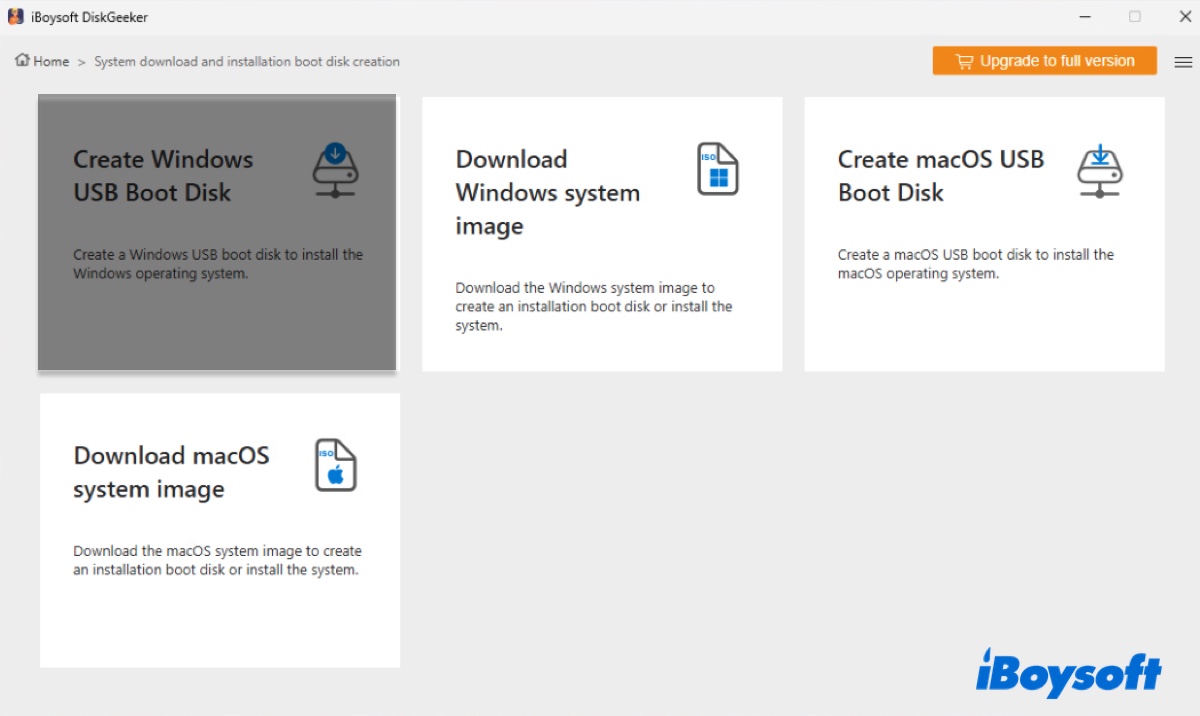
Step 2: Open the bootable USB creator for Windows and click on Download and create boot disk > Create Windows USB Boot Disk.
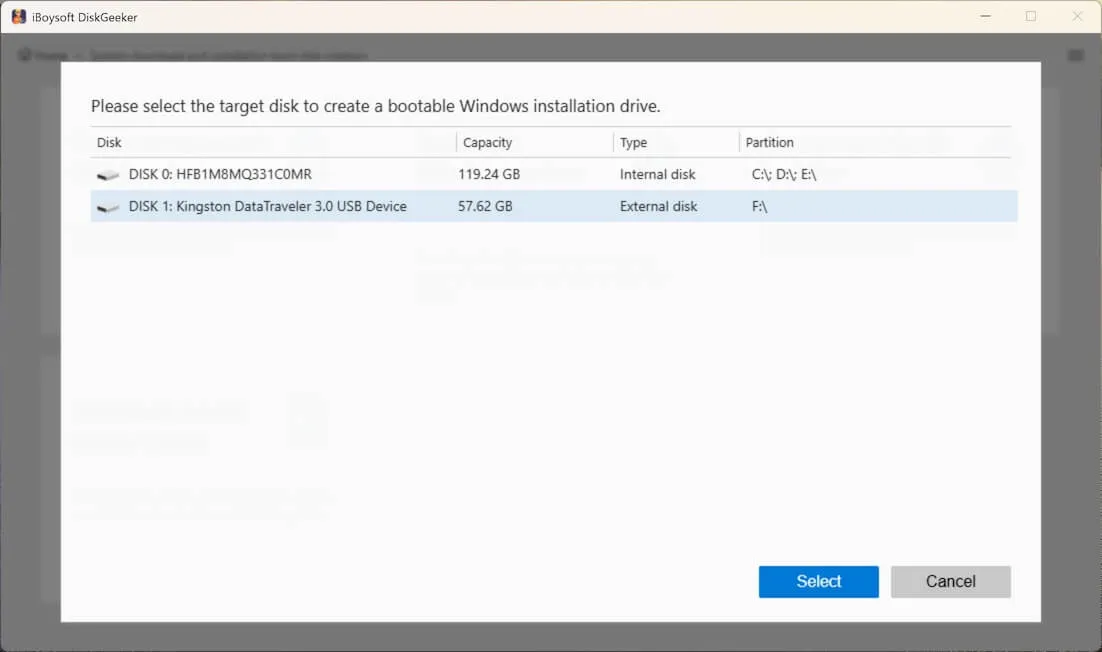
Step 3: Select your external drive and click Select.
Step 4: Click Windows 7, choose SP1 (Build 7601), the ideal language, system architecture (32-bit or 64-bit), and system version (Home, Pro, or Ultimate).
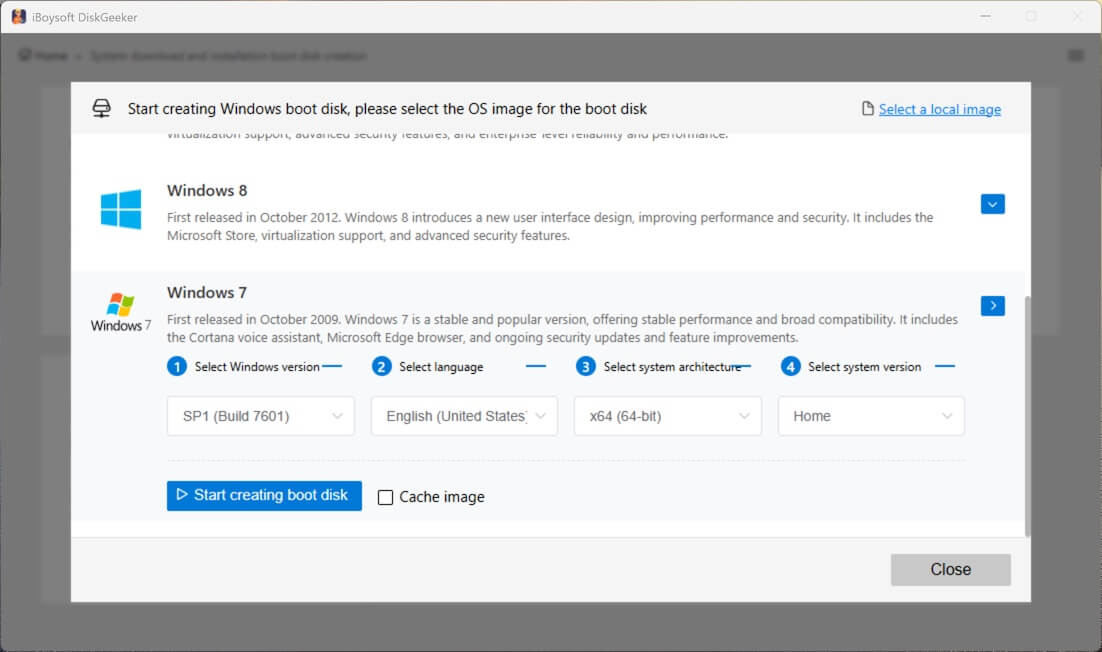
Step 5: Click on Start creating boot disk.
Step 6: The tool will download the Windows 7 ISO file and then create the bootable USB for Windows 7 automatically.
Share this software to help others make a bootable USB for Windows 7.
Make bootable Windows 7 USB with Windows 7 USB/DVD Download Tool (BIOS)
If the Windows PC you want to boot with uses the older BIOS system, you can also make the Windows 7 bootable disk through the Windows 7 USB/DVD Download Tool. It was the official Microsoft tool for making Windows 7 bootable drives, but unfortunately, it's no longer maintained, and Microsoft doesn't provide the official download link.
Here's how to create a Windows 7 bootable USB using the Windows 7 USB/DVD Download Tool:
- Download the Windows 7 USB/DVD Download Tool. (source:archive.org)
- Once downloaded, execute the file and follow the instructions to install it.
- Download the necessary ISO file from these resources. (⬇️ Windows 7 Home Premium ISO Download, Windows 7 Ultimate ISO Download, Windows 7 All-in-One ISO Download, All Windows Versions Download.)
- Start the Windows 7 USB/DVD Download Tool.
- On the Step 1 of 4: Choose ISO file screen, select Browse.
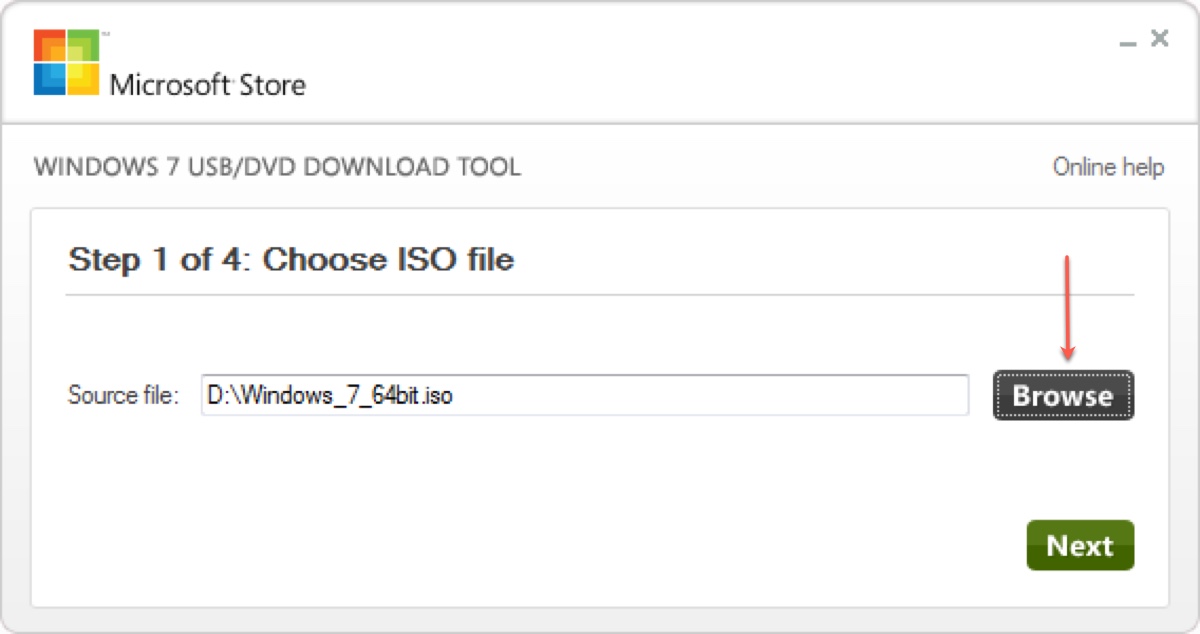
- Choose the downloaded Windows ISO file and click Open.
- Click Next.
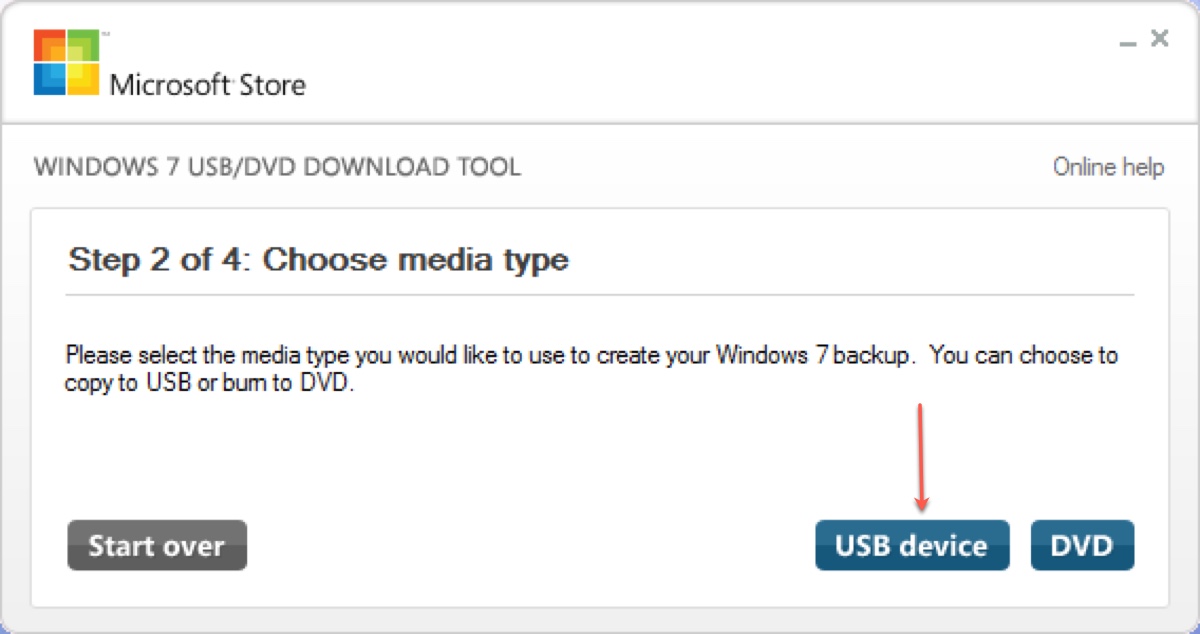
- On the Step 2 of 4: Choose media type screen, click USB device.
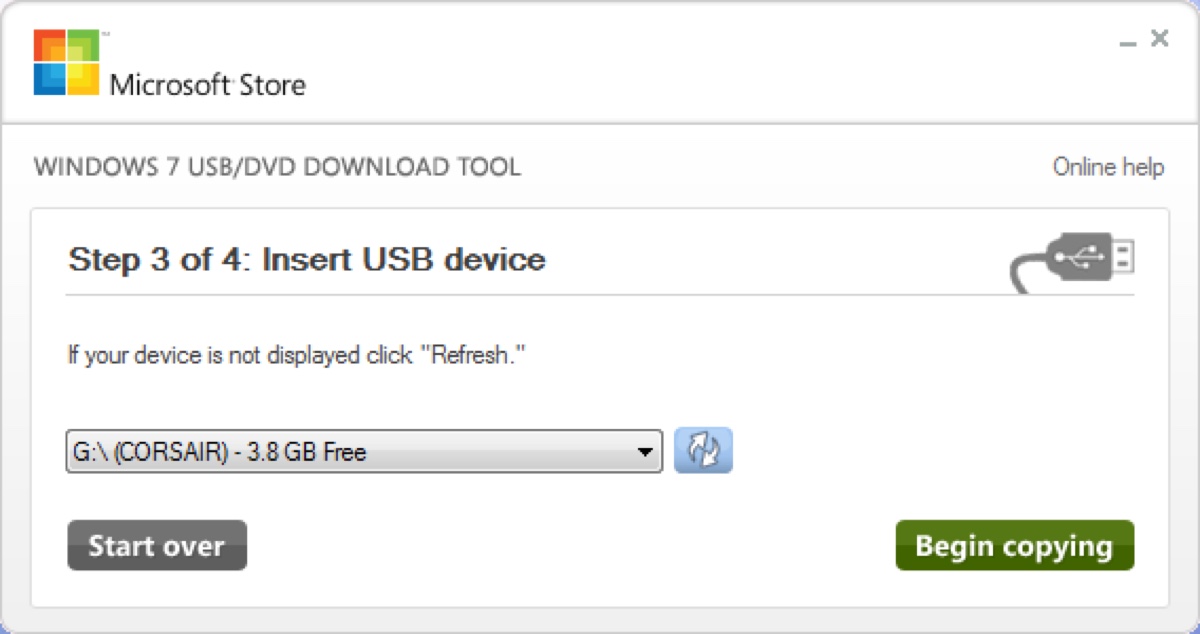
- On the Step 3 of 4: Insert USB device screen, choose the flash drive or external drive you want to put the Windows 7 installation files on.
- Click Begin copying.
- Select Erase USB Device and click Yes if your external drive is not empty.
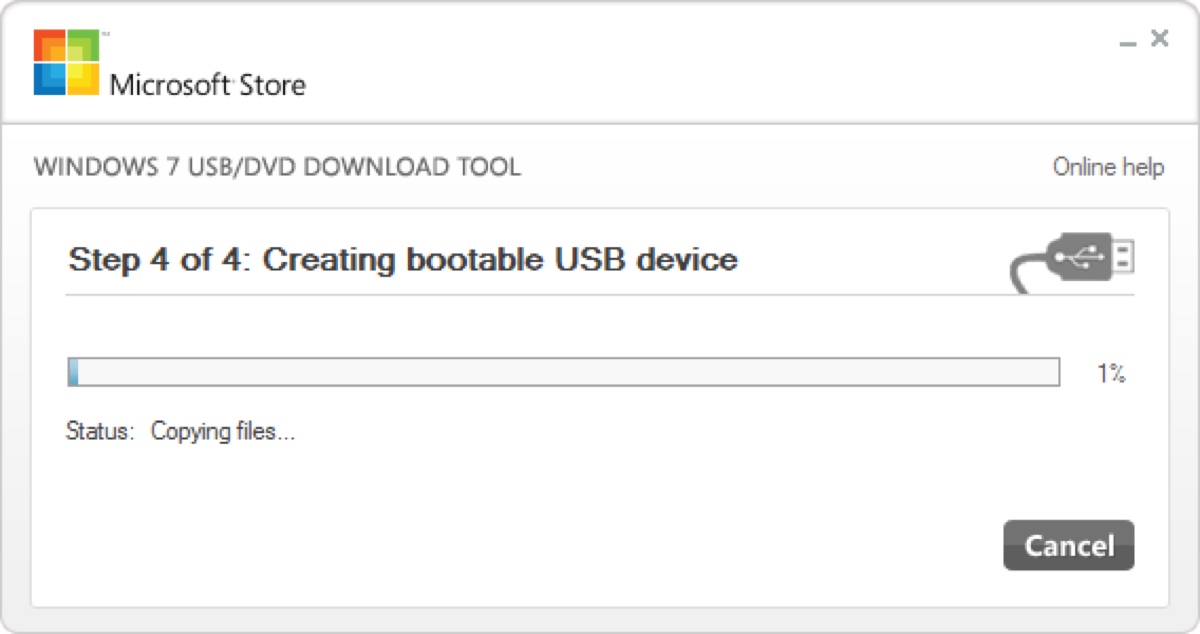
- On the Step 4 of 4: Creating bootable USB device screen, wait for the tool to format your drive and copy the installation files to it from the provided ISO file.
Create bootable USB for Windows 7 via Rufus (UEFI & BIOS)
If the PC used to create the Windows 7 bootable USB runs Windows 8 or later systems, you can make the bootable USB for Windows 7 using Rufus, an open-source utility that helps you format and create bootable USB flash drives, such as a Windows 7 bootable USB pen drive.
Note that the newer versions of Rufus have deprecated Windows 7, but older versions like Rufus 3.22 still work with Windows 7.
To create a bootable USB for Windows 7 using Rufus:
- Download Rufus 3.22 (Latest version compatible with Windows 7).
- Download the necessary Windows ISO file from: ⬇️ Windows 7 Ultimate ISO Download, Windows 7 All-in-One ISO Download, All Windows Versions Download.
- Launch Rufus.
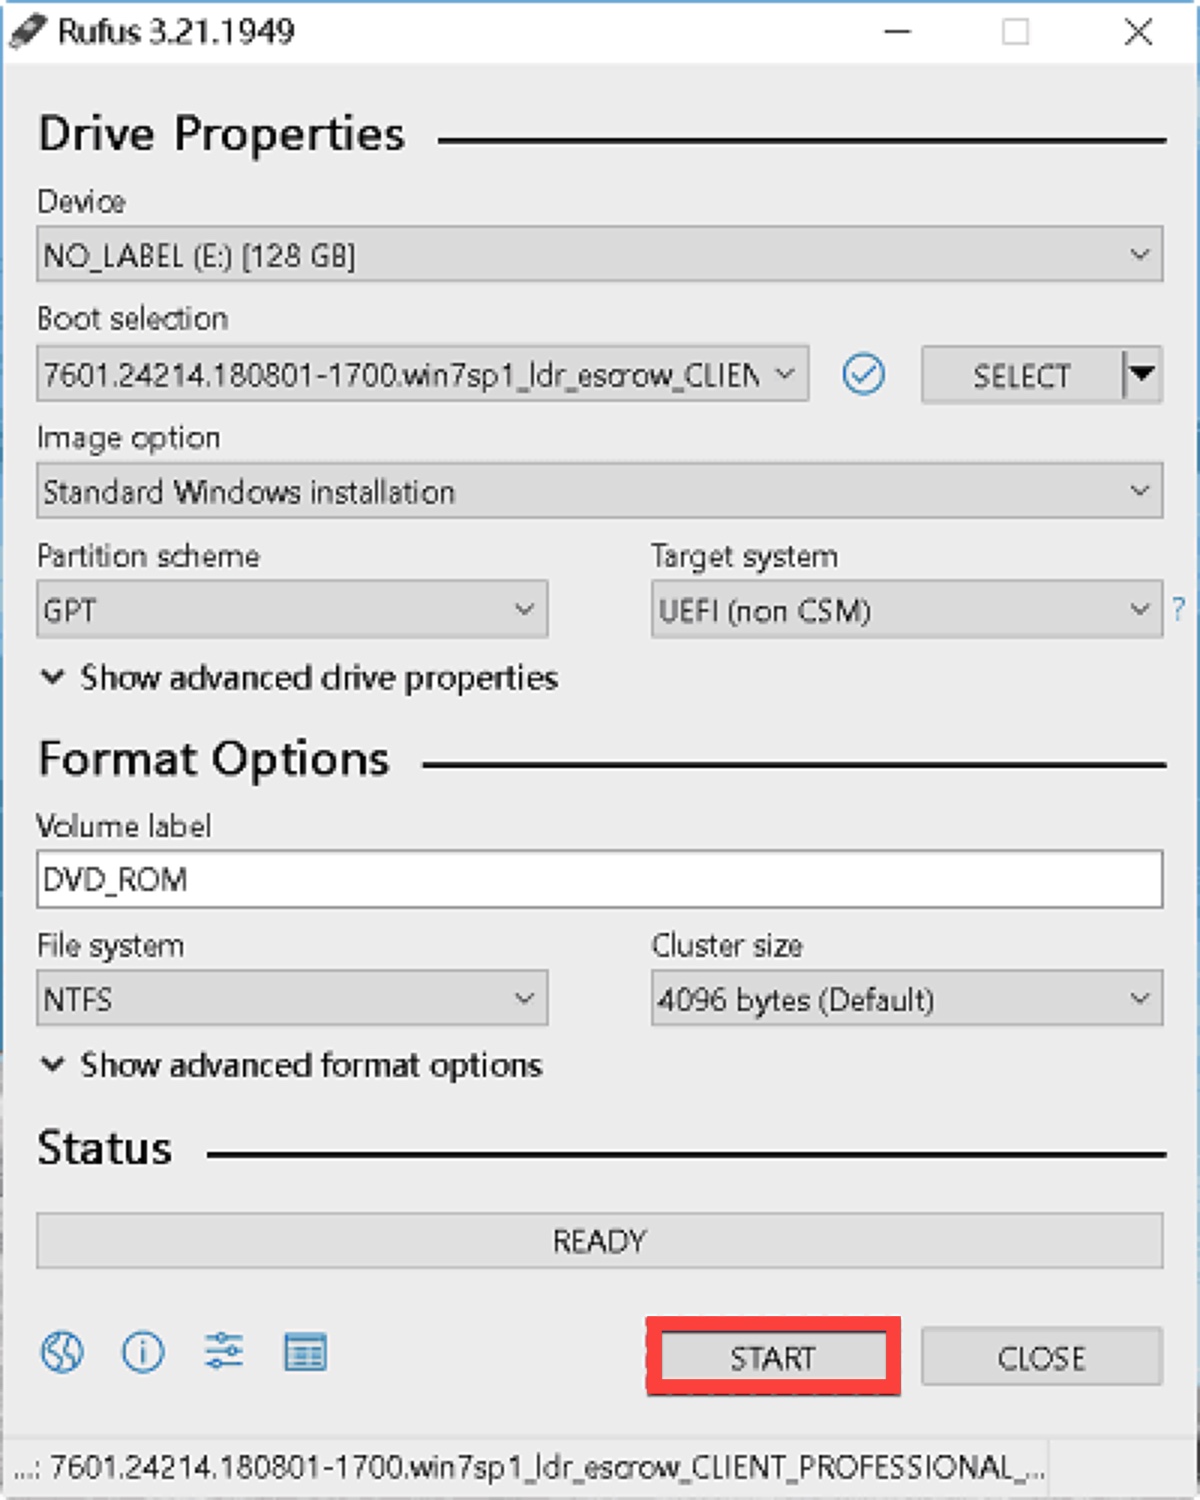
- It will scan for external drives connected to your PC and select one by default. If it chooses the wrong one, you can manually change it.
- Click the Select button and choose the downloaded Windows ISO file.
- Choose the partition scheme and target system, or keep the default options.
- Give the drive a name under Volume Label, choose NTFS as the file system, and select a proper cluster size.
- Click Start.
If you wish to download the Windows 10 ISO file directly on a PC, too, read: How to Download Windows 10 ISO without Media Creation Tool?
If you also need Windows 11, click to download Windows 11 Update 25H2, 24H2, 23H2, 22H2, & 21H2 ISOs.
We've shared three ways to create a Windows 7 bootable USB. Share them to benefit others!
FAQs about creating Windows 7 bootable USB from ISO
- QHow to make a Windows 7 bootable usb for free?
-
A
To create a bootable usb for Windows 7 for free, you can use the Windows 7 USB/DVD Download Tool if the target PC has BIOS system or use Rufus if the PC you create the boot drive on runs Windows 8 or later.
- QHow to make bootable usb for Windows 7 without software?
-
A
Making bootable Windows 7 USB disks is easier with software. However, if you want to make a Windows 7 boot USB without software, you can use the built-in Windows Command Prompt and the diskpart utility.