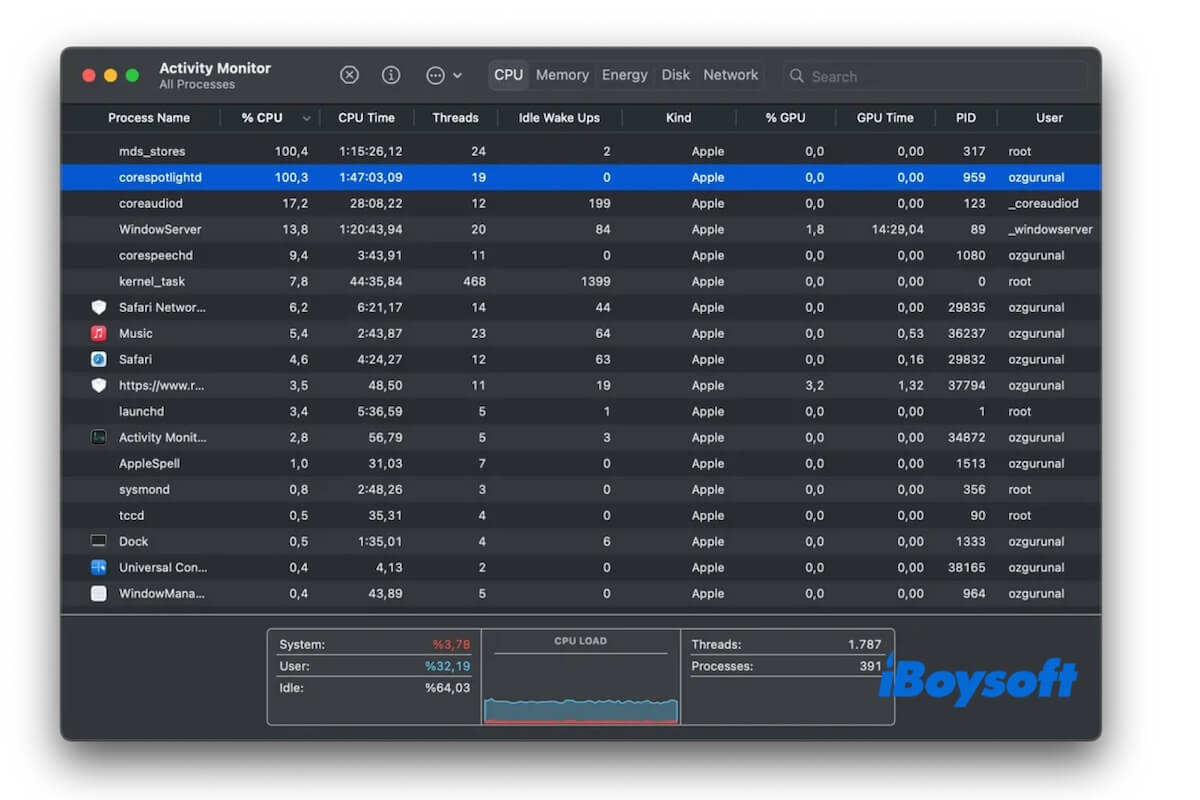
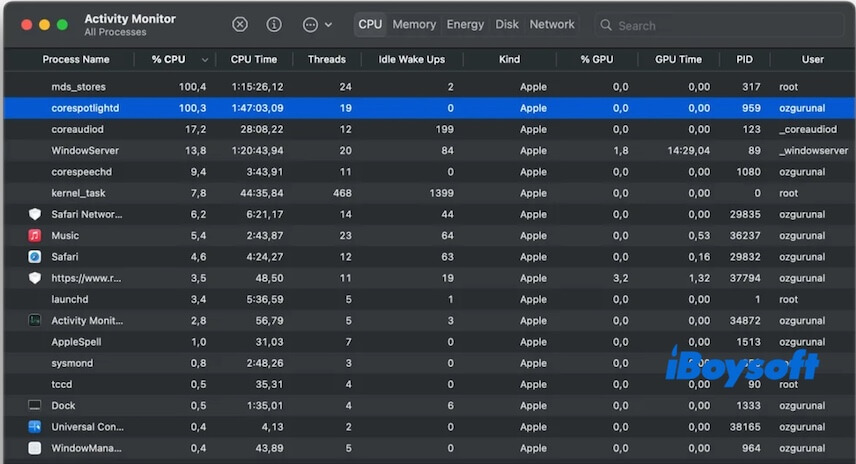
Many users are experiencing the continued corespotlightd CPU overload issue on macOS Sequoia. It slows down your Mac, makes your Mac and cursor freeze, or even triggers kernel panic (crash) frequently.
I believe you've already tried force quitting corespotlightd in Activity Monitor, reindexing Spotlight, and updating to the latest macOS 15.5. All these methods only treat the symptom, not the cause.
Don't worry. After a month's survey, repeated tests, and discussion, we draw a series of feasible methods to permanently fix the corespotlightd high CPU issue on macOS Sequoia or earlier. Follow them one by one until you get out of trouble.
How to fix the continued corespotlightd CPU overload issue
We have found that this continued corespotlightd CPU overload issue mainly happens on M1 and M2 MacBook running macOS Sequoia. It is probably caused by the resource allocation issues where corespotlightd requires exclusive access to particular resources and consequently, gets into the weeds and exhausts high CPU.
Before Apple makes some tweaks on resource allocation for corespotlightd, the following are relatively long-lasting methods for resolving this problem.
Empty the ~/Library/Metadata/Corespotlight folder (Quick fix)
Corespotlightd is the main process that handles search indexing data via the Core Spotlight framework.
We have found that when the corespotlightd process consumes high CPU in Activity Monitor, the size of the Corespotlight folder becomes large too. The Corespotlight folder stores Spotlight metadata for items that have been indexed by apps using the Core Spotlight framework, such as Mail, Notes, Messages, etc.
Clearing up the automatically added metadata in the Corespotlight folder is a near-immediate remedy to reduce the overloaded corespotlightd CPU and quickly boost your Mac's performance.
Note: Just delete the contents of the Corespotlight folder and its SpotlightKnowledgeEvents subfolder, not the folders themselves.
- Open Finder and move to the top Finder menu bar.
- Click Go > Go to Folder and enter ~/library/metadata/Corespotlight into the search box.
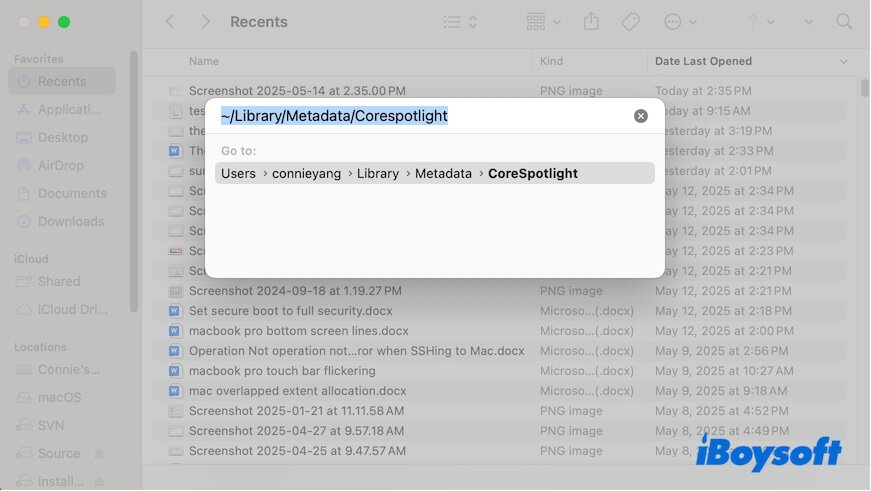
- Delete all the files in ~/library/metadata/Corespotlight folder.
Note that you do not directly delete the index.spotlightV3, Priority, and SpotlightKnowledge folders. Instead, open the three folders and delete the contents in them.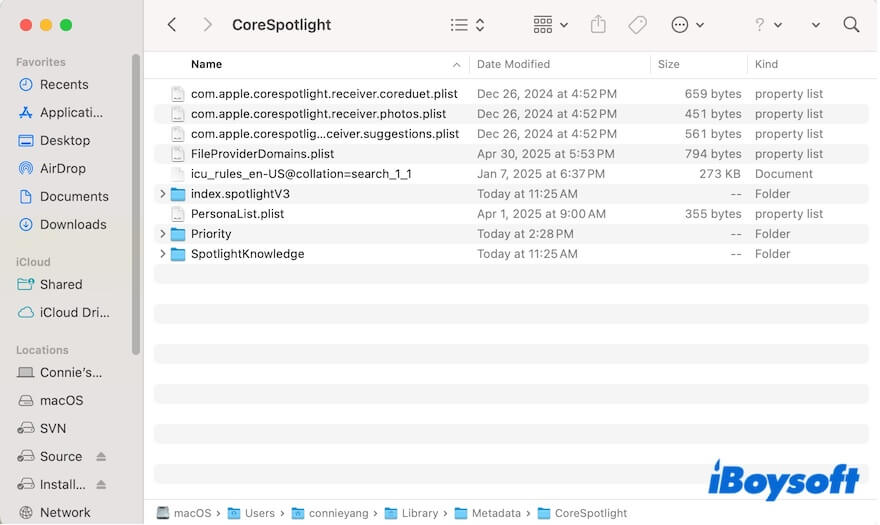
After that, you'll find the CPU and memory usage of the corespotlightd process in Activity Monitor reduces a lot.
If your issue is resolved, tell the fix to more people.
Prevent Spotlight from indexing the Time Machine backup drive (Permanent fix)
Spotlight indexing is triggered after each Time Machine backup session. If you've turned on automatic Time Machine backup, Spotlight will index your disk after every backup is complete. This greatly increases the burden of Spotlight indexing-related processes like corespotlightd and causes the continued corespotlightd CPU overload issue.
Thus, stop Spotlight from indexing your Time Machine backup disk rather than reindex Spotlight by adding and removing volumes in Spotlight Privacy, as Spotlight always needs to index these drives.
To prevent Spotlight from indexing the Time Machine backup disk, follow:
- Go to Apple menu > System Settings > Siri & Spotlight.
- Scroll down to find and open Spotlight Privacy.
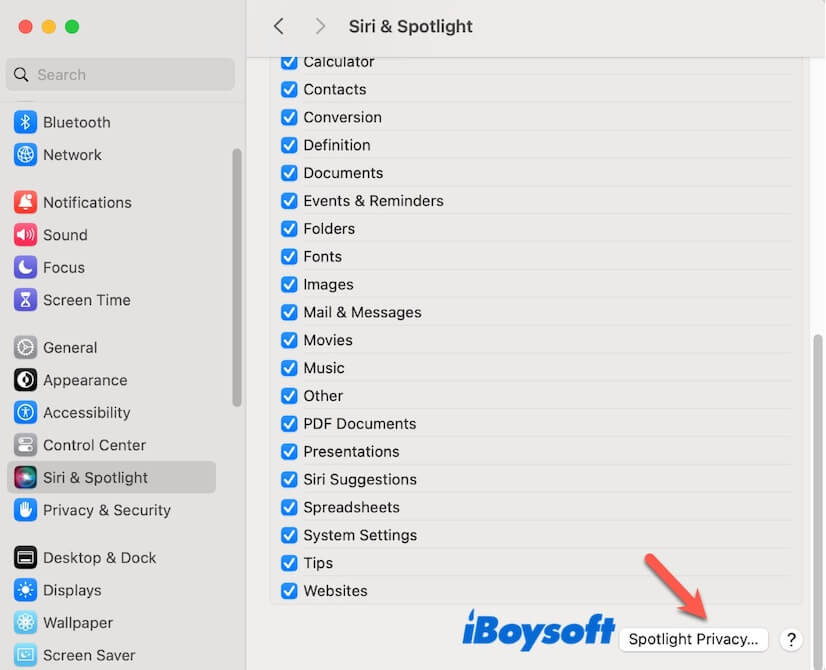
- Click the add button (+) to add the Time Machine backup drive to the list.
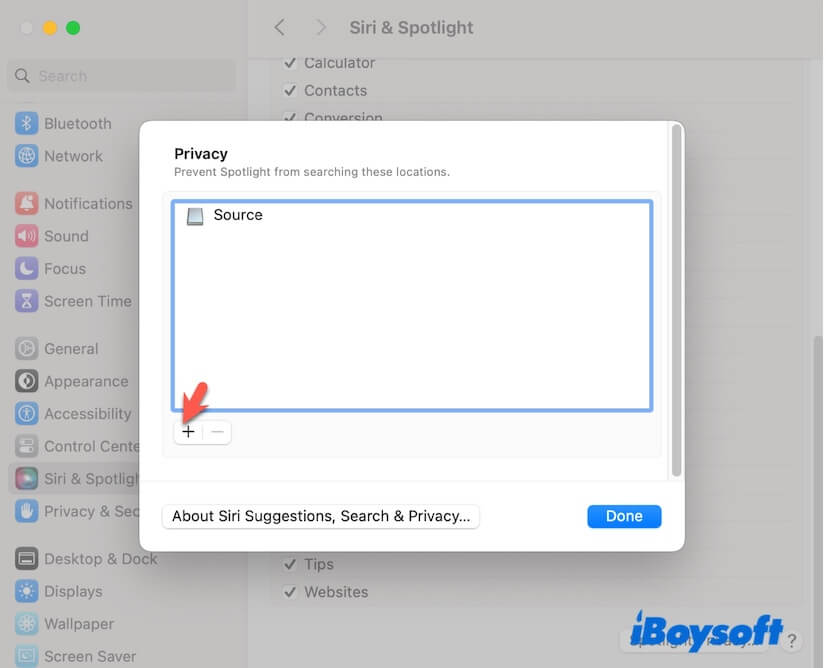
- Click Done.
Clear system cache
Many users report that corespotlightd occupies over 100% CPU usage after upgrading from macOS 15.2 to macOS 15.5. That's because upgrading macOS typically generates a large amount of system cache and temporary files.
If any of this system cache is corrupted, it may cause the Spotlight-related processes like corespotlightd to hang or slow down, naturally, consume excessive CPU resources.
Therefore, we suggest you clean up the system cache regularly, especially after a macOS update. The system cache files are scattered in ~/Library/Caches, /System/Library/Caches, and /Library/Caches folders. You can use Finder > Go > Go to Folder to find and delete the contents in them.
Actually, your Mac scatters diverse types of junk files that will slow down your Mac. You can use a Mac cleaner like iBoysoft DiskGeeker to optimize your Mac. This tool helps you search for user cache files, trash, user log files, and other junk files on your Mac for one-click deletion, keeping your Mac always in its best performance.
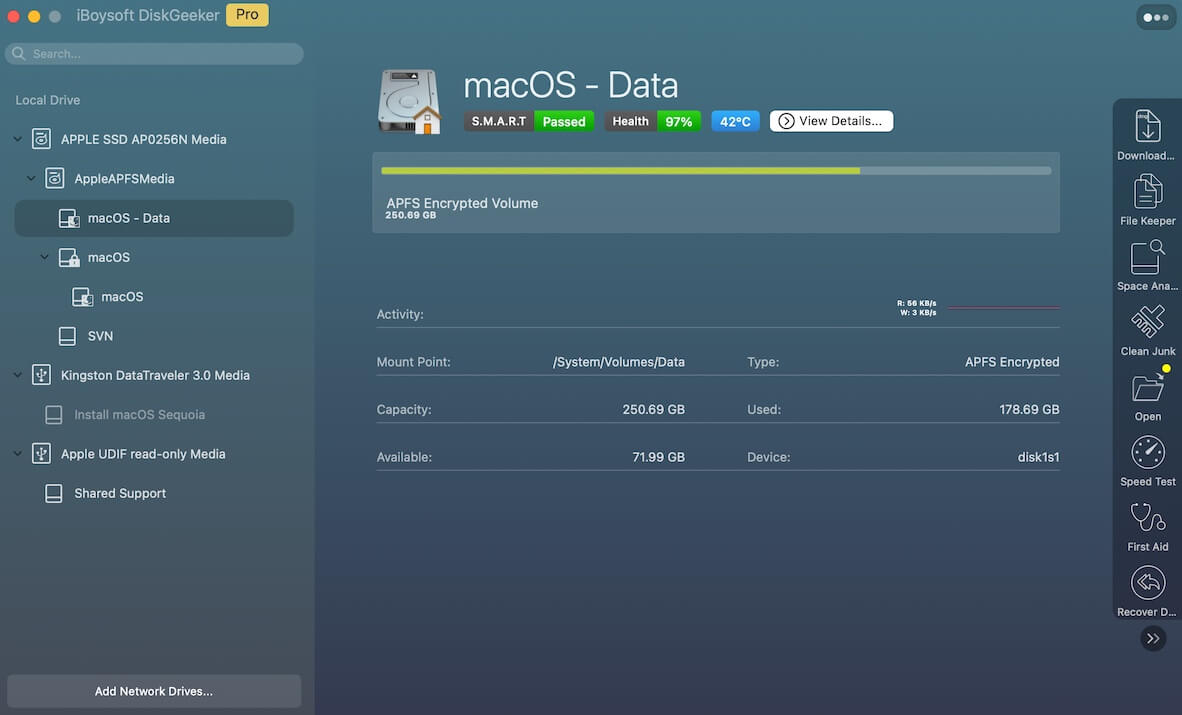
- Free download, install, and open iBoysoft DiskGeeker.
- Select the user data volume ( Macintosh HD - Data or macOS - Data) and click Clean Junk.
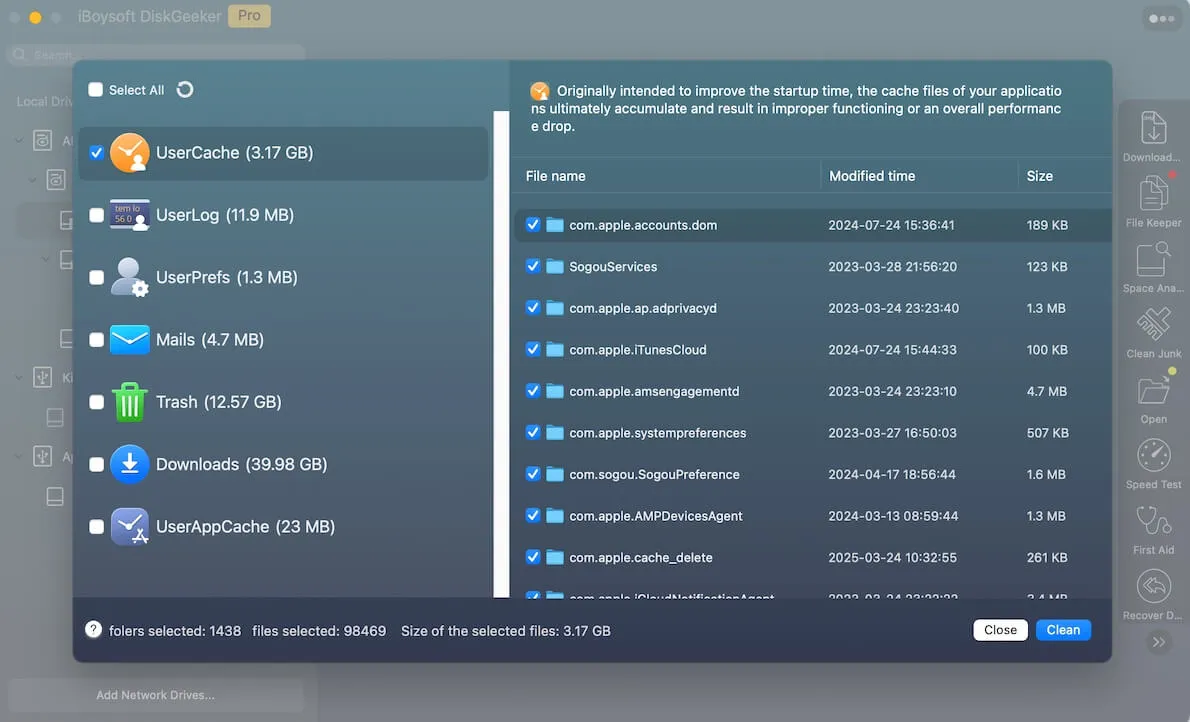
- After scanning, select the unwanted files and click Clean to directly remove them from your Mac.
After that, check if the corespotlightd high CPU usage continues on macOS Sequoia or not.
Share this Mac cleaner with others to let more people experience better performance with their Macs.
Force quit all Spotlight-related processes & delete Spotlight .plist file
Some users say that killing corespotlightd in Activity Monitor changes nothing. Notably, not only the corespotlightd process but also mds, mdworker, and mds_stores are also related to Spotlight search.
You should force quit all of these Spotlight-related processes and also delete the Spotlight .plist file to refresh Spotlight. This is a rescue for reducing the persistent excessive corespotlightd CPU usage.
Here's how:
- Open Activity Monitor and force quit corespotlightd, mds, mdworker, and md_stores one by one.
- Open Finder, navigate to the top menu bar, and click Go > Go to Folder.
- Enter ~/Library/Preferences/com.apple.Spotlight.plist to find the Spotlight .plist file.
- Move the file to the Trash.
After a restart or re-logging in to your Mac, Spotlight will be refreshed. The corespotlightd CPU usage will also become less.
Quit Pages or other suspicious applications
We have tested and found that the corespotlightd CPU becomes high with using Spotlight to search for the large Pages documents.
The truth is that various mdworker processes write large amounts of data into the corespotlight metadata folders when Spotlight indexes some Pages files.
We think there are some glitches in the way Spotlight handles large Pages documents. So, you can try to quit Pages and wait for a moment to verify if the corespotlightd CPU usage has reduced.
Of course, Pages is not the only troublemaker. If the corespotlightd CPU high usage happens after you run another app, just quit it.
Turn off Spotlight index and then on
Re-enabling the Spotlight index is useful for reducing CPU usage or troubleshooting errors. If you have tried this solution but in vain, skip it. If not, this also could be a trick, as some users have fixed the high CPU usage of corespotlightd in this way.
- Open Terminal from Launchpad > Other.
- Enter the command below. This is to disable Spotlight index on the main system volume. sudo mdutil -i off /
- Enter your admin password if asked.
- Wait for a moment and then enter the following command to turn it on. sudo mdutil -i on /
Delete your Spotlight index
Deleting the Spotlight index will wipe the current index data that Spotlight uses to search files, but macOS will automatically rebuild the index afterward.
This can clear the large indexing data that results in the continued corespotlightd CPU overload issue.
- Open Terminal from Launchpad > Other.
- Enter the command below in the Terminal window. sudo mdutil -E /
If this post helps you fix the corespotlightd high CPU on macOS Sequoia, share it with more people.