Cut and paste is a basic but essential function on computers when you do file management. It helps to move files from one place to another quickly.
However, sometimes you may encounter files lost during the cut and paste. Don't worry, there are a few ways you can get that files back. Below we're going to walk through you how to recover files lost during cut and paste on your Windows computer. Just keep reading.
What does cut and paste do in Windows
Cut and paste is a frequently-used command to move data from one location on your computer to another. Rather than copy and paste, the cut command or Ctrl + X shortcut temporarily removes the data from its original place to the clipboard. As the paste command is performed, the data will be moved to a permanent location.
What's the difference between cutting and deleting?
As mentioned before, all cut files including images, texts, videos, files, folders, programs, etc. will go to the clipboard temporarily. The clipboard is a virtual space in the computer's memory that stores cut files. However, when you delete a file in Windows, it either goes to the Recycle Bin or it's permanently deleted from the system. Once deleted, it will no longer show up in its original place.
Why can files be lost in cut and paste?
A few reasons could result in files being lost during cut and paste on Windows. Namely, they're:
- Sudden shutdown: If your computer is turned off abruptly during a cut-and-paste operation due to power failure or other reasons, the cut data might be lost.
- Incorrect storage device ejection: If you are making use of an external storage device such as a USB flash drive or an external hard drive, it's possible that if the storage device is ejected during the process of cut and paste, then that data might be lost.
- Hardware failure: When storage hardware fails fully or partially in cut and paste, this will result in data loss.
We's be appreciated it if you share this post with more people!
Basic checks before recovering files lost in cut and paste
Before starting to recover files lost during cut and paste, you can do some basic checks on your PC since there is the possibility that your cut files are still there, you just can't find them. You can do the below steps to have a check.
1. Check the folder where you've cut the files from
If the cut-and-paste process was suddenly stopped, the cut files may have stayed in the original folder. So, if you don't see some files in the destination folder, you should first check the folder from where you cut them. If you can't find them there, ensure that they aren't hidden.
2. Make sure the files aren't hidden
Sometimes, the cut files may be hidden due to some reasons, thus, you still need to ensure they are actually lost, not just hidden. To do so, follow these steps:
- Open File Explorer.
- Go to the folder where the lost files were before.
- Navigate to the View tab and tick the Hidden items box in the Show/hide section.
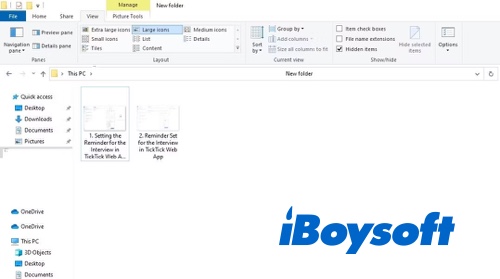
If you don't find them here, try the same method but in the folder where you wanted to paste the file.
3. Check the Recycle Bin
Another place you may find your cut files is Windows Recycle Bin. If you find the files there, simply select them all, right-click, and click on Restore. If the lost files don't appear in Recycle Bin also, try the below methods to recover files lost during cut and paste.
How to recover files lost during cut and paste
Here we offer you 3 ways to get lost files back during cut and paste, you can choose which one to use according to your needs:
Method 1: How to recover files lost during cut and paste via recovery software
The best way to recover files lost during cut and paste on Windows 11/10/8/7 is to use a professional file recovery app. iBoysoft Data Recovery for Windows is one of the best data recovery software in the market that can recover lost files due to accident deletion, virus attack, empty Recycle Bin, etc. Besides, it can recover deleted photos, videos, audio, Office documents, and much more on Windows PC.
Best Windows File Recovery Software - iBoysoft Data Recovery
- Recover shift deleted files from the system disk, sd card, HDD, SSD, and USB drive
- Restore lost Word, Excel, photos, videos, emails, etc. from corrupted disk
- Restore missing files from BitLocker encrypted hard drives
- Work on Windows 11/10/8/7/vista/XP and Windows servers
Read-only & risk-free
How to recover lost files after cutting and pasting the folder? Simply do the following:
Step 1: Free download, install and Launch iBoysoft Data Recovery. To avoid data overwriting on your Windows drive, it is highly recommended that you download this file recovery software in a different volume. After the installation finishes, open this app.
Step 2: Select a recovery module from three recovery modules according to your data loss scenarios:
- Data Recovery: Recover data from a corrupted or formatted storage device or recover lost data from a non-BitLocker encrypted hard drive.
- Raw Drive Recovery: Recover data from a RAW drive and convert RAW to NTFS/FAT32.
- BitLocker Recovery: Recover data from a BitLocker-encrypted hard drive.

Step 3: Select the drive where the cut file was stored before deletion. It could be your Windows system drive or an external drive. Then click Next to start scanning. In order to quickly find and recover the cut files, you can use Quick scan mode. If you want to find other lost files together, you can use Deep Scan mode to start scanning.
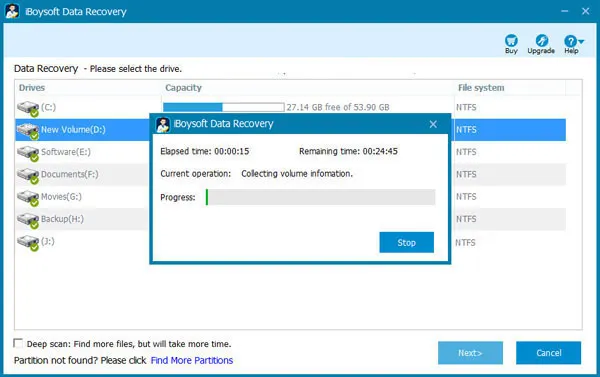
Step 4: From the scanning results, select the checkbox in front of the files you want to retrieve and click the Recover button. You will be asked to select a location to save the cut files. Save the recoverable files to another place.
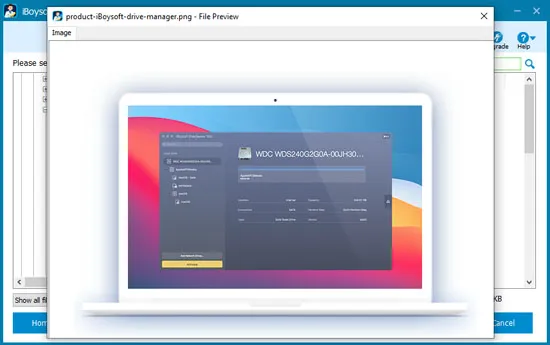
Before you quit the iBoysoft file recovery software, make sure you have recovered all your needed lost files.
If you think this post is useful, please share it on your social media.
Method 2: How to recover cut files with Windows File History
Windows 11/10/8 includes a convenient tool named File History. It is designed for users to back up data easily. If you had enabled File History before the files were cut, you can quickly and easily restore a copy of them.
Let's see how to recover files lost in cut and paste with Windows File History step by step:
- Navigate to the folder where the cut files are previously stored.
- Click History (located in the Home tab at the top).
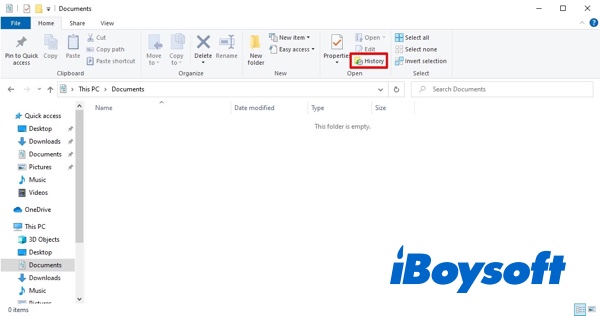
- Select the files you want to restore and click the green Restore button.
- Once you click Restore, the cut files will return to their original location. If you need to save the files to a new location instead, right-click the Restore button and click Restore to.
Method 3: How to recover lost files after cutting and pasting folder via System Restore
Another method to recover cut files on Windows PC is to use System Restore. It is useful only when you have enabled System Restore in Windows and a restore point has been created.
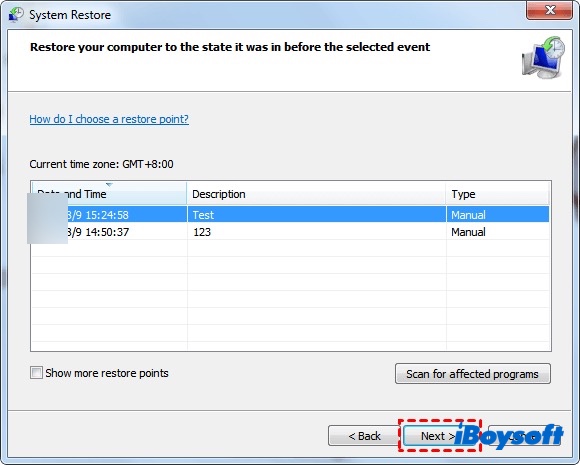
To use this method to recover copy and paste lost files, go to the Windows search box and type "create a restore point." then click the System Restore option, then click Next.
A list of restore points will show up with the date and time. Choose your wanted restore point, click Next, and Finish. Check the files lost in cut and paste have been recovered successfully.
Please post this informative post on your social media, thanks.
FAQs about recovering files lost during cut and paste
- QWhat does cut and paste mean?
-
A
Cut and paste refers to the action of moving a file from one location to another. For example, if you have a file in Folder A but want to move it to Folder B, you would cut it from Folder A then paste it in Folder B.
- QAre the files that I lost because of a cut and paste operation gone forever?
-
A
Actually, they are not gone forever. They may be stored in your computer's clipboard. You can press the Windows button + V to see them in your Clipboard History. Otherwise, it may go to Recycle Bin.
- QHow do I recover files that suddenly disappeared when cut and paste?
-
A
You can recover lost files during the cut and paste easily if you have a previous backup that contains them. If not, recovery software is really your best and only option to get the lost files back.
