You must have seen or used Photo Booth on your Mac or MacBook, which is used to take photos. But it can not only take photos but edit them. Maybe there are some hidden uses that you have never noticed before.
Now, follow this post and see what interesting features you've missed before in Photo Booth. Keep reading and learn more about Photo Booth on your Mac or MacBook.
Share this post to let more people learn about Photo Booth on Mac/MacBook.
What is Photo Booth on Mac/Macbook?
Photo Booth, published by Apple Inc., is a software application for taking photos and videos with an iSight camera, as a part of macOS and iPadOS. Since the iPad 2, it can be used on the iPad and iPad mini.
Released in October 2005, Photo Booth was initially available only on Macintosh computers that had built-in iSight camera running Mac OS X Tiger (version 10.4). After macOS X 10.5 Leopard and iOS 4, it becomes a part of Mac's versions.
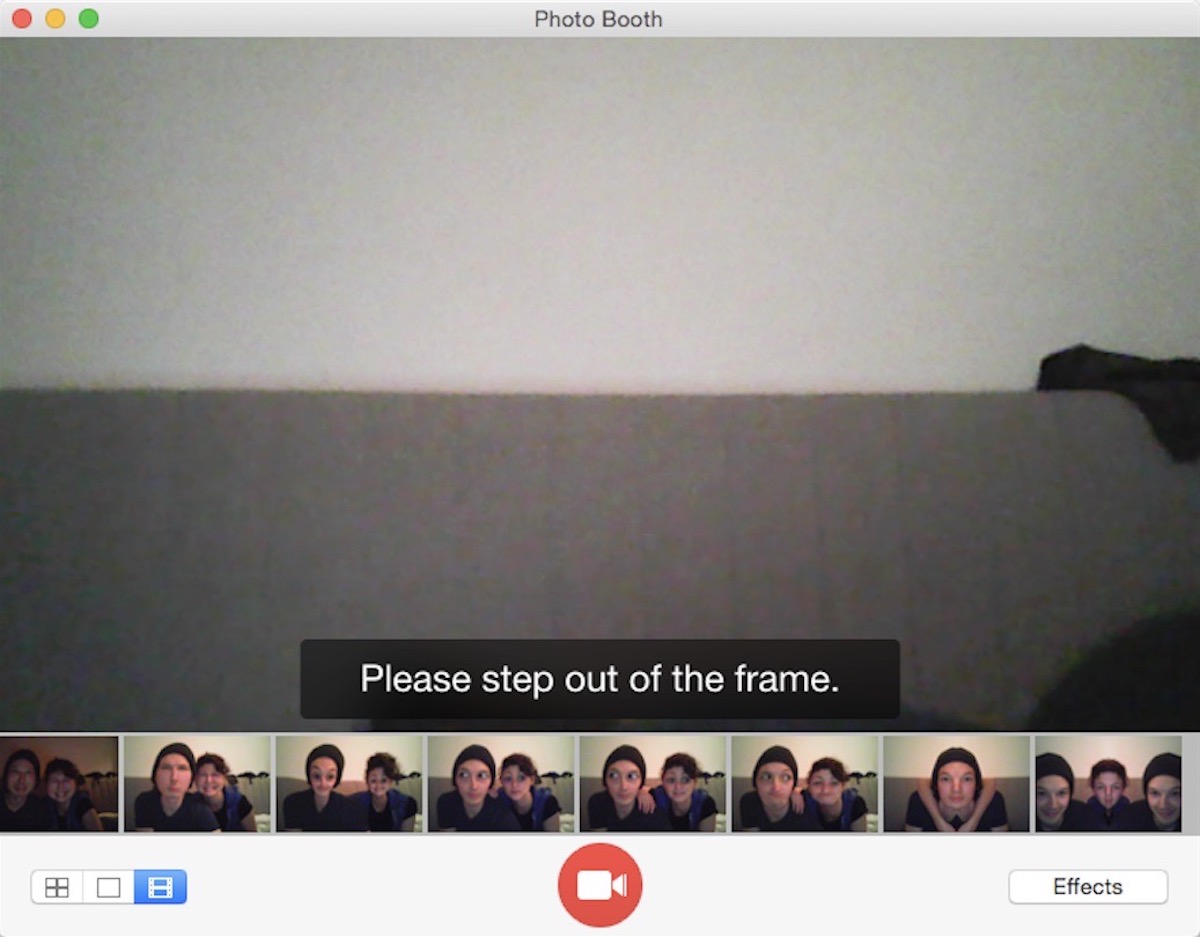
Photo Booth displays a preview to show the camera's preview in real-time. Thumbnails of saved photos and videos are displayed along the bottom of this window. These can be shown or played by clicking on the thumbnails.
By default, Photo Booth's live preview and take photos are reversed horizontally, to make the user feel like looking into a mirror. But you can also choose unreversed images.
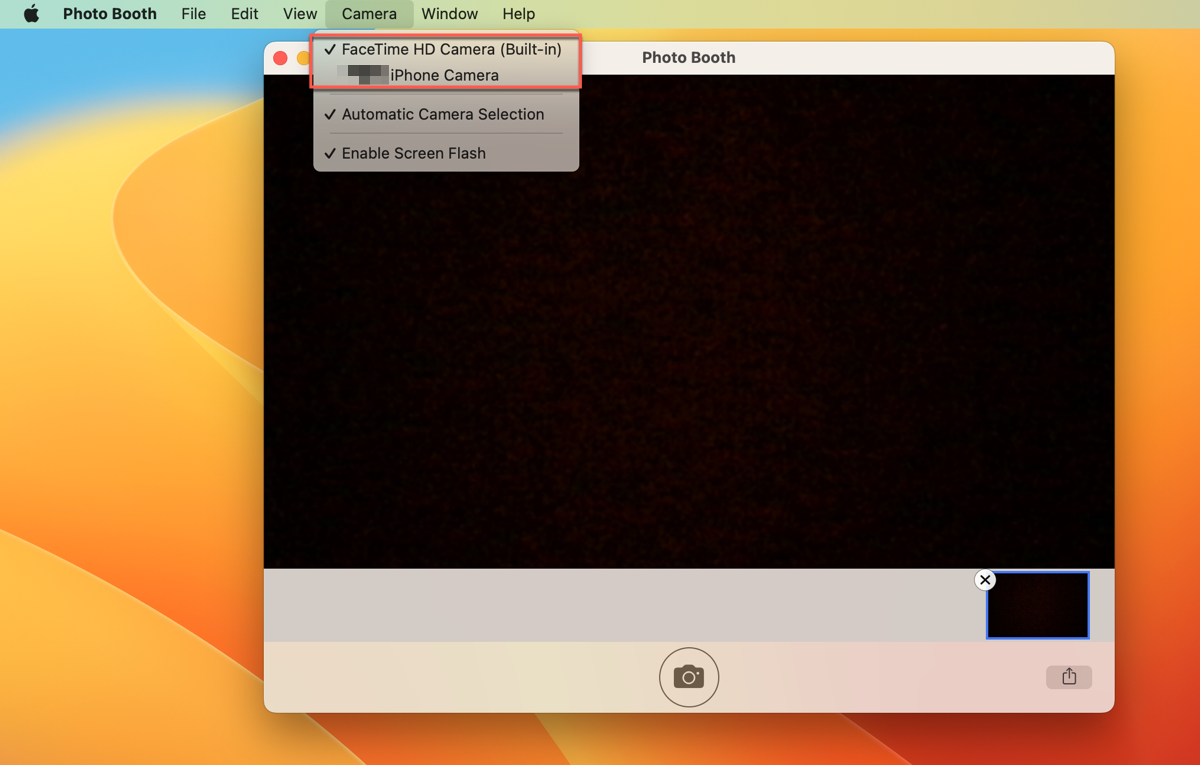
If you connect your Mac/MacBook with your iPhone, when you take photos or videos in Photo Booth on Mac or MacBook, you can select the "camera" in the upper of the menu to change.
If you think this post is interesting, share it.
How to use Photo Booth on Mac/MacBook?
Now, you should have an impression of Photo Booth on Mac/MacBook. Then, let's learn how to use Photo Booth on Mac/MacBook in detail.
Edit photos or videos on Photo Booth on Mac/MacBook
Before you edit the photo in Photo Booth on your Mac or MacBook, you can use the iSight camera to take a photo at first. Press the camera icon and wait for three seconds to take a photo. And you will see a preview photo at the bottom of Photo Booth.
Here's how to edit photos on Photo Booth on Mac/MacBook
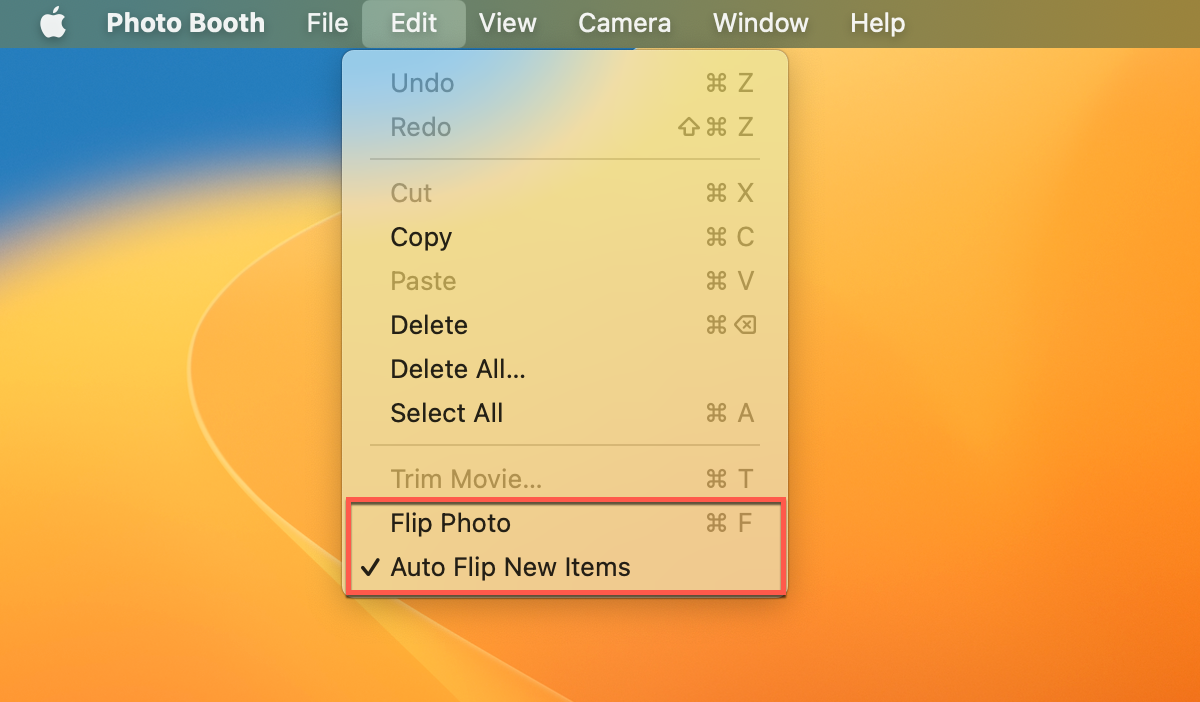
- Click the photo, then select Edit > Flip Photo to invert the photo.
- Choose Edit > Auto Flip New Item to automatically invert new photos or videos.
- Select the photo, then click File > Export Original to save the photo without effects.
How to edit videos on Photo Booth on Mac/MacBook:
- Play the video that you want to edit.
- Choose Edit > Trim Movie.
- Drag the yellow start and end markers, and then click Trim to edit the video.
If you want to make more edits, click and hold the markers to see individual frames of the video.
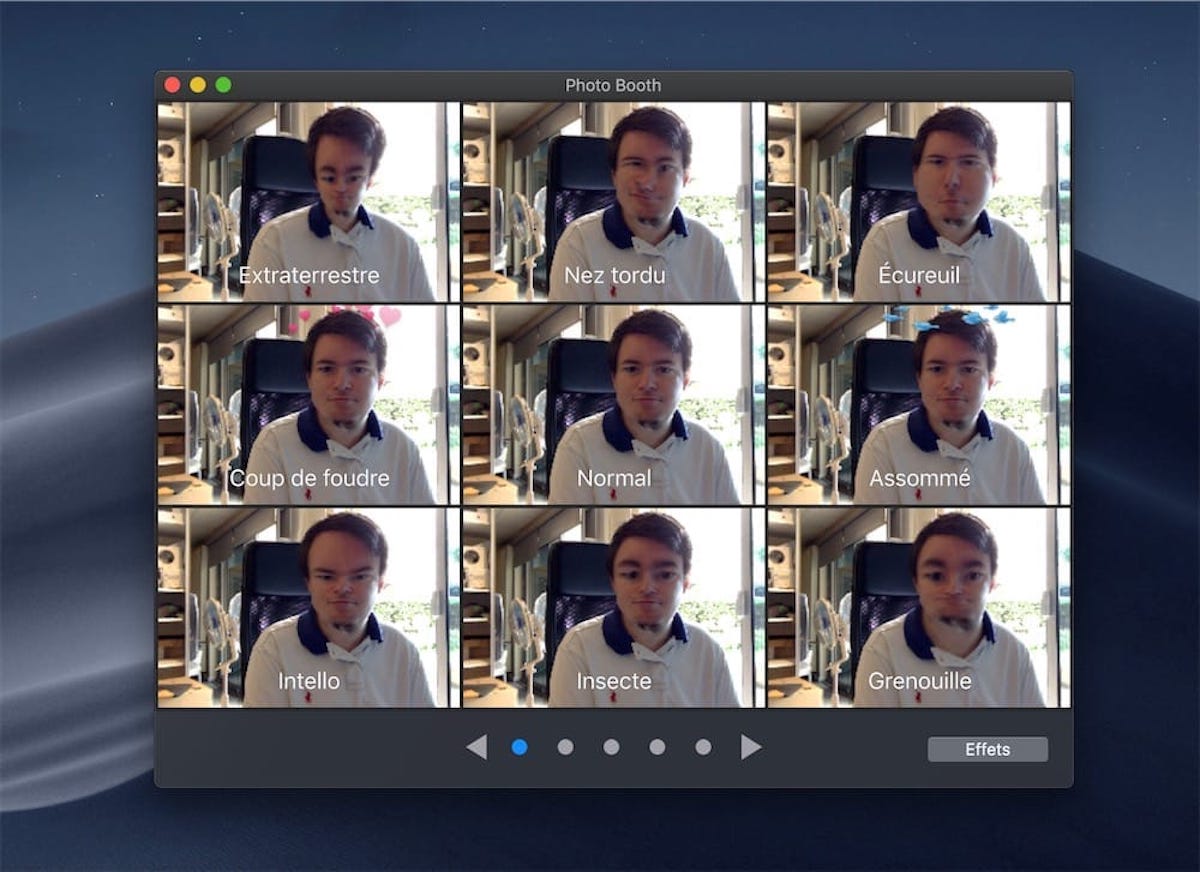
Add background or more effects on Photo Booth on Mac/MacBook
To beautify your photos, you may want to add a background to them. And different system versions have different ways to add background on Photo Booth on your Mac/MacBook.
If your system version is macOS Mojave or earlier, use the following steps to create a custom backdrop.
- Click the View Photo Preview button or the View Video Preview button when you're viewing a photo or video.
- Click the Effect button.
- Browse through the effects until you see User Backdrops.
- Drag a photo or video to one of the User Backdrop frames.
You can drag the photo or video from the desktop, Finder, iMovie, or Safari.
From macOS Catalina, Apple Inc. removed the User Backdrop, so you can only add the background or apply an effect when you are taking photos or videos. Here's how.
- Click the View Photo Preview button or the View Video Preview button when you're viewing a photo or video.
- Click the Effect button.
- Click the browse button at the bottom of the window to see the previews of the effects.
- Select an effect to apply it.
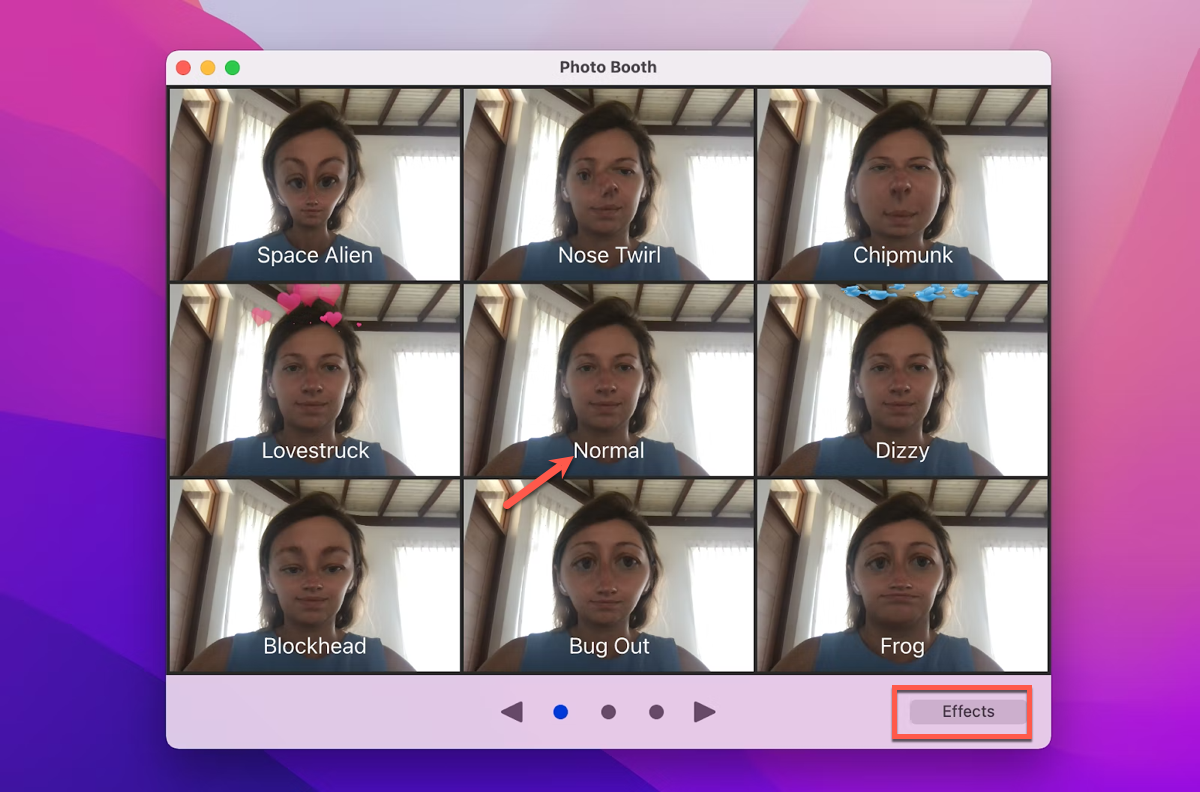
If you don't want to use the effects, select Normal in the center of the effects.
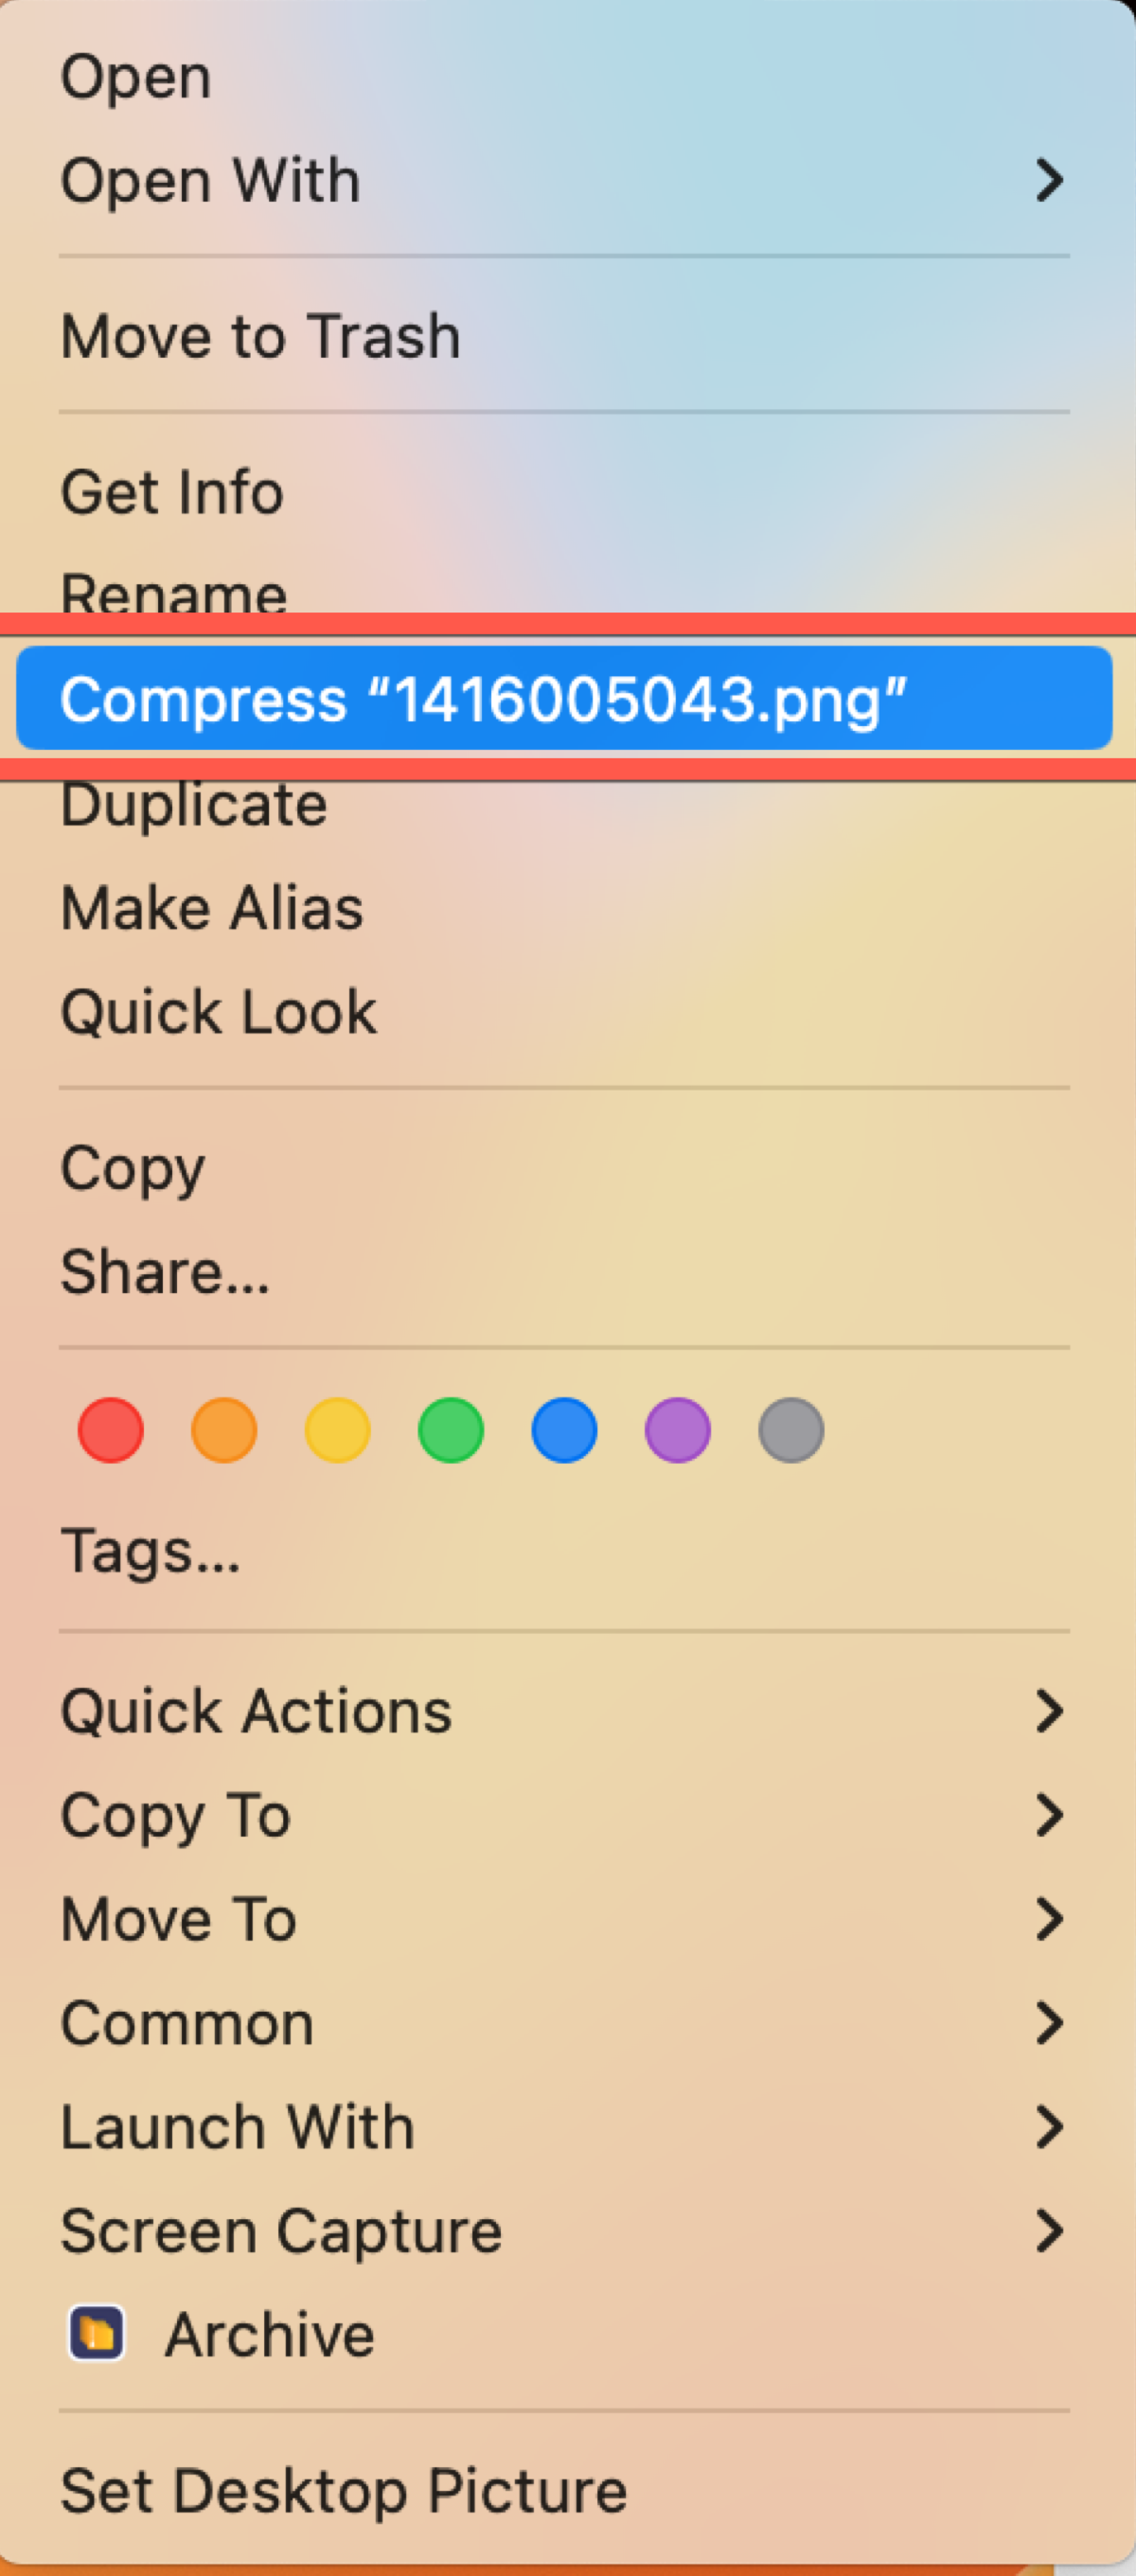
Compress photos or videos on Mac/MacBook
Sometimes, the size of the photo or video you took by Photo Booth may be too large to share, so you need to compress it. But you can't compress it in just Photo Booth. Don't worry, and it's easy to operate. Here's how.
- Click the photo or video to see the preview.
- Click File > Export, and then select the storage location.
- Right-click the saved photo or video and then select Compress.
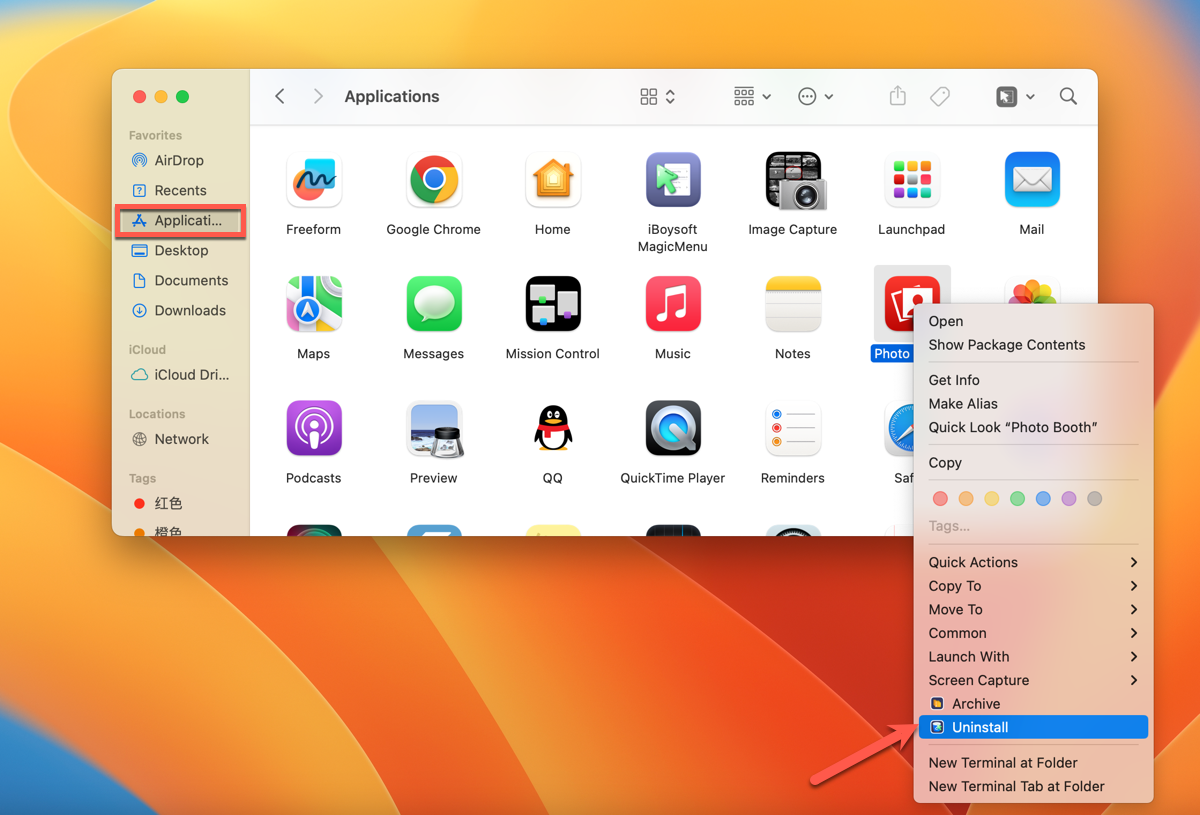
How to uninstall Photo Booth on Mac/MacBook?
Although Photo Booth is a good application, it still can be bothering, especially when other programs attempt to activate the FaceTime camera. So follow the steps to learn how to uninstall Photo Booth on Mac/MacBook.
- Open Finder in Dock.
- Select Applications in the left sidebar.
- Right-click Photo Booth and then click Uninstall in the pop-up menu.
You can share this post with your friends in order to know more about Photo Booth on Mac/MacBook.
FAQ about Photo Booth
- QDo all Macs have Photo Booth?
-
A
Actually yes. After macOS X 10.5 Leopard, Photo Booth became a part of Mac.
- QIs Photo Booth on Mac free?
-
A
Yes. It's an in-build of Mac.
- QWhat does Apple Photo Booth do?
-
A
You can use it to take photos or videos, edit them and make effects.