Creating a slideshow on Mac is a perfect way to organize your photos and view or show them to someone. Photos and Preview are two built-in apps on Mac that can help you to make a slideshow easily.
Before you create a slideshow on your Mac, you need to prepare some high-quality photos and videos. Besides, if you're making a long slideshow, having a soundtrack can be a great way to liven things up.
The following will show you more details to create a slideshow on your Mac using Photos and Preview.
If you think this post is informative, click the below button to share it.
How to create a slideshow in Photos on Mac?
Your Mac has a built-in slideshow creator embedded in the Photos app. This feature allows you to turn a group of photos and videos into a slideshow with just a few clicks.
Follow the below steps to create an instant slideshow:
- Open Photos from the Dock.
- Select Library on the left sidebar and choose Day in the top toolbar.
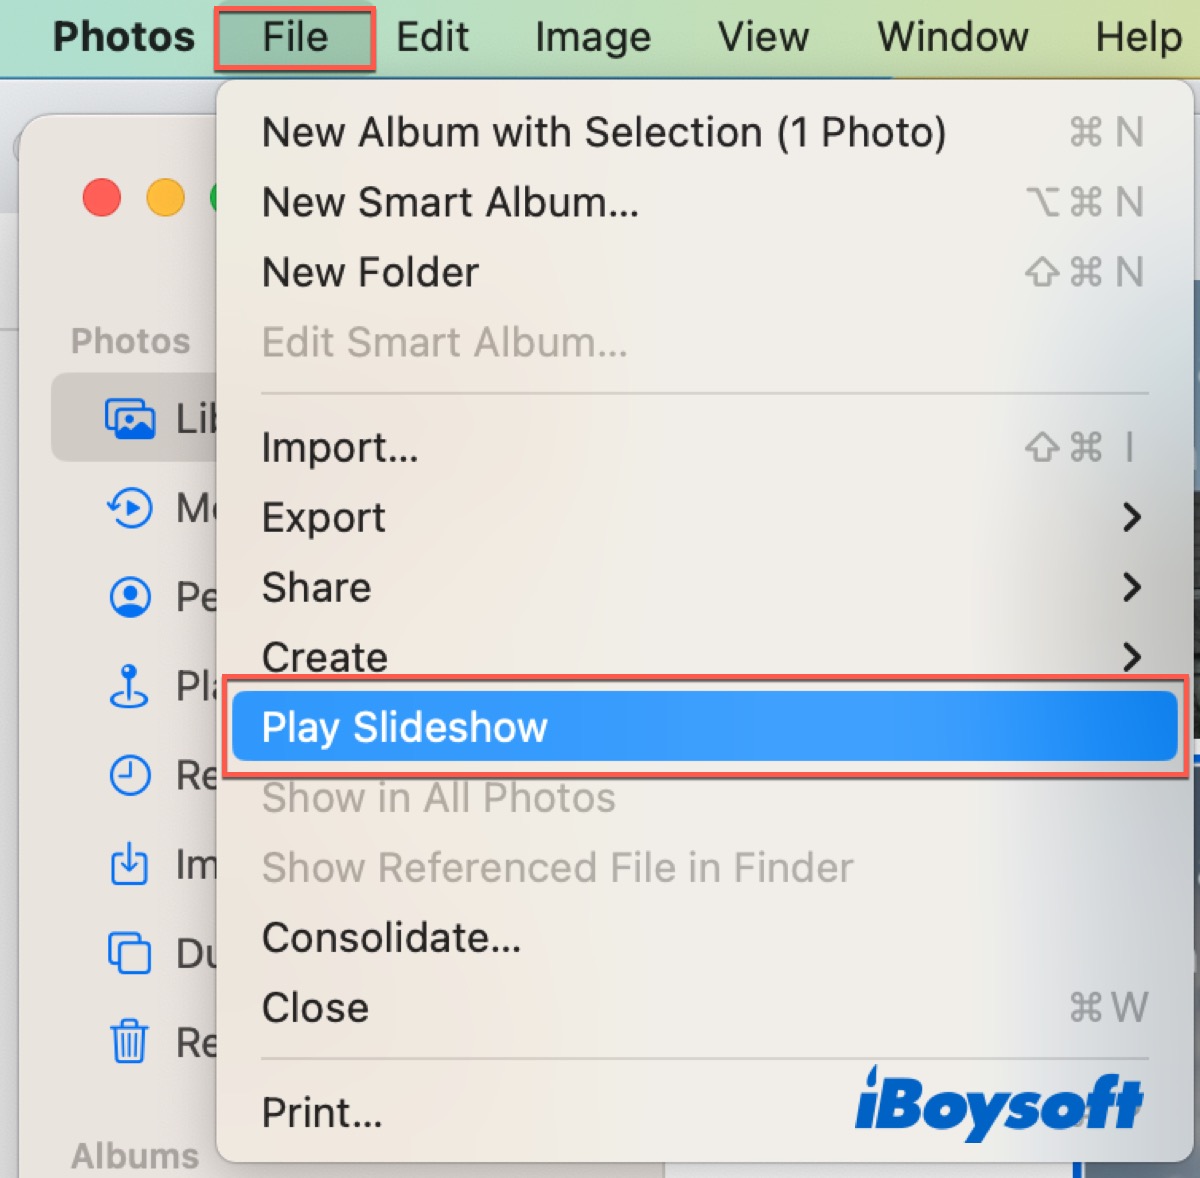
- Select the photos and then click File in the Apple menu.
- Choose Play Slideshow from the drop-down list.
- Select the theme and the music you want for your slideshow.
- Click Play Slideshow.
While watching, you can skip forward and backward in the slideshow by pressing the arrow keys. Use space to pause and hit the X key or Escape to stop playing the slideshow.
Except for the instant slideshow, you can create a slideshow project in Photos:
- Open Photos and click My Projects in the left sidebar.
- Click the + button next to My Projects.
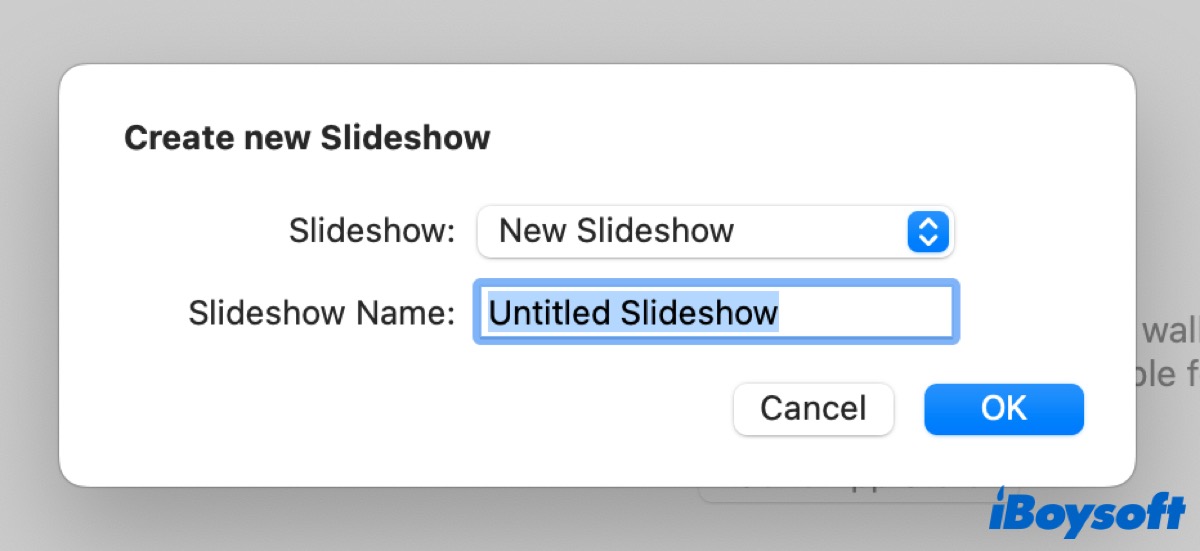
- Go to Slideshow > Photos.
- Type in the slideshow name and click OK.
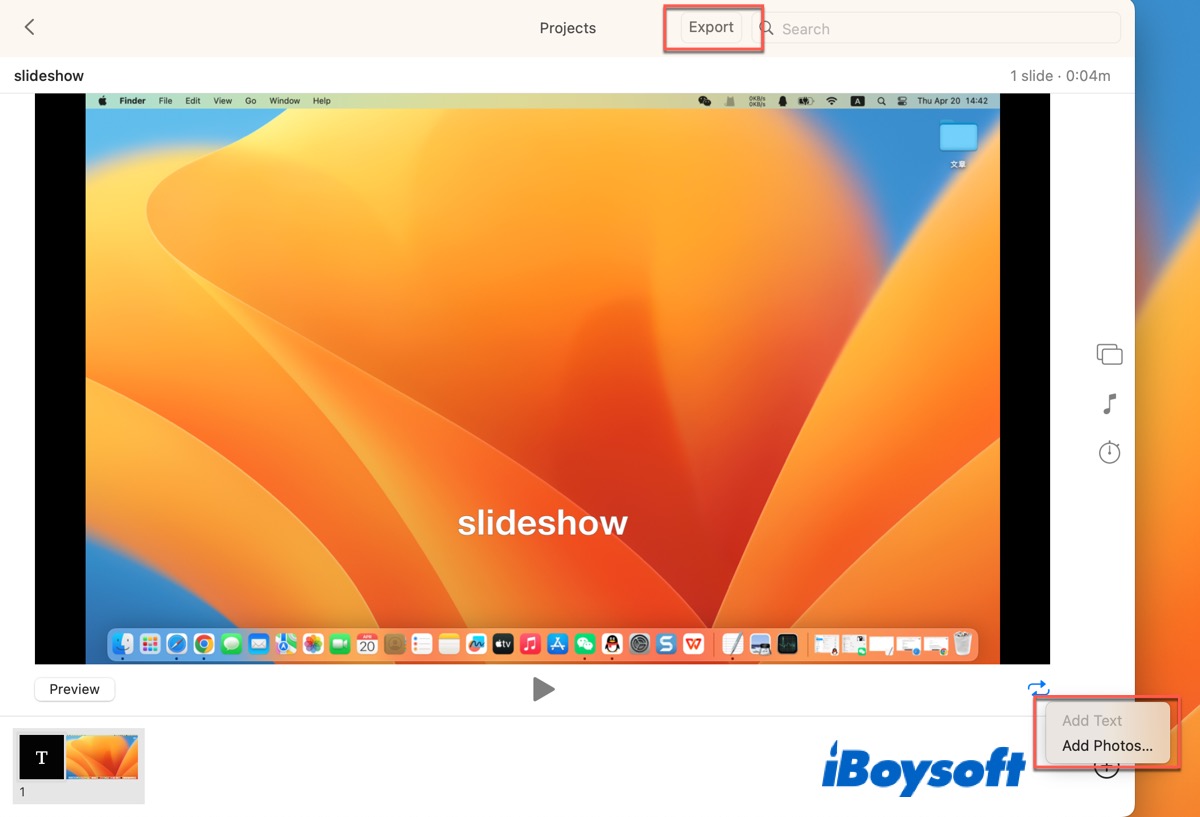
After that, if you want to add the music, click the Music button on the right. If you want to export the slideshow, you can click Export at the top of the window.
How to create a slideshow in Preview on Mac?
There is a more quick way to create a slideshow on Mac with Preview, which is the default application in macOS for image files and has a basic editing toolkit, so it's a good solution if you want to add text to your slides. Here's how.
- Open Preview and click File in the Apple menu.
- Click Open or press Command + O to open another window.
- Choose the photos you want to use.
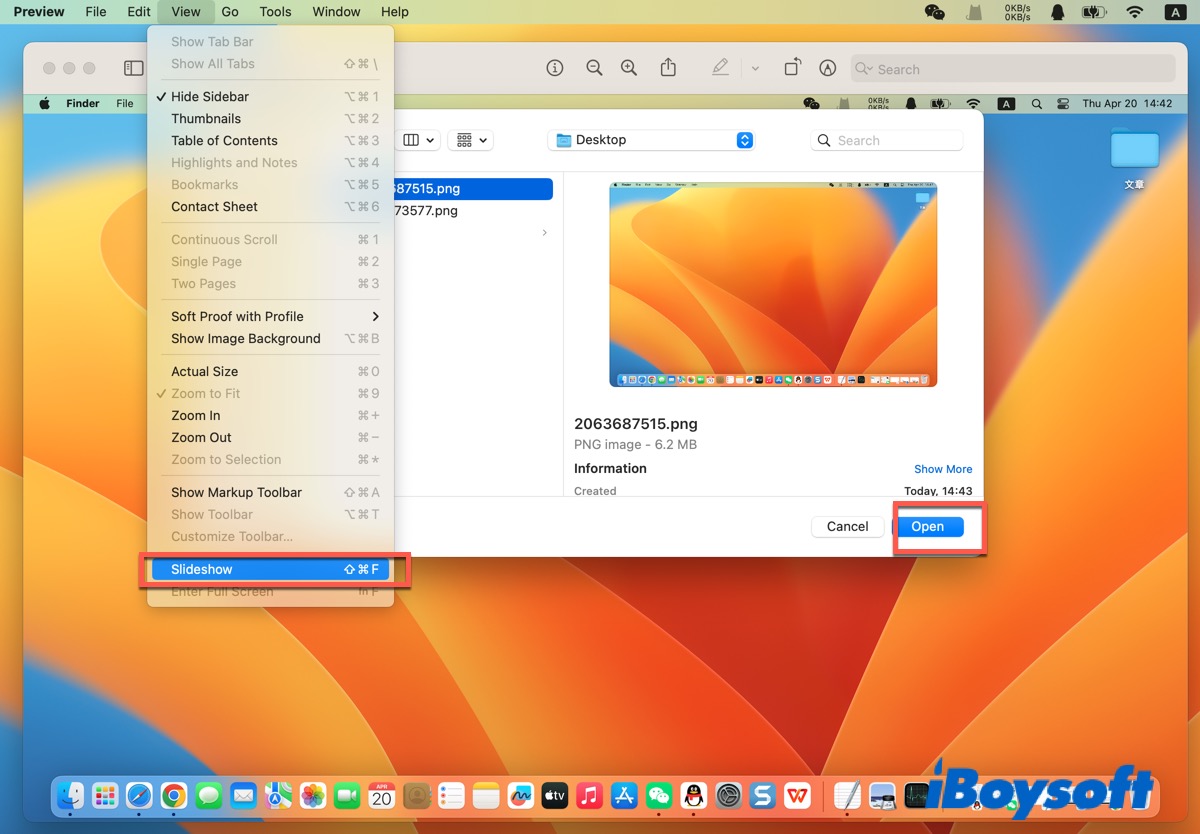
- Click View in the Apple menu and select Slideshow in the dropdown menu.
- Click Play.
How to add or remove photos in a slideshow?
After you create a slideshow, you still can add or remove photos, videos, or text at any time. Details are listed below. Open Photos and click the slideshow you created under Project.
- Add photos: Click the + button at the left bottom of the slideshow and select Add Photos. Choose the photos you want in the row of thumbnails and click Add.
- Delete photos: Select a photo you want to delete from the slideshow and then press Delete on the keyboard.
- Add text: Select a photo, click the + button, then click Add Text. Select the text in the text box, then type the text you want.
- Delete text: Select the text in the photo or select the T frame before the photo in the row of thumbnails, then press Delete.
Much grateful if you share this post with more people.
FAQ about creating a slideshow on Mac
- QHow to make a slideshow on Mac preview?
-
A
Open a PDF in Preview, and then choose View > Slideshow.
- QHow do I save a slideshow on my Mac?
-
A
In the Photos app, click a slideshow under Projects in the sidebar and then click Export in the toolbar.