With Mac screen sharing, you can collaborate with others, project your Mac's screen to a monitor, remotely manage a computer, etc. However, you may find Mac screen sharing not working with issues such as Mac Firewall blocking screen sharing, Mac cannot be located for screen sharing, Mac screen sharing connection failed, or can't share screen though permissions granted.
This can happen to both Intel and M1 Macs, either with the built-in macOS screen sharing, native apps like FaceTime, or third-party screen sharing or video conferencing tools like Zoom, Microsoft Teams, Discord, etc. Here, we will guide you to fix these macOS screen sharing problems. Let's start with the reasons behind it.
Why is screen sharing not working on Mac?
If you are using Mac's built-in screen sharing feature, you may experience screen sharing not working on Mac when:
- having no permission to access another Mac.
- either of the devices goes to sleep.
- Mac firewall blocking screen sharing.
If you are employing a built-in or third-party app that allows you to share the screen with another Mac or PC, you may have issues like Zoom screen sharing not working on Mac when:
- the app has no recording permission.
- the app is frozen, malfunctioning, or outdated.
- other software is accessing your camera.
- the internet connection is unstable.
After knowing what may result in the Mac share screen not working, it's time to fix the problem.
How to fix Mac screen sharing not working with macOS Screen Sharing?
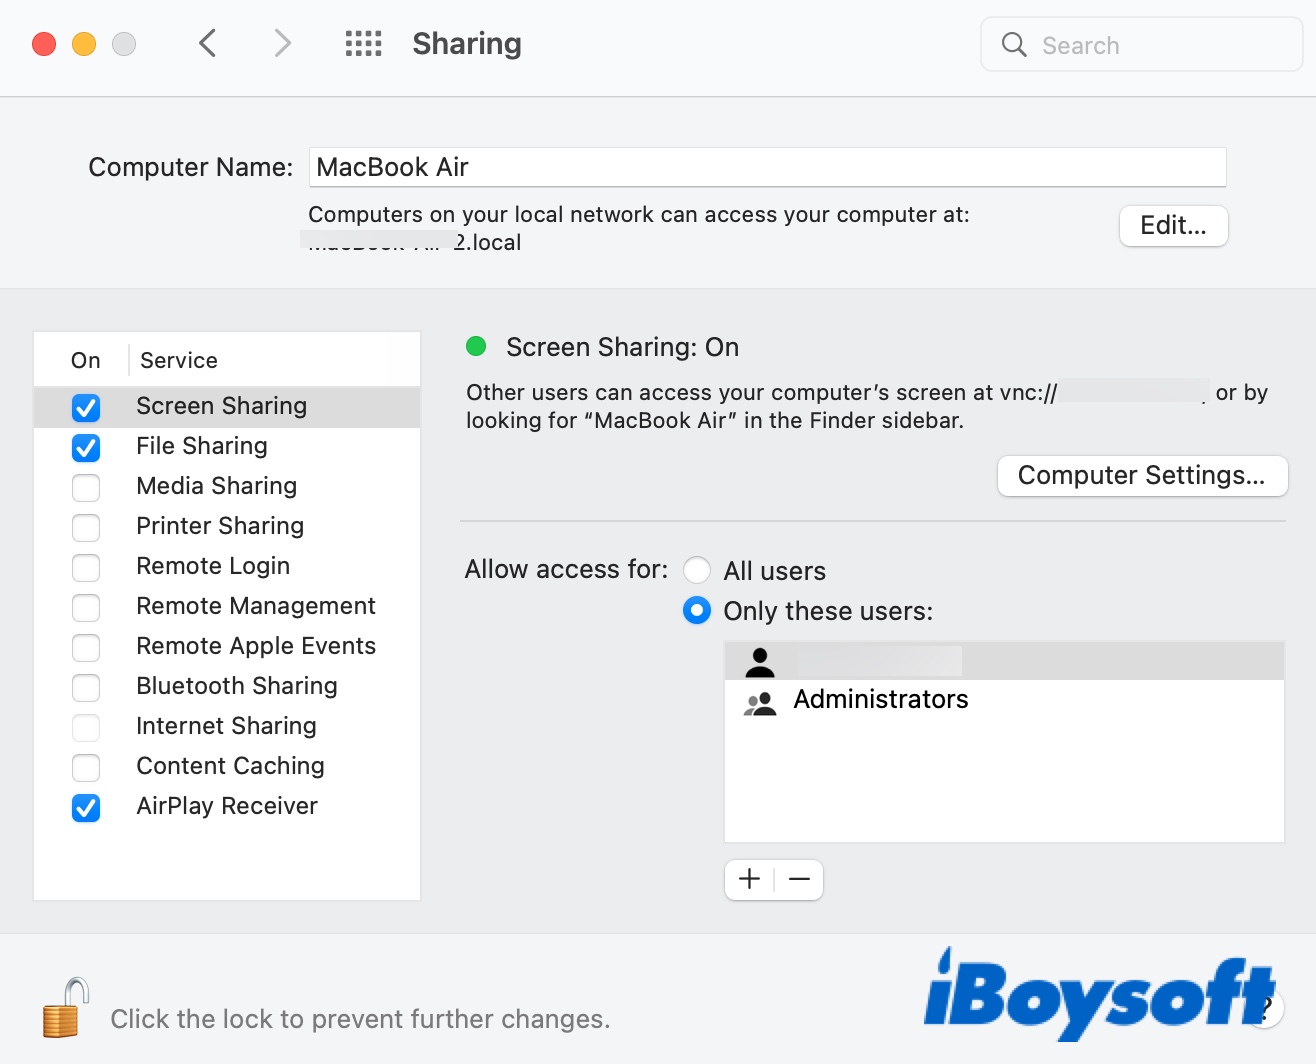
Suppose you have enabled screen share on the Mac you want to access and allowed share screen permission to your or another account in the Sharing preference pane. In that case, you should be able to access the shared Mac's desktop using the authorized account when working within the same network.
However, if Mac screen sharing keeps disconnecting or is not working at all, you need to follow the solutions below to resolve the issue:
- Enable screen sharing on Mac using the Screen Sharing app
- Change Mac's sleep settings
- Disable and re-enable Screen Sharing
- Change or turn off the Firewall
- Disable Remote Management
- Kill NetAuthAgent or NetAuthSysAgent
- Restart your Mac
- Switch to 'Using DHCP'
- Share screen via Messages
Note: If you are using a third-party USB camera with your Mac mini, make sure that it is plugged in before sharing the screen on Mac.
You can post these solutions to help similar users like you with a simple click!
Enable screen sharing on Mac using macOS screen sharing
If you can't share screen on Mac remotely and this is your first attempt to use it, you are likely not following the correct steps. Configuring the Mac you want to share from System Preferences > Sharing works best with local networks. However, if you are trying to connect to a remote Mac on a different network, you should enable screen sharing on Mac with these steps.
How to enable screen sharing on Mac remotely:
- On the Mac you share the screen with, press Command + Space and type in "screen sharing."
- Double-click to open the Screen Sharing app.
- Enter the Apple ID or hostname of the Mac you are trying to access remotely and click Connect.
- Click Accept to allow remote control on the Mac you want to access.
- Check Allow user to "Control my screen" and click Accept.
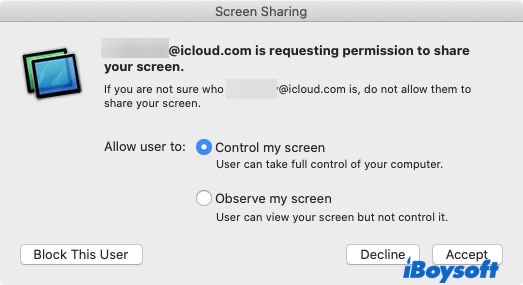
You can now see the shared screen on your Mac, where you can remotely open apps, move files & folders of the shared Mac, etc. Note that both Macs must be awake for screen sharing to work. So, if you are trying to control another Mac of your own remotely, you need to set the remote Mac not to sleep during screen sharing.
Change Mac's sleep settings
You may find Mac screen sharing keeps disconnecting if either of the devices goes to sleep. That's why it's best to turn off sleep mode or adjust the setting to avoid your remote Mac getting into sleep mode when screen sharing is ongoing.
- Open System Preferences, then choose "Battery" on a Mac notebook and "Energy Saver" on a Mac desktop.
- Click Battery and move the slider under "Turn display off after" to Never or other proper duration.
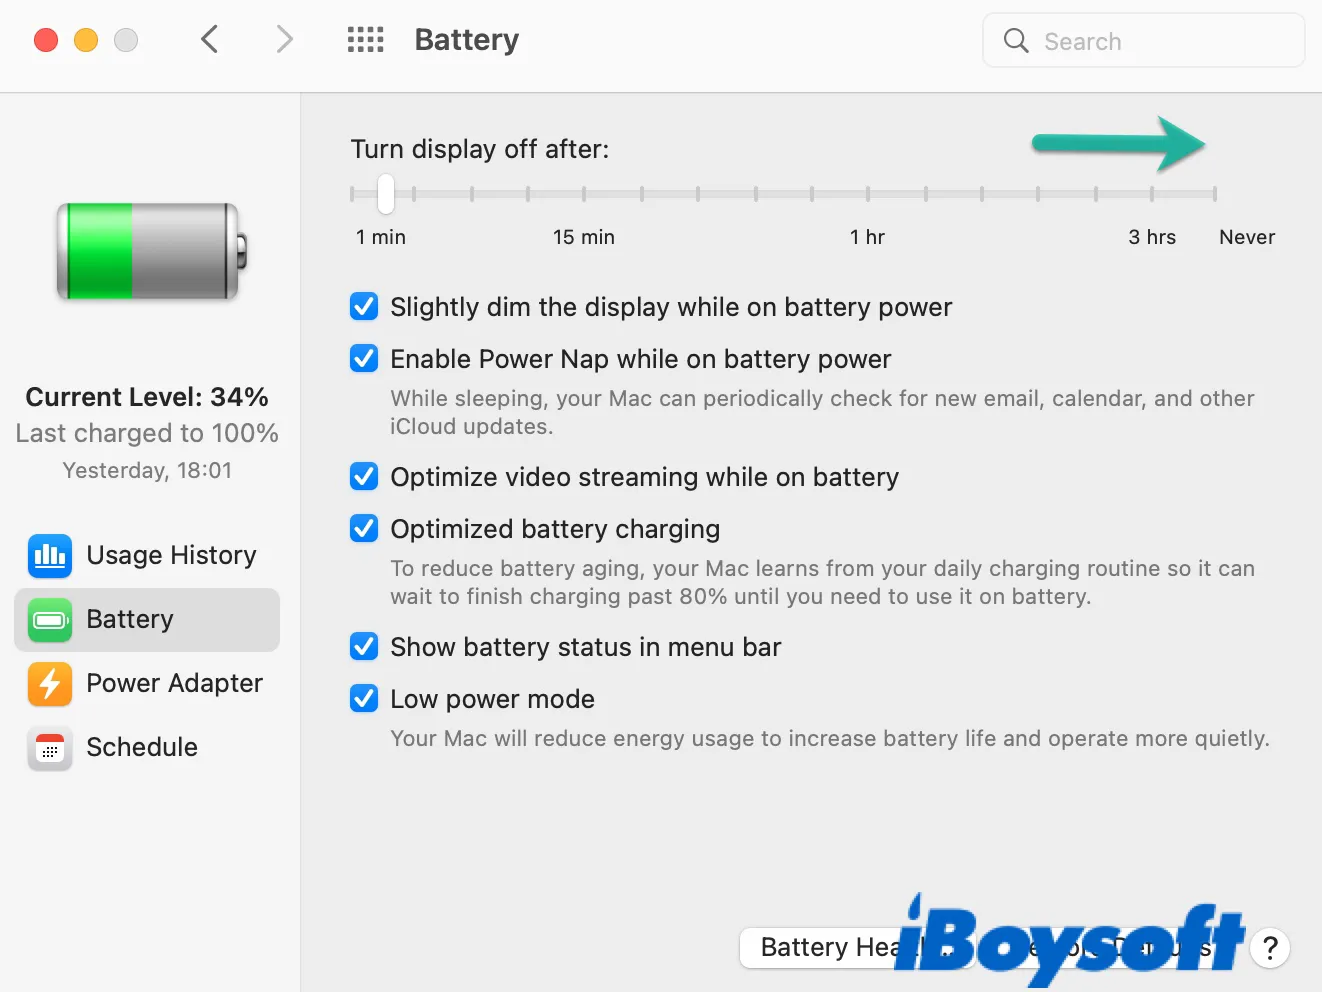
- Select "Power Adatper" and do the same.
Suppose screen sharing doesn't work on Mac; try other solutions below.
Disable and re-enable Screen Sharing
When connecting to a remote Mac, you may receive an error reading "***cannot be located for screen sharing." When that happens, you can deselect the "Screen Sharing" option in System Preferences > Sharing and reselect it again. If you still find the Mac share screen not working, check your firewall settings.
Change or turn off the Firewall
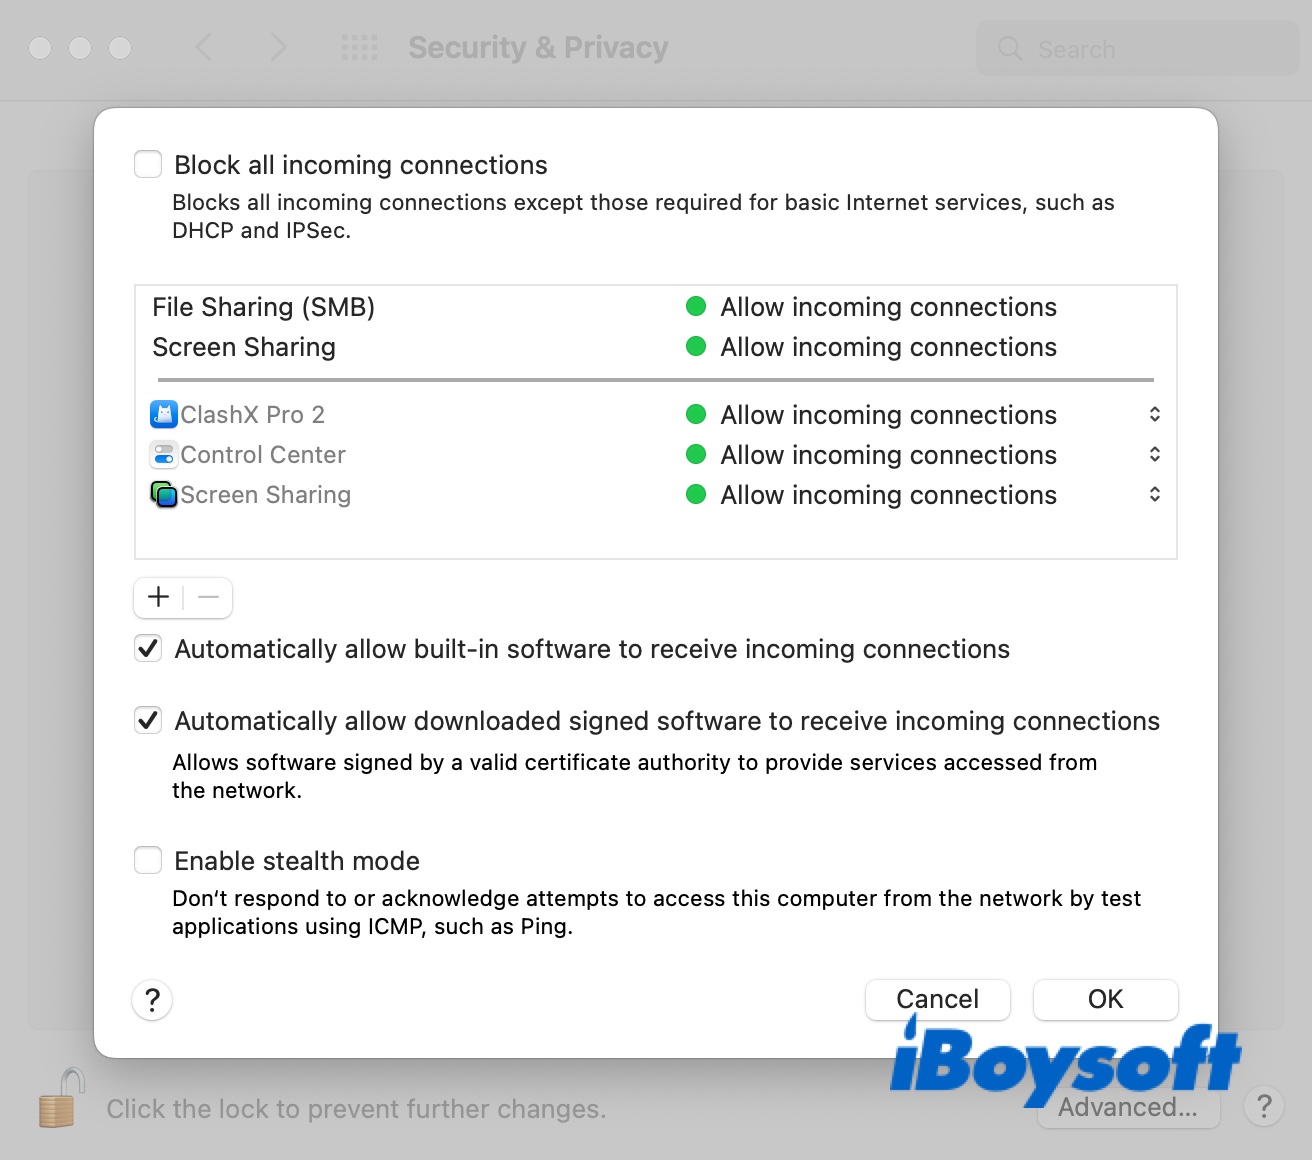
If you have enabled the firewall on Mac or are using third-party firewall software, it will block incoming connections until you change the configuration. Go through the steps below to stop Mac firewall blocking screen sharing.
Fix Mac screen sharing not working on M1 Mac:
- Open System Preferences > Security & Privacy.
- Select the Firewall tab.
- Click the lock and enter your password.
- Select Firewall Options.
- Deselect "Block all incoming connections."
- Ensure the "Screen Sharing" box is set to "Allow incoming connections."
- Open Finder > Go > Go to Folder.
- Input /System/Library/CoreServices/Applications/Screen Sharing.app and hit Enter.
- Move the Screen Sharing app to the Dock.
- Click the (+) icon to select the Screen Sharing app and click Add.
- Click OK to save changes.
- Open the Screen Sharing app on your Dock and enter the host.local name to connect.
If your Mac's firewall is configured to allow incoming connections already, you should turn off the firewall and retry screen sharing. If you still can't share the screen on Mac, move on to the next fix.
Disable Remote Management
Besides Screen Sharing, Remote Management also allows you to access your Mac from other devices. Nevertheless, you can't run them simultaneously as Remote Management controls the Screen Sharing service.
On newer macOS like Sonoma, you can only select either one of them at a time. But if you are running an older macOS, you should check and ensure that Remote Management is unchecked.
Kill NetAuthAgent or NetAuthSysAgent
Your Mac must authenticate itself to connect to the remote Mac, which may activate a process called NetAuthAgent or NetAuthSysAgent. When this process becomes unresponsive, you will likely experience Mac screen sharing not working.
In which case, you need to force quit the process. Note that even if the process isn't listed as not responding, you can also give it a try.
- Open Activity Monitor by opening Finder > Applications > Utilities.
- Search for the NetAuthAgent or NetAuthSysAgent process.
- Select it and click the (✕) sign at the top.
- Click "Force Quit".
Restart your Mac
Many users managed to resolve the issue by rebooting their Macs, which clears corrupted caches or minor glitches. Chances are that these are also the reasons why screen sharing doesn't work on your Mac. You're recommended to save changes made to the running apps and close them before rebooting your Mac.
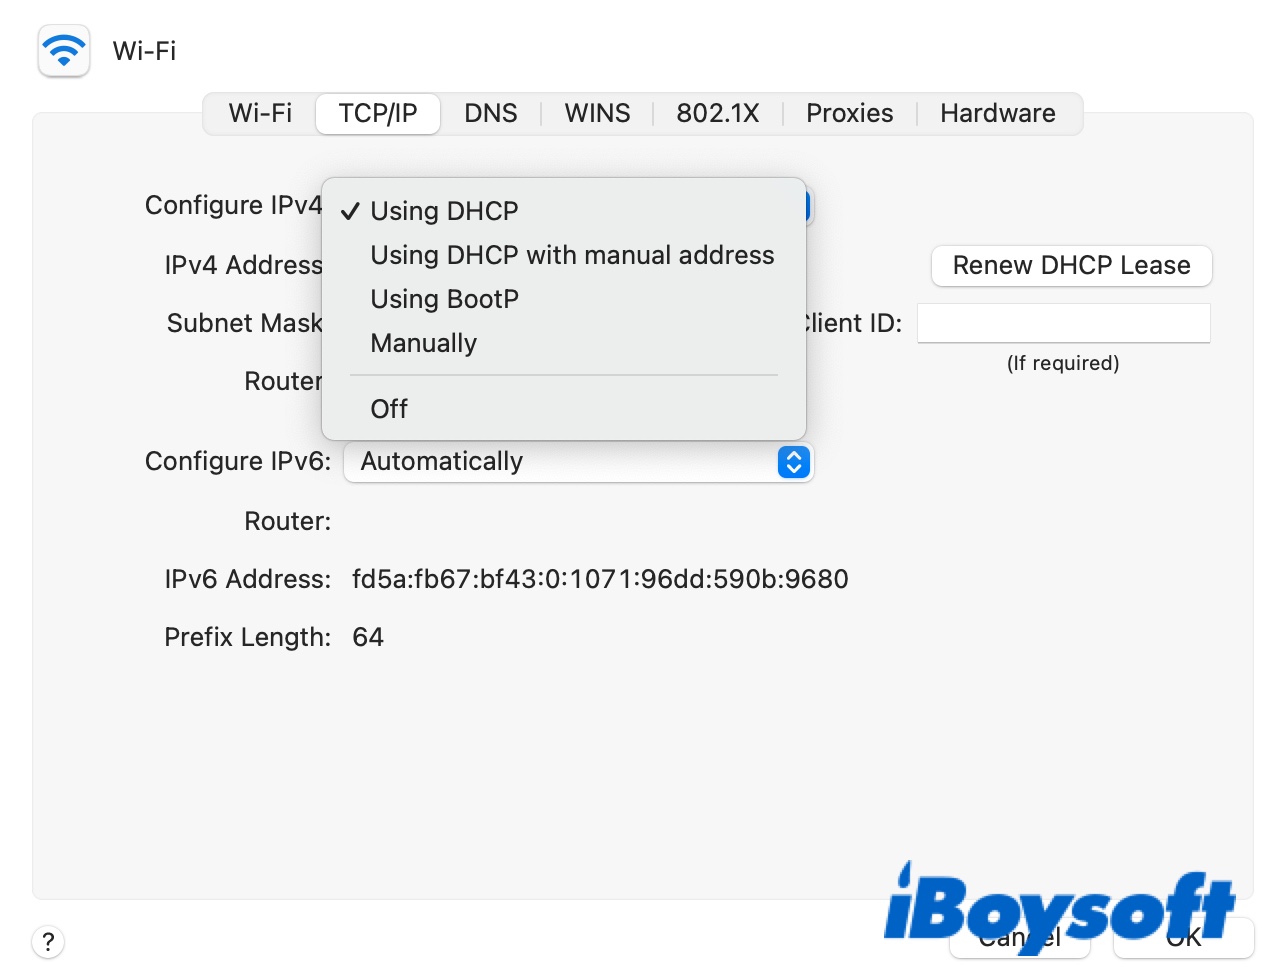
Switch to 'Using DHCP'
If you keep receiving the Mac screen sharing connection failed error, you need to check your Mac's network preferences and configure IPv4 to "Using DHCP" if not already, with these steps:
- Open System Preferences > Network.
- Click WiFi > Advanced.
- Select the TCP/IP tab.
- Choose "Using DHCP" on the box next to "Configure IPv4".
Share screen via Messages
If screen sharing doesn't work on a Mac, no matter what you try, you can use other built-in apps such as Messages to share a Mac's screen with another device by following Apple's guide regarding Messages.
How to fix screen-sharing app issues like Zoom screen sharing not working on Mac?
If you use apps such as Zoom or FaceTime to share your Mac's screen, you may come across issues like Zoom screen sharing not working on Mac, or screen sharing not working on Mac Discord app. Try these quick tips if Monterey/Big Sur screen sharing not working:
- If you are using a video conference app like Zoom, confirm with the host that you can share the screen.
- Close other running apps that may use your camera or microphone.
- Try sharing the screen with the web version of the app.
- Disable VPN or anti-virus software.
- Restart your Mac.
If you still can't share screen on Mac, continue reading other solutions below.
- Grant the app access to Microphone, Camera, Accessibility, and Screen Sharing
- Force quit the app
- Modify firewall settings
- Update the app
- Contact the app developer
Click the button below to share these solutions with your favorite platform!
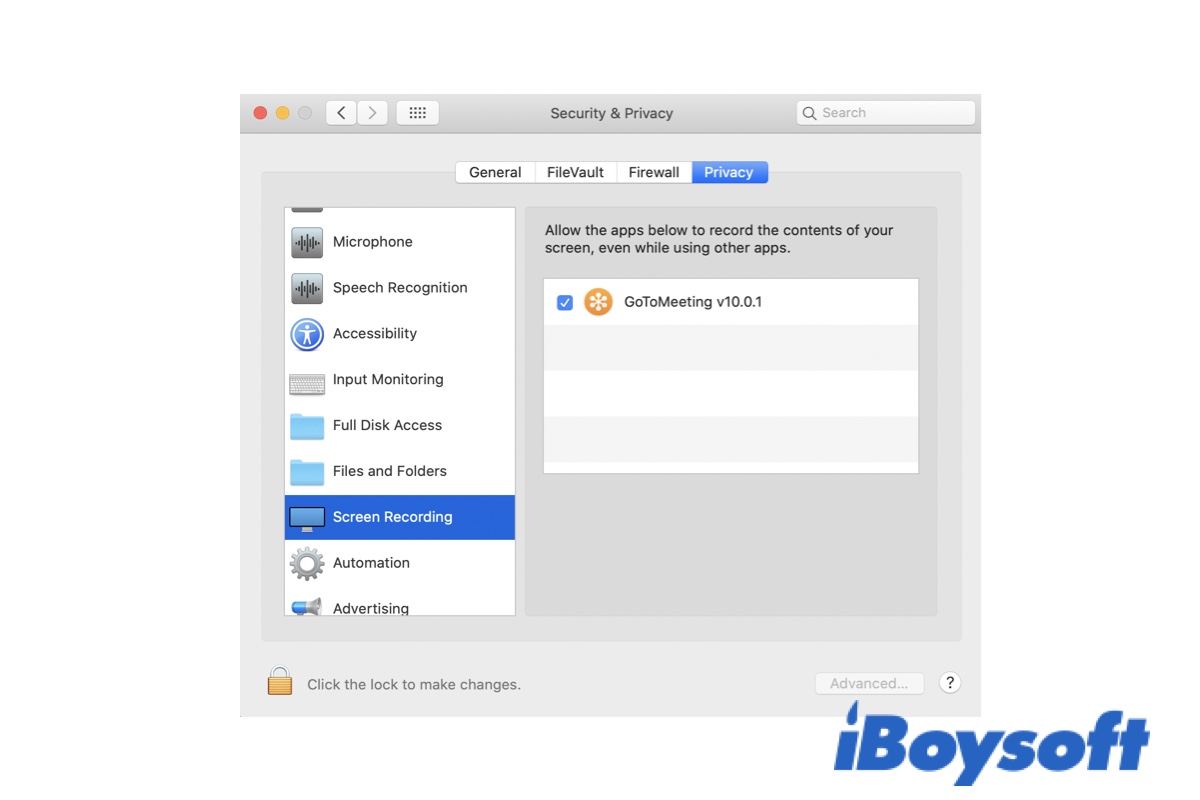
Grant the app access to Microphone, Camera, Accessibility, and Screen Sharing
When the screen-sharing app first attempts to record or share your screen, it pops up a notification asking you to grant permission to use your Mac's microphone, camera, etc. If you deny the permission or ignore the message, Mac won't let you share the screen on Zoom or other apps.
- Open System Preferences > Security & Privacy.
- Click the Privacy tab.
- Tap on the lock icon and enter your password.
- Select Camera from the left sidebar.
- Click the box next to the app used for screen sharing.
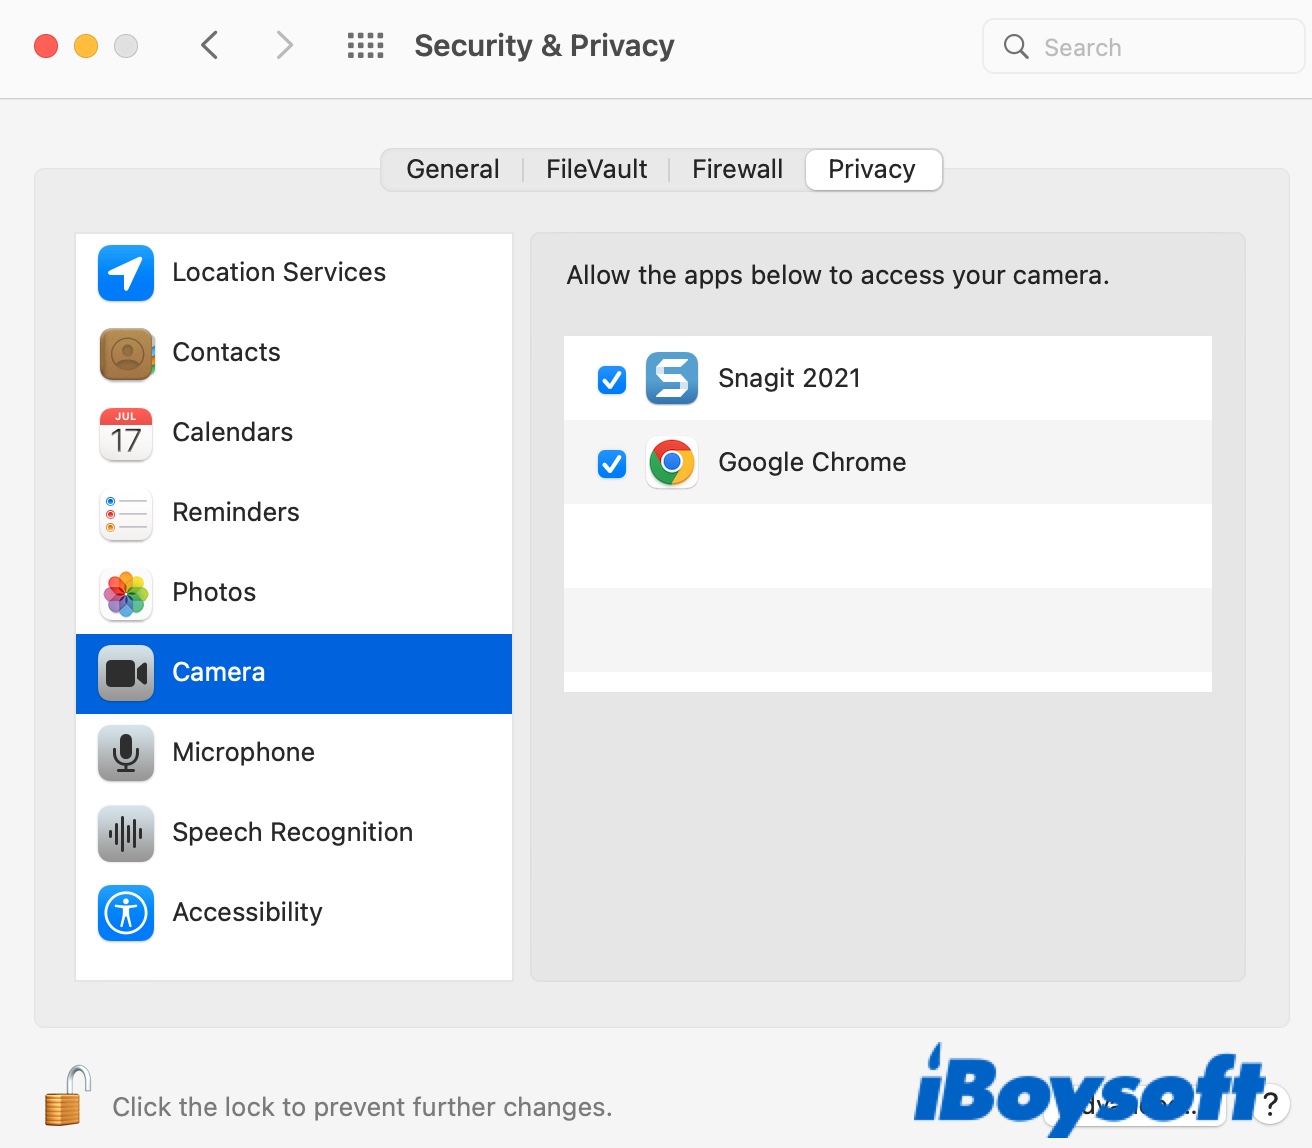
- Click the (+) button to add the app to the list if it's missing.
- Open the Applications folder, select the app, and click Open.
- Repeat these steps with Microphone, Accessibility, Files and Folders, and Screen Recording.
- Quit the app, relaunch it, and then try sharing your Mac's screen again.
Suppose issues like "Zoom screen sharing not working on Mac" persist, proceed to the next solution.
Force quit the app
Force quitting the potentially frozen app and reopening it is another efficient way to fix Mac screen sharing that keeps disconnecting. That way, you can shut down the unresponsive app and restart the processes that stall.
- Press Command + Option + Escape to open the "Force Quit Applications" window.
- Select the affected app and click Force Quit.
- Click Force Quit again.
- Reopen the problematic app.
If you can't share screen on your Mac after force quitting the app, check your Mac's firewall settings.
Modify firewall settings
If you have turned on the firewall on your Mac, you should ensure it allows incoming connections from the screen-sharing app. Otherwise, you may encounter macOS screen sharing not working. Follow these steps:
- Open System Preferences > Security & Privacy.
- Select the Firewall tab.
- Click the lock and enter your password.
- Select Firewall Options.
- Deselect "Block all incoming connections."
- Locate the app you use to share the screen.
- Click the drop-down button and select "Allow incoming connections."
- Tap on the (+) icon to add the affected app to the list if you can't find it.
- Open the Applications folder, select the app, and click Add.
- Click OK to save the firewall permissions.
Hopefully, you can share your Mac's screen successfully by now. If not, keep trying other fixes.
Update the app
Mac won't let you share screen on Zoom or a similar app if the app itself is outdated or buggy. If you haven't updated the app for a while, you can check and install the available app update by visiting the App Store or the developer's official website.
Contact the app developer
If the solutions above don't help, you can seek assistance from the app developer since it may be a bug on their side.
If you find this post helpful, share it with your friends!