I have a Mac mini (2012) and want to run macOS Big Sur. It's unsupported, and I'm worried about data loss. Can I install it on an external USB and use it as the main system? What's the safest way to upgrade? - Reddit
Many users have expressed a desire to upgrade their Mac mini 2012 to macOS Big Sur or even newer versions, but the process isn't straightforward. Read this guide carefully to learn how to do it.
Does the Mac mini 2012 support Big Sur
According to Apple's compatibility list, macOS Big Sur officially supports only Mac mini models from 2014 and later. However, with the help of third-party tools like OpenCore Legacy Patcher, you can unofficially install Big Sur on unsupported devices, including the Mac mini 2012.
This process requires some technical steps, such as creating a bootable installer, applying patches, etc. Please follow the instructions below carefully.
Keep in mind that this method carries certain risks, so it's strongly recommended to back up your data before proceeding.
Click the button below to share this article!
Preparations before updating
Before you update your Mac Mini 2012 to Big Sur, you need to do the following preparations.
A Mac running macOS Big Sur
You should prepare a Mac that already has macOS Big Sur installed (any supported model is fine). This machine will be used to download the official Big Sur installer and run OpenCore Legacy Patcher to create a bootable installer.
A USB flash drive with at least 16GB of storage
Prepare a USB flash drive with at least 16 GB of storage capacity to create a macOS Big Sur bootable installer. For best results, use a USB 3.0 drive from a reliable brand like SanDisk or Kingston to ensure a stable write process and reduce the risk of installation errors.
Back up your Mac mini
Before upgrading, it's crucial to back up your Mac mini completely to avoid data loss in case something goes wrong during the installation. You can use Time Machine, the built-in backup tool in macOS, to easily back up your entire system and personal files for quick restoration if needed.
Make sure your Mac mini 2012 has enough storage
macOS Big Sur requires at least 35GB of free disk space for a successful installation. You can check your available space by going to Apple Menu > About This Mac > Storage.
If you're running low on space, it's highly recommended to use a cleaning tool like iBoysoft DiskGeeker for Mac to free up space on “Macintosh HD”, ensuring the installation process goes smoothly. 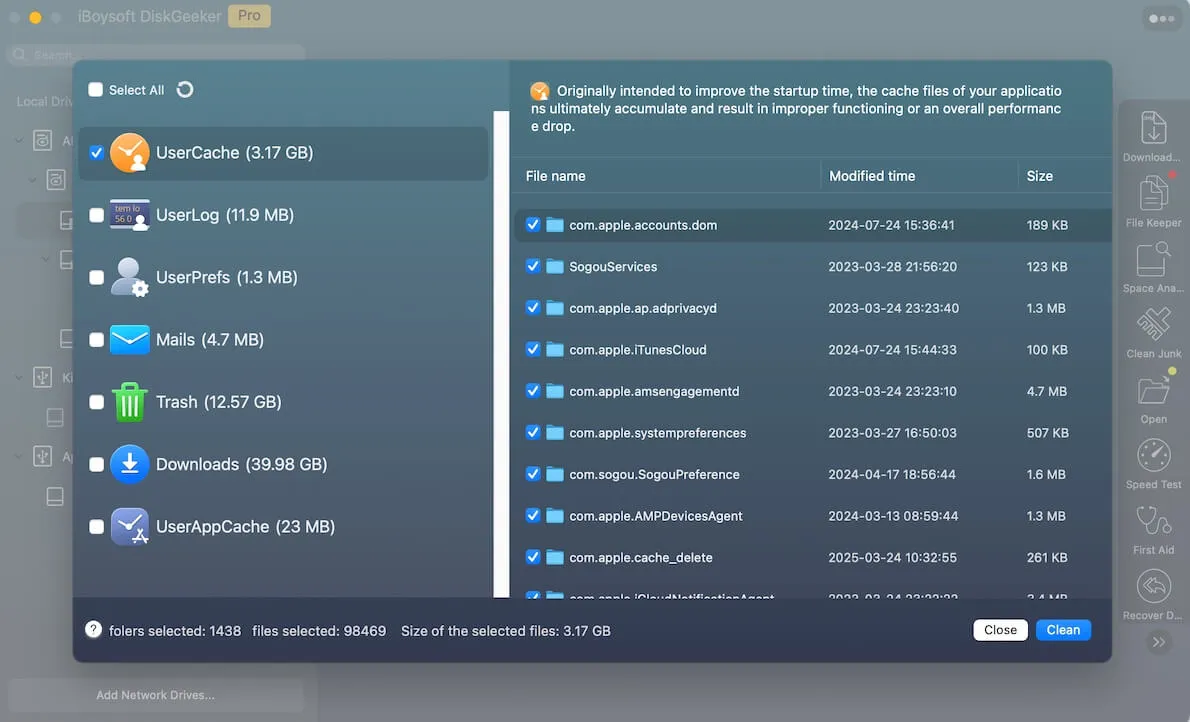
How to update Mac Mini 2012 to Big Sur
The following steps are the critical part of updating your Mac mini 2012 to Big Sur. Please make sure to follow each step carefully. Skipping any step may result in a failed installation.
Step 1. Download the macOS Big Sur Installer
Before creating a bootable USB or applying patches, you first need the full macOS Big Sur installer. The file is large (over 12 GB), so ensure the Mac has a stable internet connection and enough storage space before downloading.
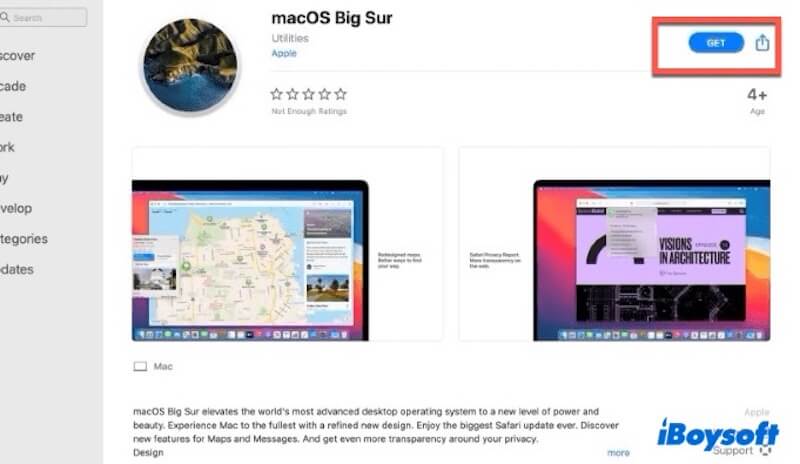
- Open the App Store on a Mac that supports Big Sur (or is already running it). In the search bar, type “macOS Big Sur”, then click “Get” to start the download.
- Once the download is complete, the installer will be saved automatically in your Applications folder as Install macOS Big Sur.app.
You don't need to install it on this Mac, so just ensure the file stays in the Applications folder. It will be used later when creating the bootable USB installer.
Step2. Create the macOS Big Sur Bootable USB
After downloading the Big Sur installer, the next step is to create a bootable USB installer to use for installing macOS on your Mac Mini 2012.
- Insert the USB drive into your Mac. (Make sure to back up any important data on the drive beforehand, as the bootable installer creation process will erase all existing data on the USB.)
- Open Disk Utility (Applications > Utilities > Disk Utility), and select your USB device from the list on the left.
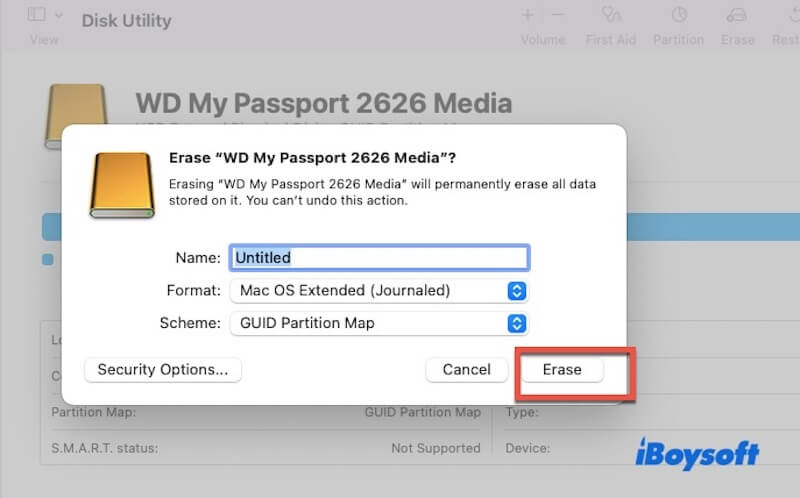
- Click the Erase button at the top. Select Mac OS Extended (Journaled) as the Format section, GUID Partition Map as the Scheme section. Then click Erase to begin formatting the drive.
- Open Terminal, then type the following command and press Enter to begin creating the bootable installer: sudo /Applications/Install\ macOS\ Big\ Sur.app/Contents/Resources/createinstallmedia --volume /Volumes/YourUSBName Be sure to replace YourUSBName with the actual name of your USB flash drive.
Follow the on-screen prompts to complete the process. Creating the installer may take several minutes. Please be patient and do not remove the USB drive during this time. Once the terminal displays “Done.”, your bootable installer has been successfully created.
Step3. Install OpenCore Legacy Patcher
Even if you've created a macOS Big Sur bootable installer, attempting to boot it directly on a 2012 Mac often results in issues such as black screens, boot failure, or kernel panics.
That's why you need to install OpenCore Legacy Patcher. This tool patches the macOS boot process, allowing unsupported older Macs to run newer versions of macOS.
- Click here to download OpenCore Legacy Patcher on the Mac running macOS Big Sur. Extract the downloaded file and drag the application to the Applications folder.
- Open the OpenCore Legacy Patcher app. If you see a security warning, right-click the icon and select Open to bypass macOS's Gatekeeper.
- On the main screen, click “Build and Install OpenCore.” The program will automatically detect your Mac model and start generating the appropriate OpenCore boot configuration.
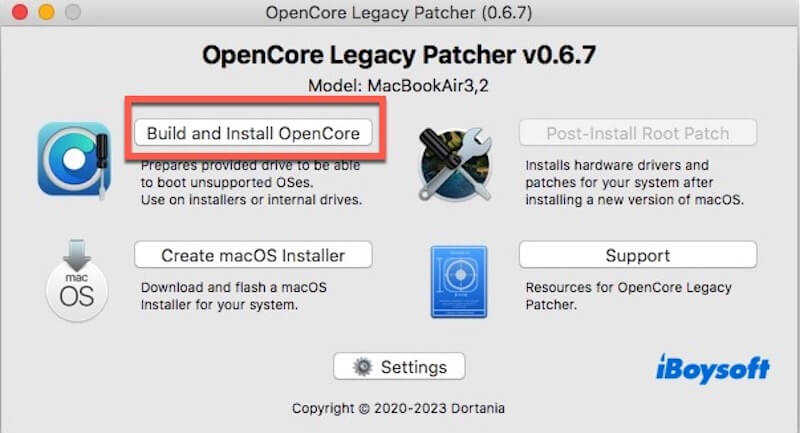
- Click “Build OpenCore” to begin the build process. Wait a few seconds until it completes and shows a confirmation message.
- Click “Install OpenCore,” then select the USB drive that you previously formatted and turned into a macOS Big Sur boot installer. Be sure to choose the one with an EFI partition (usually auto-detected and highlighted).
- Follow the on-screen instructions to complete the installation.
- Once OpenCore is successfully installed, quit the application and eject the USB drive.
Now, you have a bootable USB installer that includes both the macOS Big Sur installer and OpenCore boot patch support. You can proceed by inserting this drive into your Mac mini 2012 and beginning the Big Sur installation process.
Share this part to help more people know how to install OpenCore Legacy Patcher!
Step 4. Install and boot macOS Big Sur on the Mac mini 2012
- Insert the prepared USB boot drive into a USB port on the Mac mini 2012.
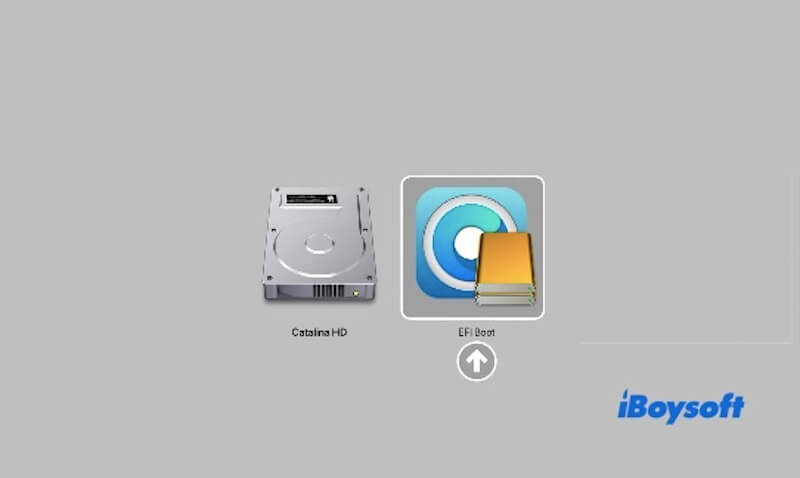
- Press the power button to start the Mac mini, and immediately press and hold the Option (⌥) key until the Startup Manager screen appears.
- Use the arrow keys to select “EFI Boot”, then press Enter to launch OpenCore.
- In the OpenCore menu, select “Install macOS Big Sur” and press Enter. (The system will boot from the USB and enter the Big Sur installer; this may take a few minutes.)
- Click Utilities in the top menu bar, then select Disk Utility. On the left sidebar, select your internal hard drive (usually named Macintosh HD).
- Click Erase, set the name to Macintosh HD, format to APFS, and scheme to GUID Partition Map. Then click Erase to confirm.
This will erase all data on the disk. Please make sure you have completed a full backup in advance.
After erasing, close Disk Utility to return to the main installer window.
- Select Install macOS Big Sur and click Continue.
- Follow the on-screen instructions to select the recently formatted Macintosh HD as the installation destination.
- During installation, the Mac will restart multiple times. After each restart, you need to boot again from EFI Boot (OpenCore) by holding Option (⌥) until the boot menu appears, and until the installation completes.
After installation, you will enter the desktop environment, but the Mac still depends on the USB to boot OpenCore. To enable booting without the USB, you need to install OpenCore onto the internal hard drive's EFI partition.
Please follow the steps below (to be done on the Mac mini):
- Reinsert the prepared USB boot drive (if you removed it previously).
- Open the OpenCore Legacy Patcher application from the USB drive, then click Build and Install OpenCore on the main interface.
- Click Build OpenCore to rebuild the boot files. When done, click Install OpenCore.
- In the pop-up disk selection window, select the EFI partition of the internal hard drive where macOS Big Sur is installed (the system usually detects and highlights it automatically).
- Follow the prompts to complete the installation. When finished, you will see a message indicating OpenCore has been successfully written to the EFI partition.
- Exit OpenCore Legacy Patcher, then eject and remove the USB boot drive.
After that, restart the Mac mini, and hold Option (⌥) during startup until the boot disk selector appears. This time, select EFI Boot from the internal hard drive. If everything is correct, the Mac mini will boot directly into macOS Big Sur.
After confirming that the Mac mini can boot successfully from the internal drive, you can delete the OpenCore Legacy Patcher app from the USB boot drive or format the USB drive. You will no longer rely on the USB to boot the Mac mini.
Share this article with more people!