I've noticed that some users are struggling to create a bootable installer for macOS Sequoia on Windows because the instructions from Apple Support are geared toward Macs.
With only a Windows PC available, they need to get this bootable installer from Windows to start their Mac, which doesn't boot up normally after upgrading to macOS Sequoia or sometimes after running it.
If you're facing the same issue, you can learn how to make a macOS Sequoia bootable USB from Windows 11/10/8/7 in this guide. (To get the latest macOS Tahoe, you can make a macOS Tahoe bootable USB from Windows.)
Tips: The guaranteed method to create a macOS Sequoia bootable USB installer from Windows is by using iBoysoft DiskGeeker for Windows. It contains the macOS Sequoia DMG file and enables you to make a macOS Sequoia bootable USB installer from Windows efficiently. With it, you don't need to download macOS Sequoia elsewhere and worry about the file's authenticity and safety.
Follow the steps below to create the macOS Sequoia bootable USB installer:
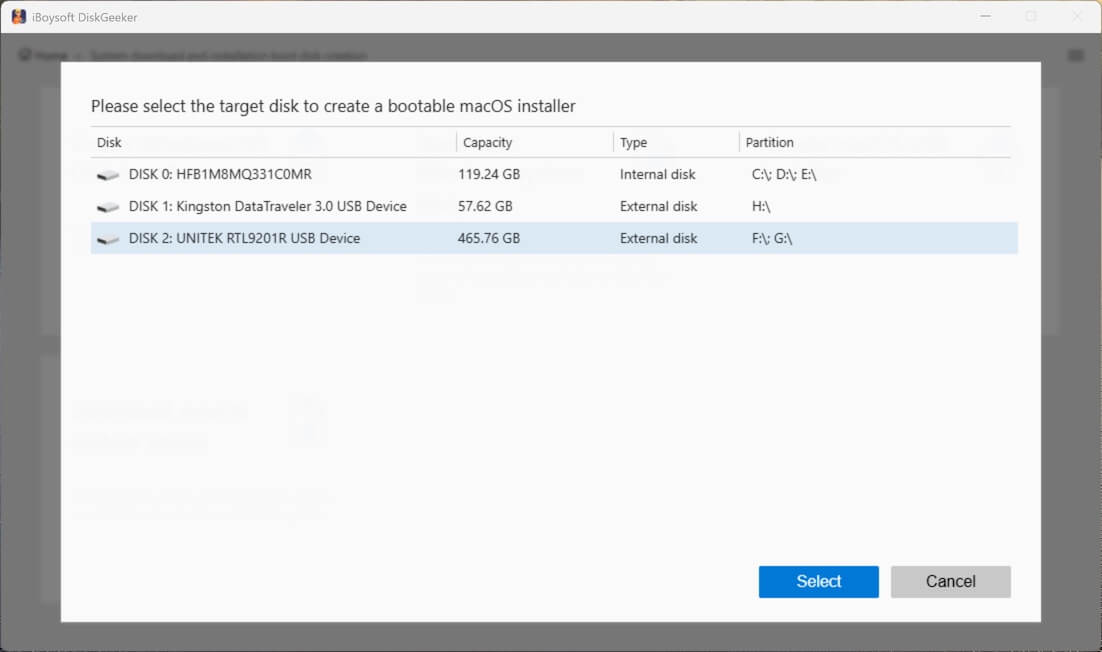
Step 1: Free download, install, and open iBoysoft DiskGeeker for Windows.
Step 2: Click Download and create boot disk > Create macOS USB Boot Disk.
e
Step 3: Choose your external drive and click Select.
Step 4: Select macOS Sequoia and click Create boot disk.
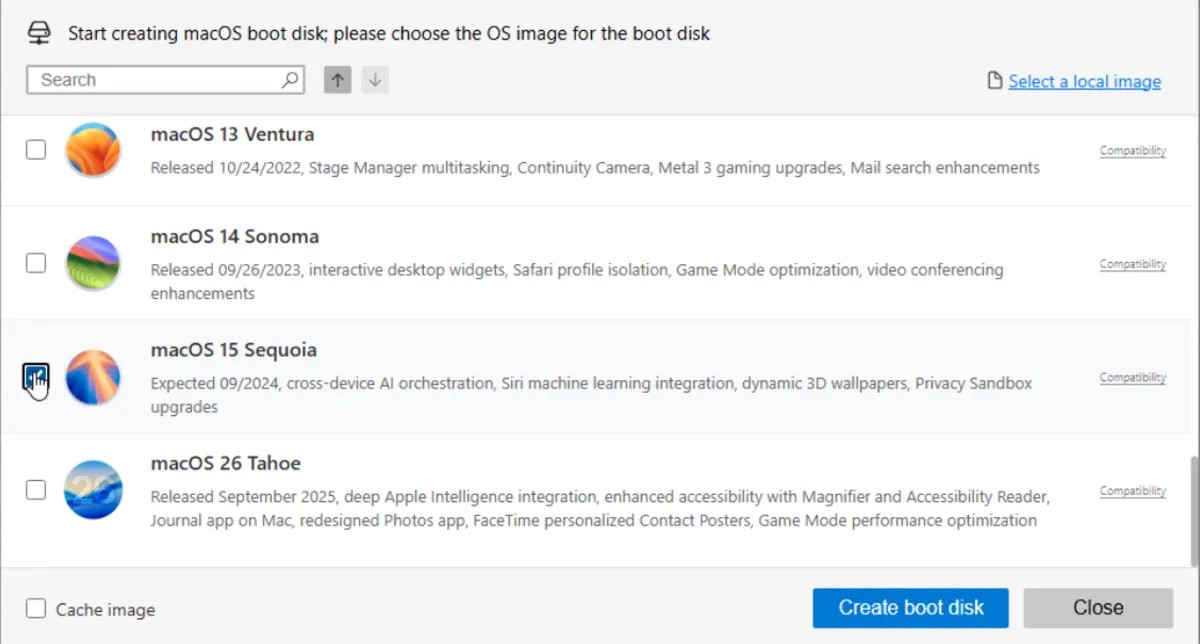
Step 5: The tool will start to download macOS Sequoia.
Step 6: After macOS Sequoia is downloaded, it will automatically start creating the macOS Sequoia bootable USB on Windows.
Notice: This versatile tool can not only make a bootable USB for macOS Sequoia on Windows but also analyze your internal hard drive, providing an overview of your disk usage and a quick way to delete large, unnecessary files. Use it to clean your Windows PC to make more room.
If you don't mind spending more time creating the macOS boot drive on Windows or the possibility that the created drive won't work, you can also follow the steps below.
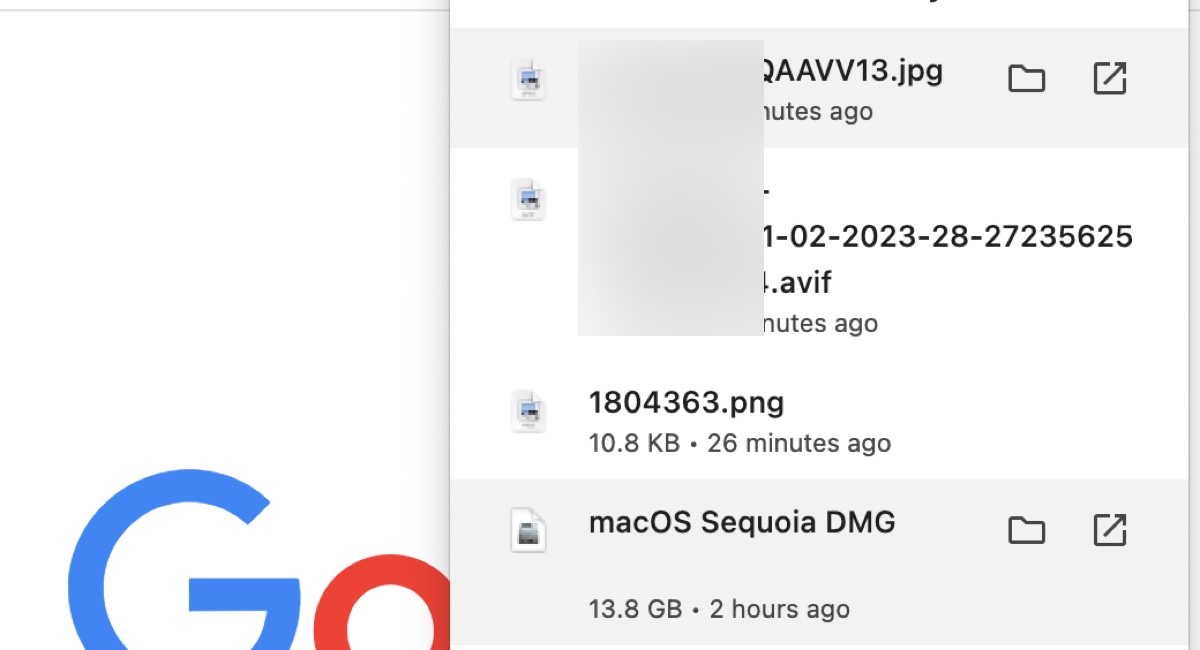
Step 1: Download macOS Sequoia DMG file
To make a macOS Sequoia bootable USB from Windows, the first thing you need is the macOS Sequoia DMG file, which is a disk image that contains the full installer of macOS Sequoia. This DMG file is around 14 GB, so it'll likely take a while to download. You can initiate the download the night before to reduce your waiting time.
Step 2: Create macOS Sequoia bootable USB on Windows
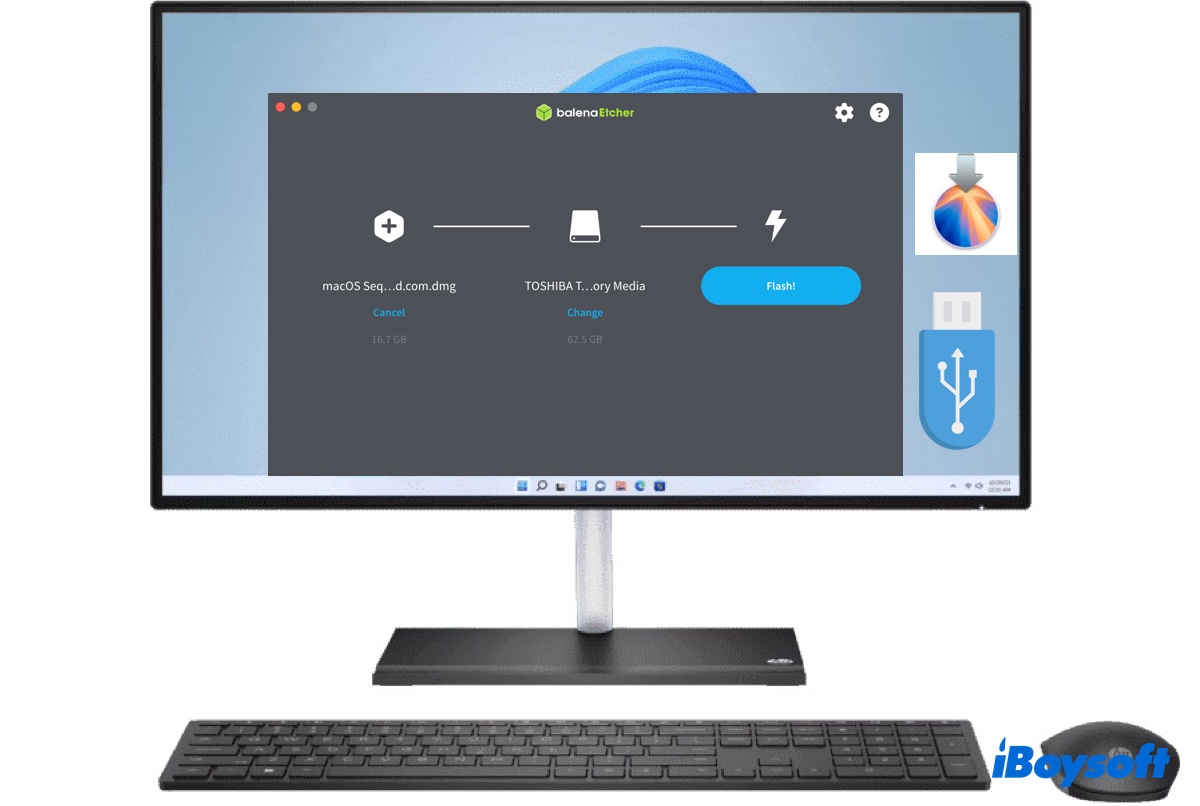
After the macOS Sequoia DMG installer is downloaded, you can flash it to a 16 GB or larger USB stick or flash drive via balenaEtcher to make a bootable installer for macOS Sequoia. Ensure your USB drive is backed up before proceeding, as the process will erase all data on this drive.
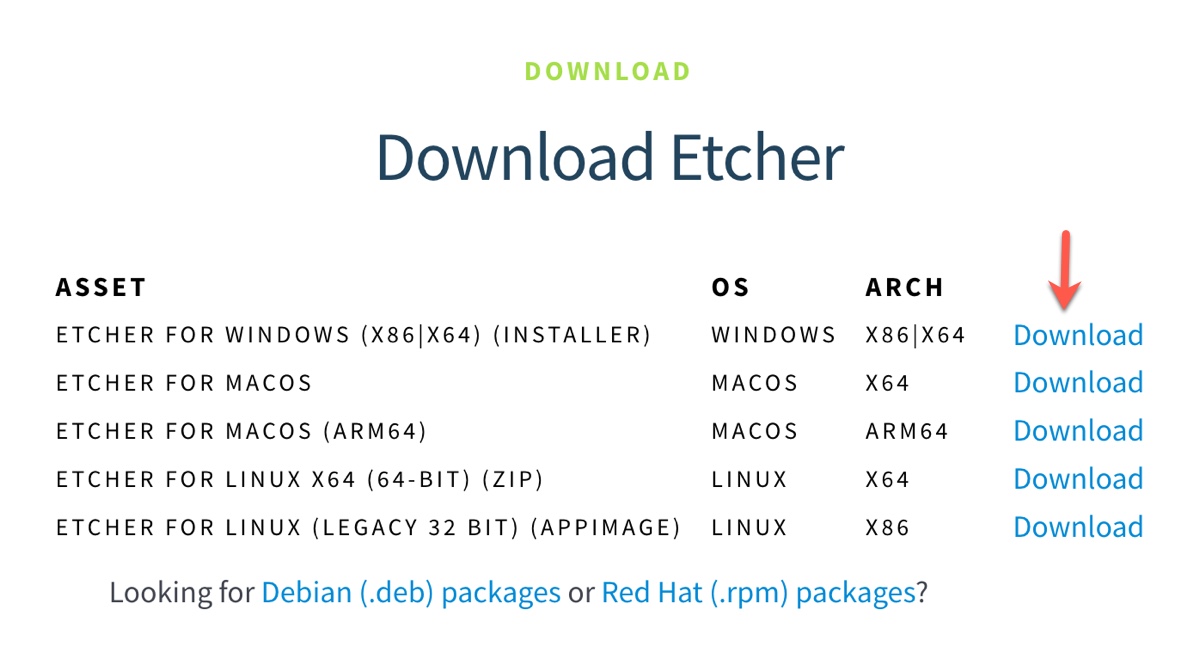
- Download balenaEtcher. Look at the Windows version and click Download.
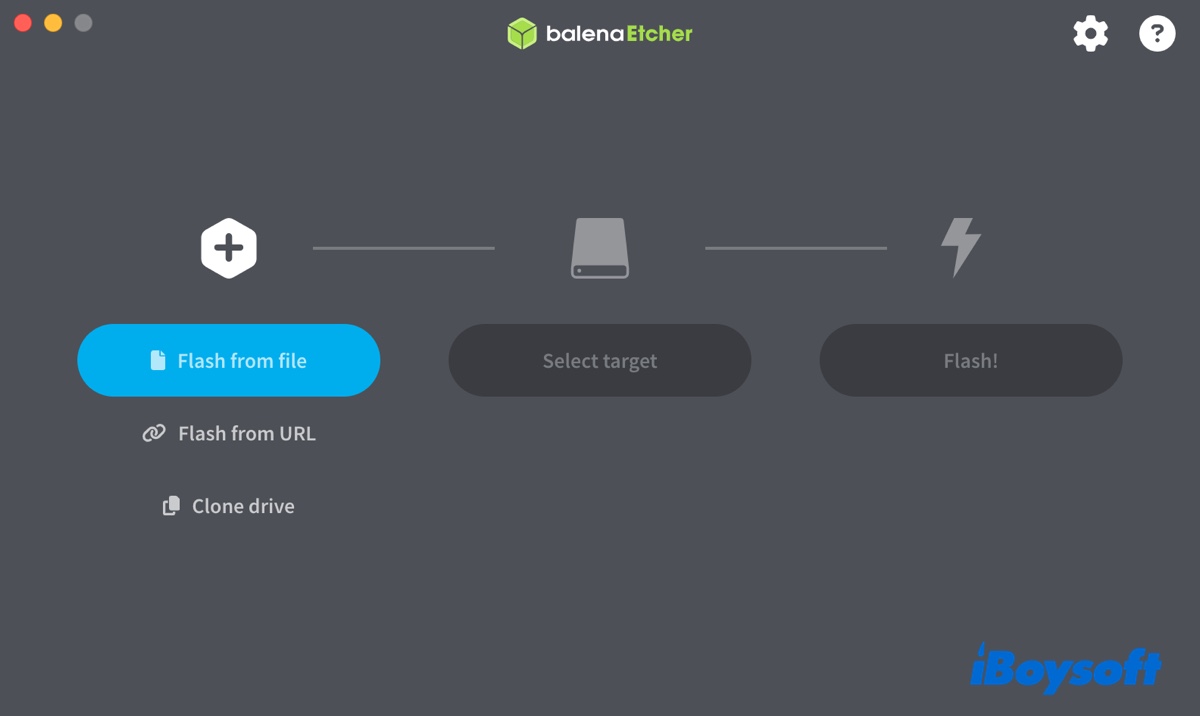
- Open the downloaded file to install and run balenaEtcher.
- Tap Flash from file and select the macOS Sequoia DMG file.
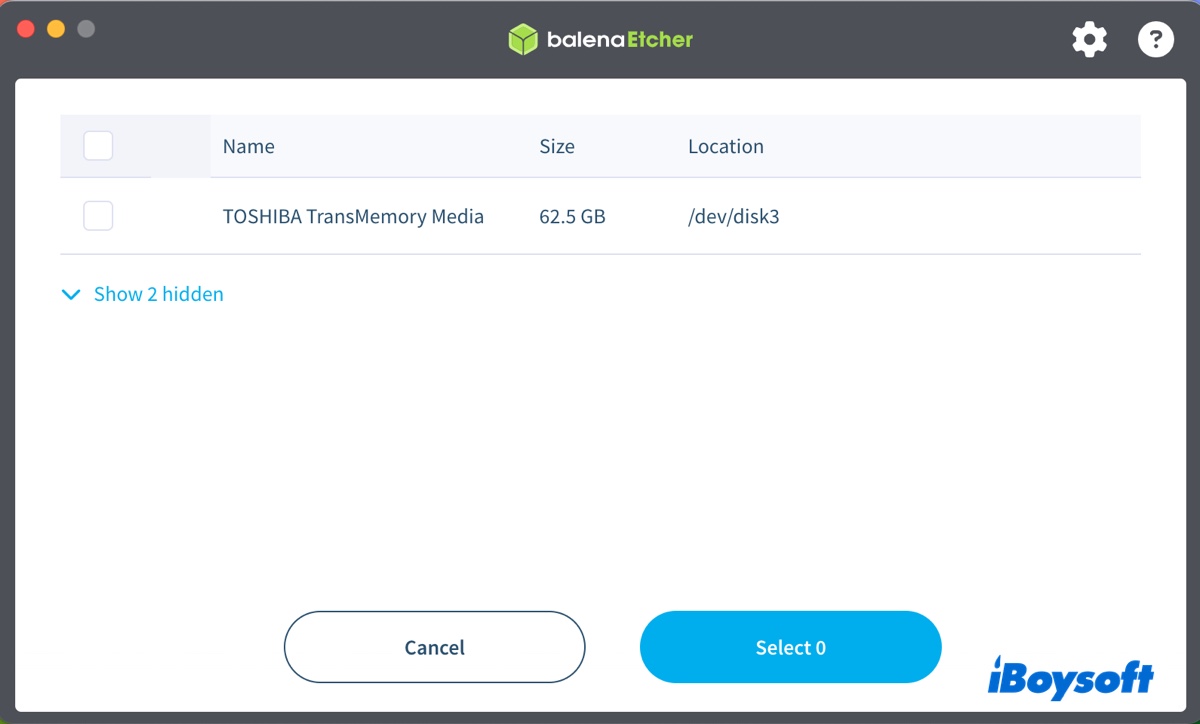
- Plug the USB drive into your computer.
- Then click Select Target and choose your USB drive.
- Tap Flash.
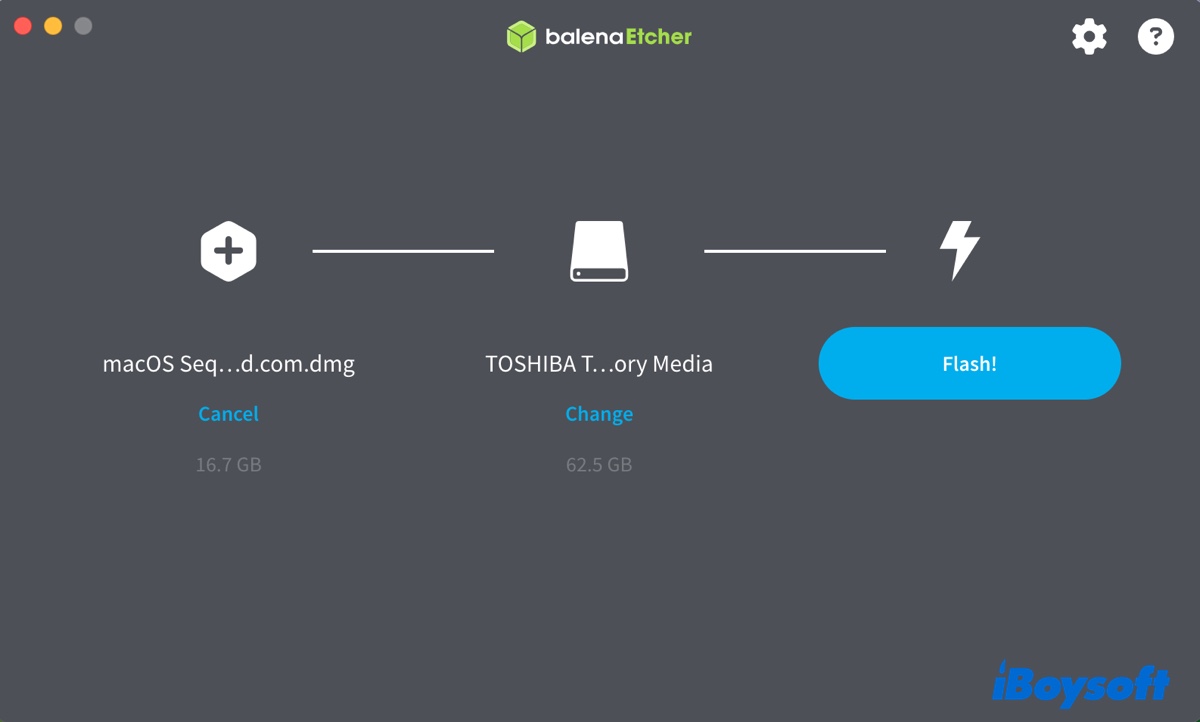
- Wait while the software is creating the bootable installer.
Share with others the methods to make macOS Sequoia bootable USB from Windows!
Boot Mac from macOS Sequoia bootable USB installer
When balenaEtcher has completed flashing the USB device, you can safely eject it and then plug it into your Mac to perform an install or another intended task. Here's how to boot from the bootable media created from Windows on your Mac:
For an Intel-based Mac:
- Turn off your Mac.
- Press the power button, then immediately press and hold the Option key.
- Release the key when you see the startup volumes.
- Choose the volume that contains the Sequoia installer and click the On-screen arrow.
- In the "macOS Utilities" window, tap "Install macOS Sequoia" and follow the instructions.
For an Apple Silicon Mac:
- Power on your Mac and continue to hold the power button until the startup options appear.
- Choose the volume containing the bootable installer for macOS Sequoia and click Continue.
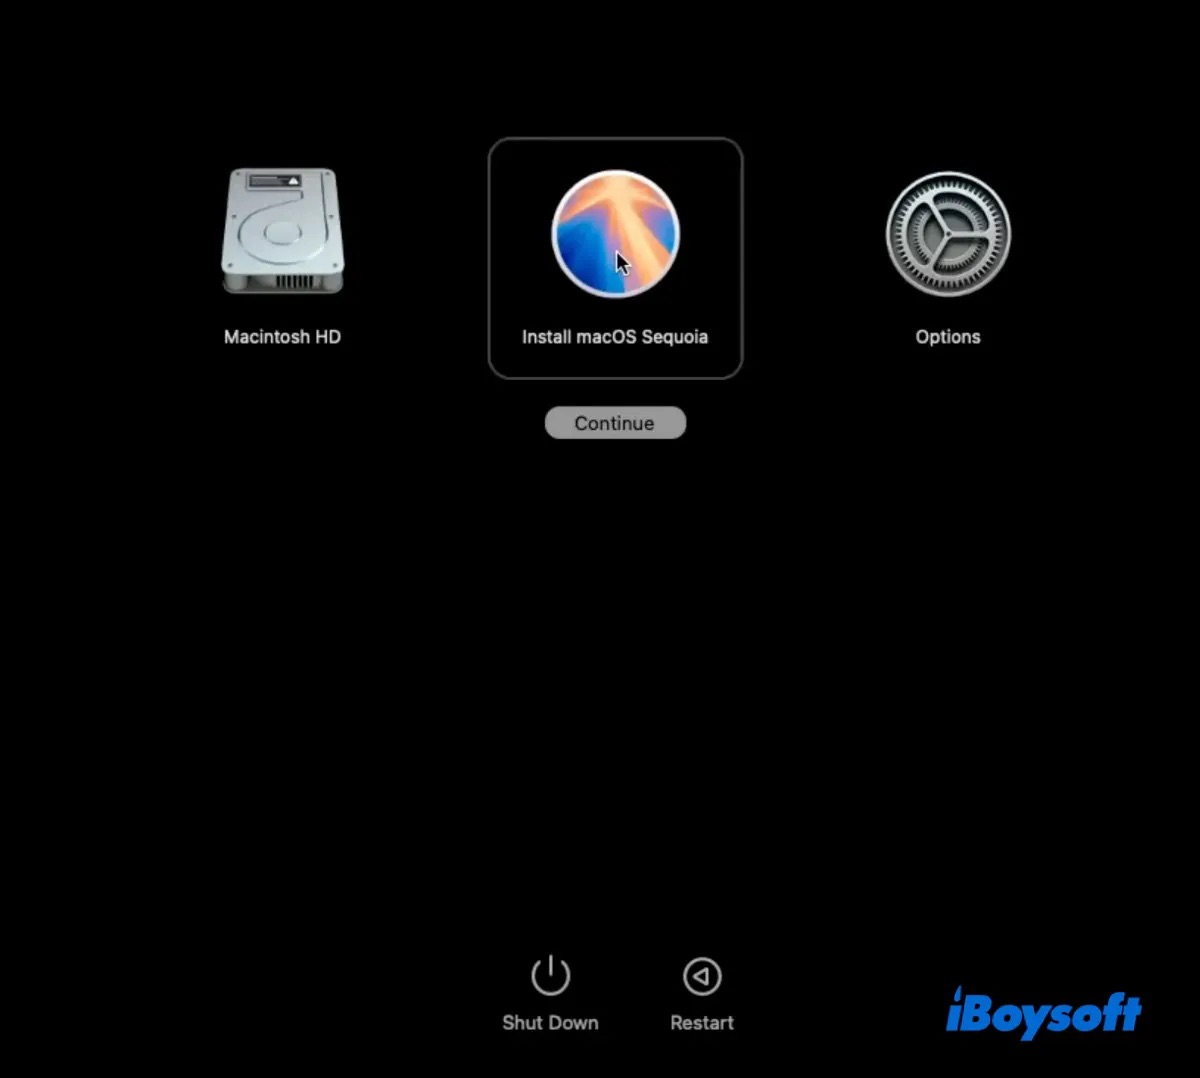
- In the "macOS Utilities" window, select "Install macOS Sequoia" and follow the instructions.
Please share this guide to help others create a macOS Sequoia bootable USB from Windows 11/10/8/7.