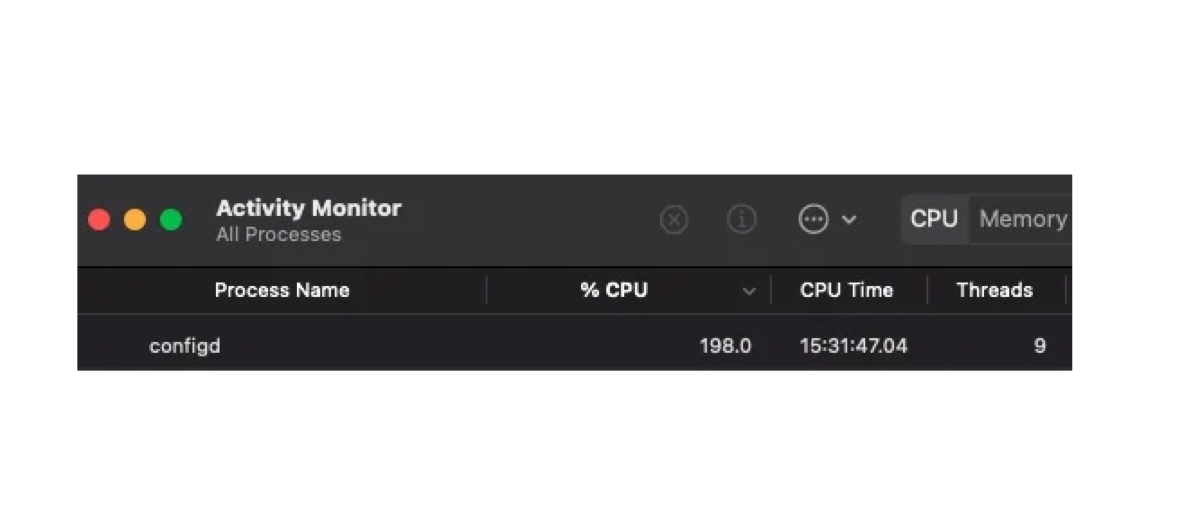
Configd isn't a demanding process, but it can act up and take 100% or more CPU usage on your Mac. This issue is especially common on older MacBooks with replaced batteries. If configd continues to exploit your Mac's CPU or memory resources, resolve it with the solutions in this guide.
What is the configd process in Mac?
The configd process in macOS is a system daemon responsible for managing various network configurations and settings. It plays a crucial role in handling dynamic network changes, such as IP address assignments, DNS configurations, and other network-related tasks.
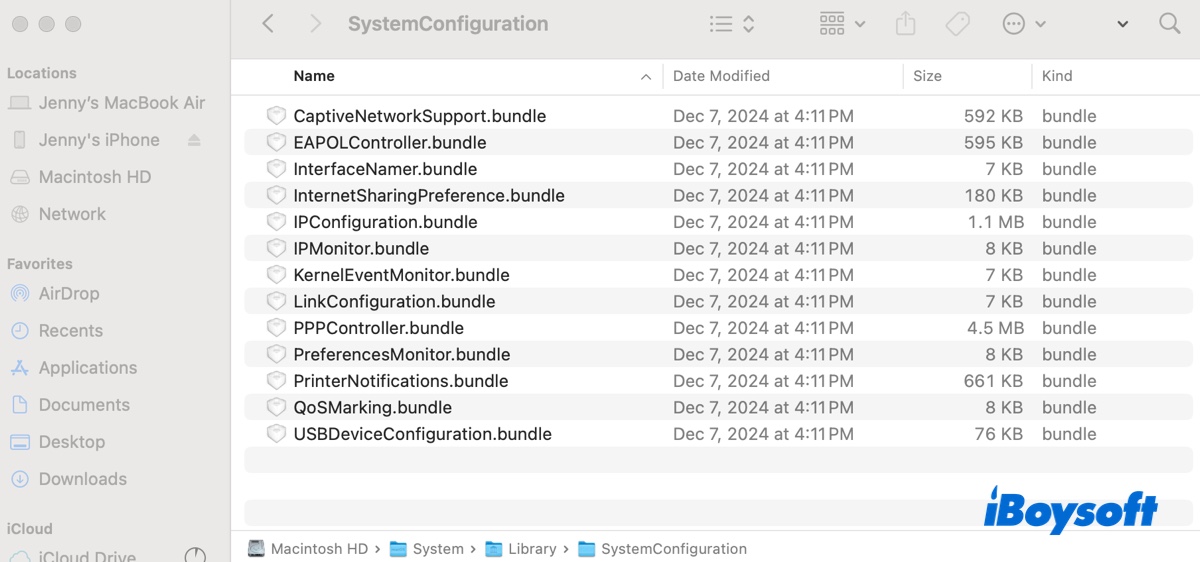
Besides, it also monitors things like printers and user preferences. You can check its app bundles at /System/Library/SystemConfiguration.
What does configd do on a Mac?
Basically, when there are changes in the system, configd is usually the first to notice and send notifications to other applications. Here's a list of examples that illustrate the various roles of configd on a Mac:
- If an application relies on an internet connection, configd is what informs the application when your Mac goes offline or reconnects to the internet.
- When you try to print a document, configd lets applications know whether the printer is connected, available, or experiencing issues.
- When your Mac obtains a new IP address (e.g., via DHCP), configd updates the system and notifies applications that rely on network connectivity.
- If you connect to or disconnect from a VPN, configd manages the network configuration changes and informs applications about the new network state.
Share the information to help others understand configd on Mac!
How to fix configd high CPU usage on Mac?
If configd keeps causing CPU or memory spikes on your Mac, try the following solutions.
Fix 1: Reboot your Mac
Let's start with the basic troubleshooting tip: rebooting the Mac. This can close all applications, clear corrupted caches and RAM, and refresh the system. Simply go to the Apple menu and click Restart to reboot macOS.
Fix 2: Turn off VPN
If you're currently running your Mac through a VPN service, such as Mullvad VPN, turning it off will likely stop configd from using too much CPU. According to some users, when they disconnect from the VPN and close the application, configd returns to normal.
Fix 3: Relaunch configd
One reason for configd using a high CPU on Mac is that it's stuck on a certain task. To break it out, you can relaunch configd using the killall command. Here's how:
- Open Terminal.
- Type the command below and hit Enter.sudo killall configd
- Input your administrator password and hit Enter.
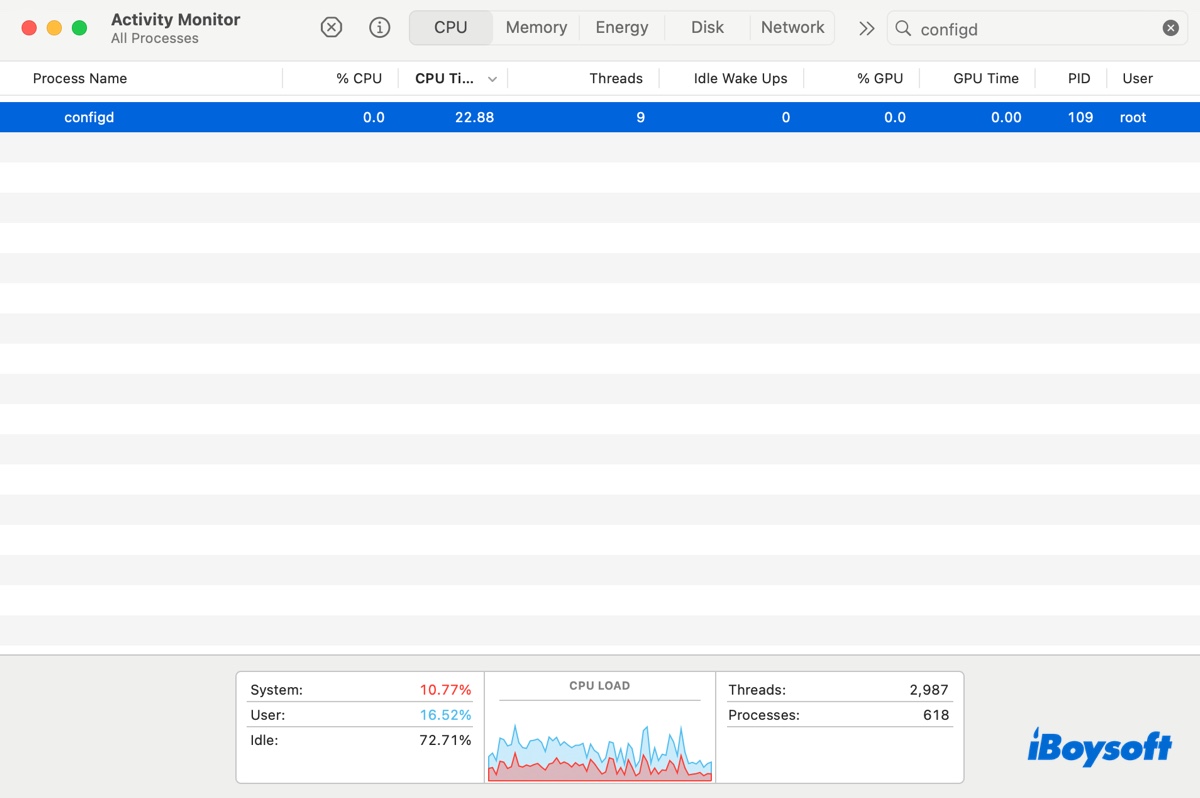
The configd process will disappear from Activity Monitor and relaunch instantly. If lucky, you'll find it consuming less than 1% of CPU, as on my MacBook Air.
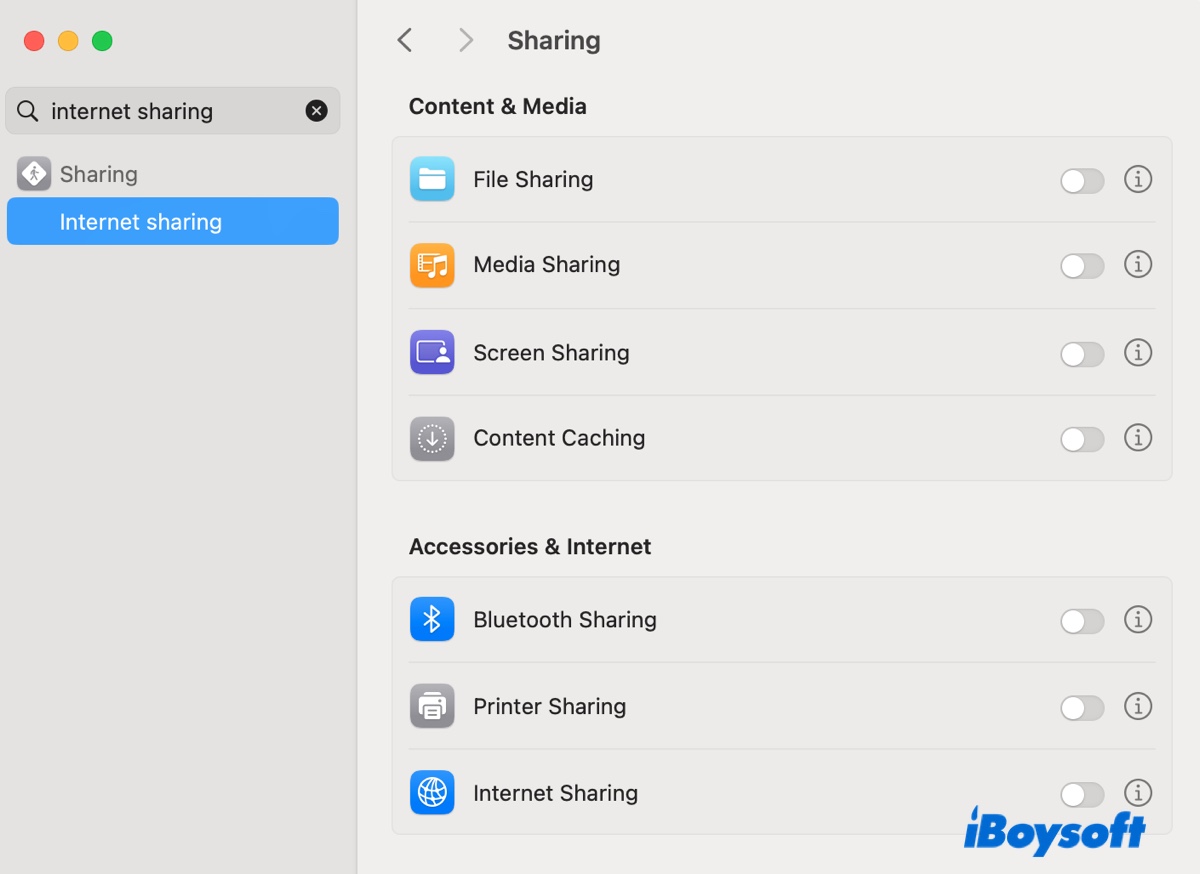
Fix 4: Disable internet sharing
If the feature Internet Sharing is turned on, try disabling it on your Mac. You can search it in System Preferences or System Settings if your Mac is on macOS Ventura or later. We've heard several users resolve the issue after turning off Internet Sharing.
Fix 5: Add a new user account
You can also create a new user account with administrative privileges to fix configd high CPU load. According to users, after they create a second account, the main account no longer has issues.
Fix 6: Disable firmware throttling
If configd only takes an abnormally high CPU when running on battery, especially a replaced one on a Mac that uses OpenCore Legacy Patcher (OCLP), you need to disable firmware throttling.
Follow the official guide to install macOS via OCLP and enable the "Disable Firmware Throttling" feature before building and installing OpenCore.
Share this post if it's useful!