If you've ever tried to copy files to an NTFS-formatted external drive on your Mac, you might have noticed something frustrating—your Mac lets you read files from the drive but won't let you write to it by default. This is because macOS has limited native support for NTFS, the default file system for Windows.
But don't worry! There are several ways to enable full read-and-write access to NTFS drives on your Mac. In this guide, we'll cover the best methods, from built-in Terminal commands to third-party apps.
Tips: If your Mac is running macOS Tahoe, read and write to NTFS drives with NTFS for macOS Tahoe!
Can a Mac write to an NTFS external hard drive?
NTFS (New Technology File System) is a proprietary file system developed by Microsoft. While macOS can read NTFS drives out of the box, Apple doesn't enable write support by default due to potential stability and compatibility risks.
To write to an NTFS external drive, you need an NTFS for Mac tool. (Explore free NTFS for Mac)
How to make your NTFS external hard drive writable on Mac?
Method 1: Use an external software to read/write to NTFS drive on Mac (Recommended)
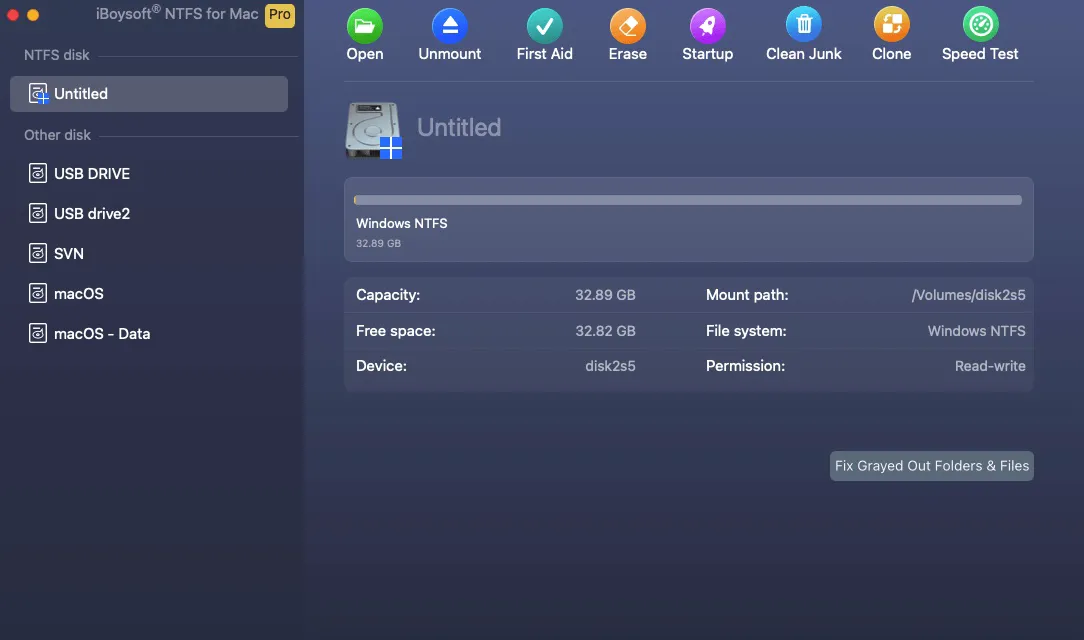
For a permanent and hassle-free solution, a dedicated NTFS driver is the best choice. iBoysoft NTFS for Mac is the best external software to make your NTFS external hard drive writable on Mac. It not only grants read/write support for NTFS drives on Mac, but also allows you to mount, unmount, repair, or format NTFS on Mac.
Follow these steps to read/write to NTFS external hard drive on Mac without formatting:
- Free download, install, and open iBoysoft NTFS for Mac.
- Select the NTFS drive from the left side and click Open.

- Copy, delete, edit, and rename the NTFS external drive on Mac freely.
Find the NTFS for Mac tool useful? Share it to help others fix read-only NTFS drives on Mac!
Method 2: Enable Native NTFS Writing via Terminal (Free)
macOS actually has hidden NTFS writing support, and it's not enabled by default. When you can't copy files from a Mac to an external drive, you can use Terminal to activate it NTFS-support:
Tips: This experimental NTFS writing support has been cancelled since macOS Ventura.
- Open Terminal. (Press Command + Space, type Terminal, and hit Enter.)
- Connect your NTFS drive. (Plug in your external hard drive (make sure it shows up in Finder).)
- Find your drive's name.
- Edit the system file.
sudo nano /etc/fstab - Enter your Mac password (no characters will show—just type and press Enter).
- Add the following line to the file.
Paste the following (change DRIVE_NAME to your drive's name):
LABEL=DRIVE_NAME none ntfs rw,auto,nobrowse Example: If your drive is called Backup, write: LABEL=Backup none ntfs rw,auto,nobrowse - Press Ctrl + O to save, then Enter.
- Press Ctrl + X to exit.
- Reconnect the drive.
- Open Finder > Go > Go to Folder (or press Cmd + Shift + G).
- Type /Volumes and press Go.
Your NTFS drive will appear—now you can read & write files!
Method 3: Reformat the Drive (But You'll Lose Data)
If you don't need Windows compatibility, you can reformat the drive to a Mac-friendly file system like APFS or exFAT:
- Open Disk Utility (Applications > Utilities > Disk Utility).
- Select your NTFS drive.
- Click Erase and choose exFAT as the format (works on both Mac & Windows).
- Confirm and reformat.
❗ Warning: This will erase all data on the drive! Backup files first.
Which method should you choose?
Here's a clear comparison of the three methods to write to NTFS drives from a Mac:
| Method | Pros | Cons | Best For |
| 1. iBoysoft NTFS for Mac driver | • Simple plug-and-play • Full desktop visibility • Best performance • Available for macOS High Sierra and later | • Costs money | Users who frequently use NTFS drives |
| 2. Use Terminal | • Free • No extra software | • Requires technical steps • Drive hides in /Volumes • Must update if renaming drive • Unstable, may cause data loss • Doesn't work on macOS Ventura and later | Tech-savvy users who want a free fix |
| 3. Reformat to exFAT | • Free • Works on Mac & Windows • No extra tools | • Erases all data • Slower than NTFS for large files | Users who don't need existing data and want cross-platform use |
- For occasional use → Try the Terminal method.
- For frequent access → Invest in a third-party NTFS driver.
- If you don't need Windows → Reformat to exFAT or APFS.
Share this guide if you find it helpful!