If you've ever plugged a Windows-formatted NTFS drive into your Mac running Big Sur, you've likely run into a frustrating limitation: macOS lets you view files on the drive but won't let you edit, delete, or save new data to it.
This read-only barrier is a holdover from Apple's long-standing approach to NTFS, but don't worry—there are workarounds. Here's how to unlock full read-write access to NTFS drives on macOS Big Sur safely and efficiently.
👉 Explore free NTFS for Mac to read and write NTFS drives on Mac.
Can Big Sur read NTFS?
Yes, macOS Big Sur can read NTFS drives out of the box—but with a catch. While Apple includes native support for reading files on NTFS-formatted drives, it intentionally restricts writing to them. This means you can open, copy, or view files stored on an NTFS drive (like a Windows external hard drive or USB stick), but you cannot edit, delete, or save new files to it without third-party tools or risky workarounds.
Can Big Sur write to NTFS?
Apple has never included native write NTFS support in macOS for one simple reason: licensing. NTFS (New Technology File System) is Microsoft's proprietary format, and while macOS includes built-in drivers to read NTFS drives, writing requires additional permissions. Big Sur continues this tradition, leaving users stuck with one-way access unless they take matters into their own hands.
The Safe Solution: Use iBoysoft NTFS Driver for Mac Big Sur
For reliable, hassle-free NTFS writing, third-party drivers are the way to go. These tools integrate seamlessly with macOS Big Sur, offering full read-write access without Terminal hacks or reformatting. Here's what to look for in a trusted NTFS driver:
- Big Sur Compatibility: Ensure the software supports macOS 11.x (and newer, like Monterey).
- M1/M2/M3/M4/M5 Chip Support: If you're on Apple Silicon, check for ARM compatibility.
- User-Friendly Interface: No coding required—just install and go.
- Data Protection: Features like smart mounting and error recovery prevent corruption.
Our Pick: iBoysoft NTFS for Mac
We've tested multiple tools, and iBoysoft stands out for its Big Sur optimization, M1/M2 support, and intuitive design. Here's how to use it:
- Download and install iBoysoft NTFS for Mac.
- Connect your NTFS drive: It should now mount with read-write access. If not, choose the NTFS drive in the NTFS tool for Mac Big Sur and click Open.
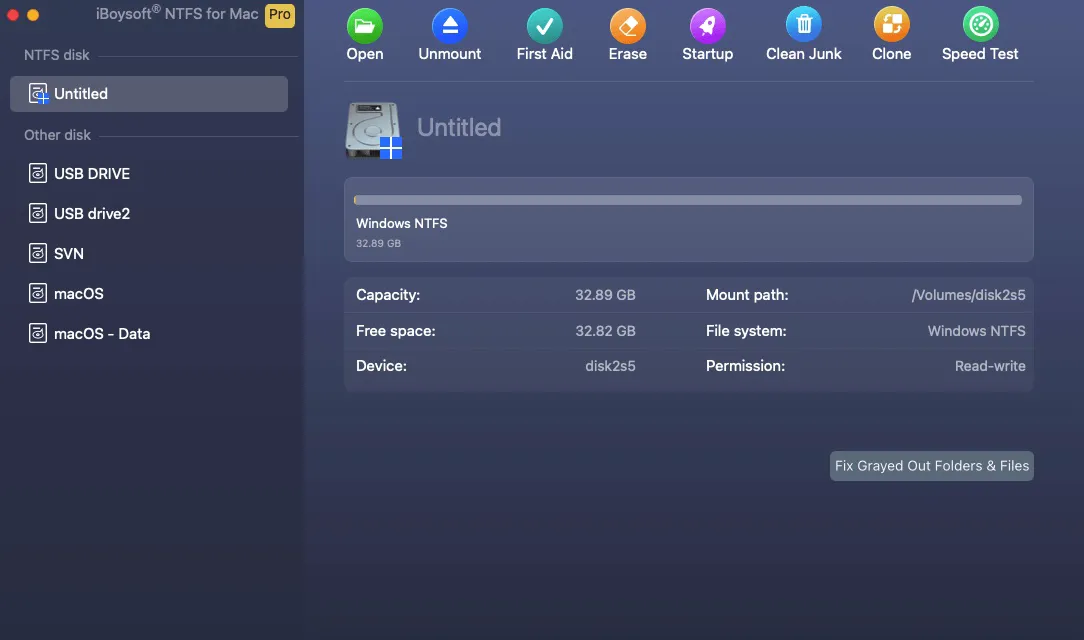
- Edit, copy, or delete files on the NTFS drive.
Other solid options include Paragon NTFS for Mac and Tuxera NTFS, but iBoysoft's balance of price and performance makes it ideal for most users.
Share the NTFS driver for Mac Big Sur with others!
The Risky Way: Enable NTFS Writing via Terminal
Technically, macOS hides a Terminal command to enable experimental NTFS write support. But proceed with caution—this method is unsupported by Apple and can lead to data corruption or drive errors. Here's how it works:
- Connect your NTFS drive and note its name.
- Open Terminal from Applications > Utilities.
- Enter the command below and hit Enter.sudo nano /etc/fstab
- Enter your password and press Enter again.
- Add this line (replace "WindowsDrive" with your drive's name):LABEL=WindowsDrive none ntfs rw,auto,nobrowse
- Press Ctrl + O to save, then Ctrl + X to exit.
- Safely eject the NTFS drive.
- Restart your Mac and reconnect the drive.
While this might grant write access, instability is common. If your drive disconnects unexpectedly or files become unreadable, you'll wish you'd tried the safer method above.
The Nuclear Option: Reformat the NTFS Drive to a Mac-Friendly File System
If you don't need to share the drive with Windows machines, reformatting it to a macOS-native file system like APFS or exFAT is a straightforward fix. This erases the read-only NTFS barrier entirely—but warning: reformatting will delete all data on the drive. Back up your files first!
- Open Disk Utility (Applications > Utilities).
- Locate your NTFS drive in the sidebar. Select the drive volume (not the parent disk) and click Erase.
- Name the drive and choose a file system:
APFS: Best for macOS-only use (optimized for SSDs and Big Sur+).
exFAT: Choose this if you occasionally need Windows compatibility.
Mac OS Extended (Journaled): Older HDDs or drives used with pre-High Sierra Macs. - Click Erase, then Done when finished.
Final Thoughts
While macOS Big Sur's read-only NTFS support feels outdated, solutions are just a few clicks away. For casual users, third-party drivers like iBoysoft NTFS for Mac offer peace of mind and plug-and-play simplicity. Avoid the Terminal gamble—your data's worth the $20-$30 investment. If NTFS is not necessary, reformat it with a native macOS format.
Ready to Break the Read-Only Chain? Download iBoysoft NTFS for Mac and start editing your NTFS drives on Big Sur today.