
Written by
Jenny Zeng
The first step to installing OS X 10.11 El Capitan is downloading its DMG file. While the App Store is the usual place for getting the OS copy, it may not work for you due to system compatibility issues. Fortunately, there are different ways to download the El Capitan DMG file, regardless of whether you have an incompatible Mac or Windows PC.
In this post, we'll guide you through downloading the El Capitan DMG file directly from Apple and creating a bootable installer with the DMG file.
To ensure the download and installation go smoothly, I suggest you clean your Mac to make more space with iBoysoft DiskGeeker. It's a reliable disk cleaner that can analyze your Mac or external drive's disk space and allow you to quickly remove large, unnecessary files.
How to download El Capitan DMG file on Mac/PC?
Apple provides two ways to download the OS X El Capitan 10.11.6 full installer DMG file, which is about 6.2GB.
① Apple Store
If your Mac is compatible with OS X El Capitan, you can download it from the Apple Store. Open this link, then click "Open App Store.app."
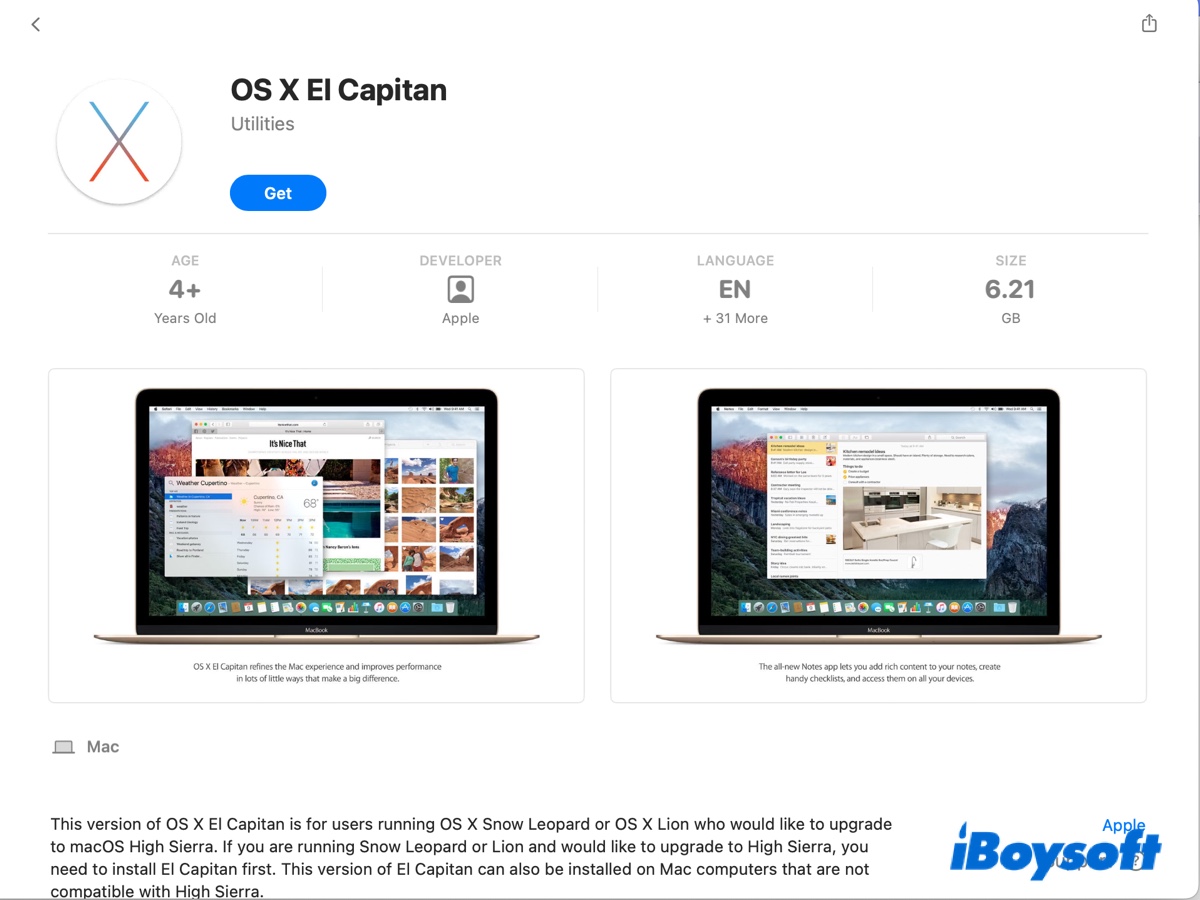
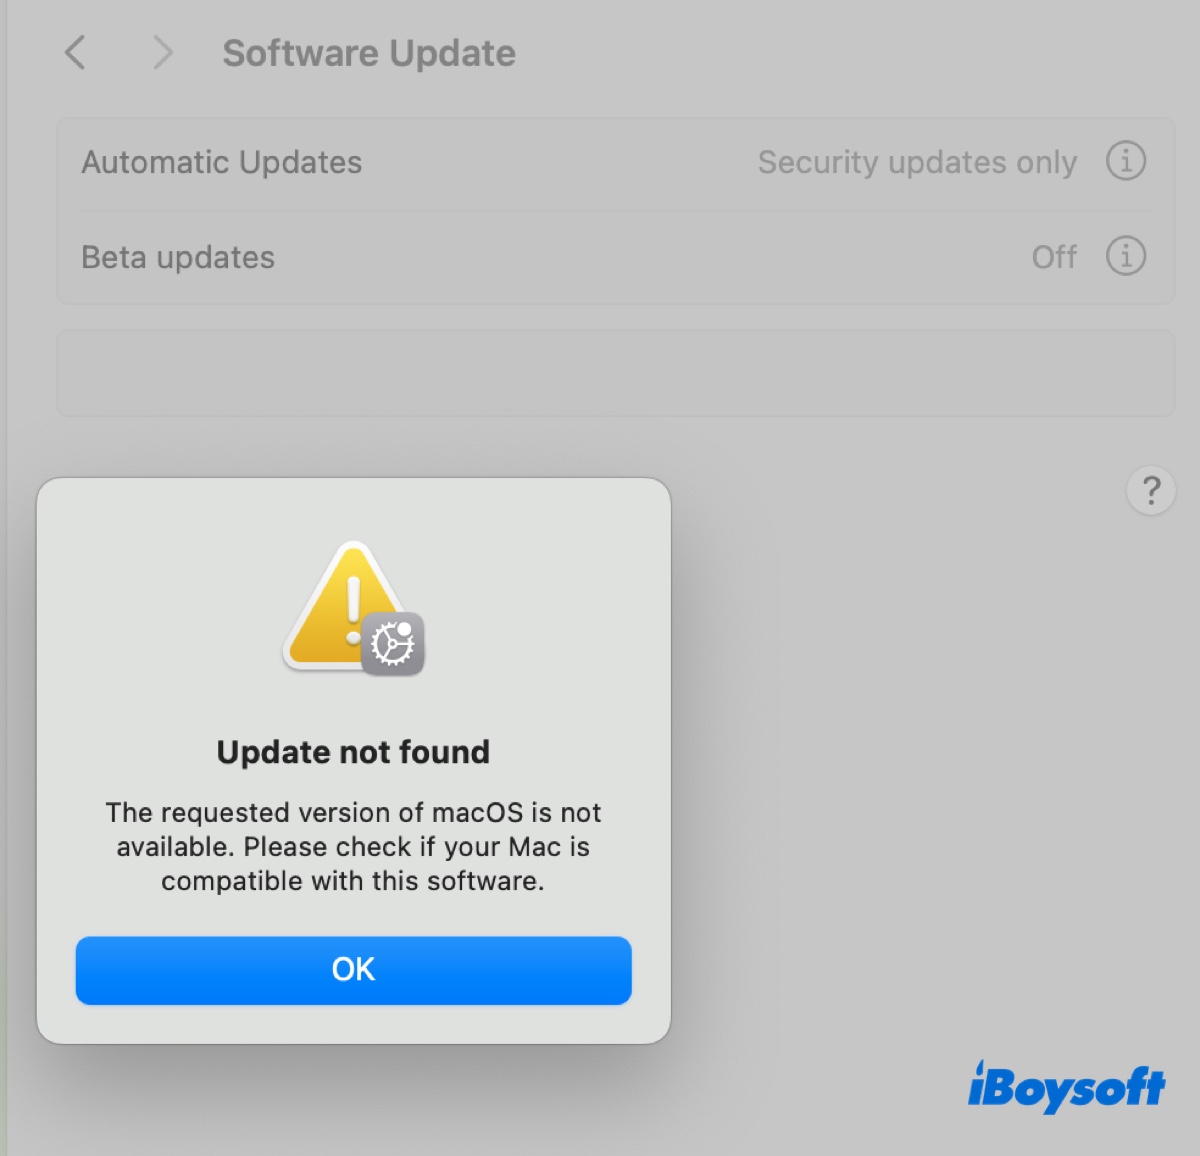
This should redirect you to the Mac App Store, where you can click Get to start the compatibility test in Software Update. If your Mac is indeed supported by OS X El Capitan, it'll allow you to download the installer. If not, it prompts an error.
② Direct download from Apple Server
You can also download OS X El Capitan without App Store by using the direct download link from Apple's server. To do this, launch Safari, then open the following link and click Allow.
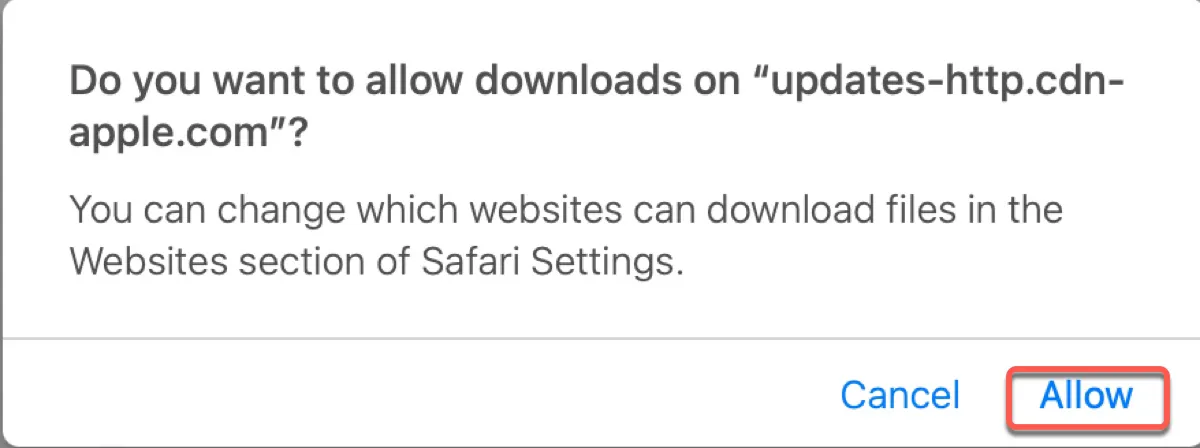
El Capitan 10.11 full installer DMG download
Now that you know how to download El Capitan with or without the App Store; don't forget to share it.
How to create a bootable USB installer with the El Capitan DMG?
After the DMG file is downloaded, you can create a bootable OS X El Capitan installer to clean install the system with the following steps:
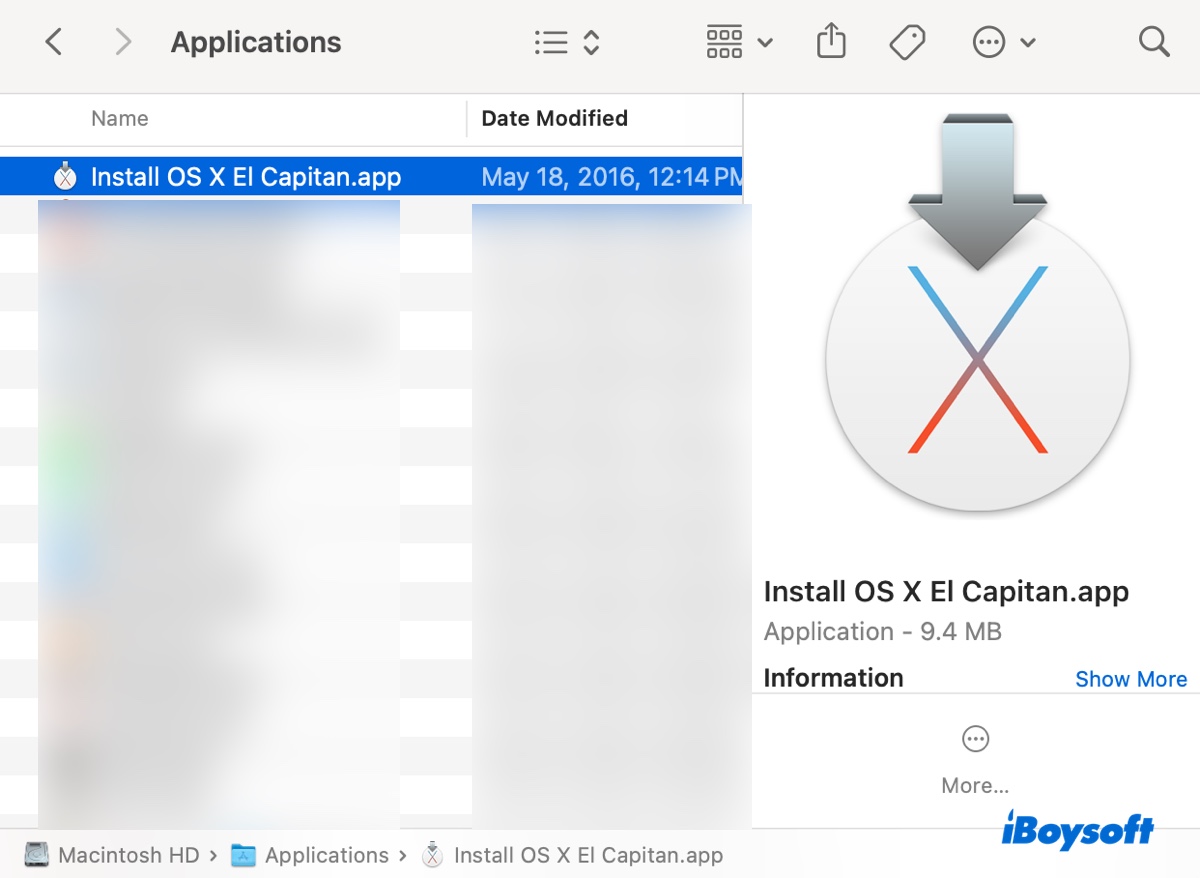
Step 1: Add the Install OS X El Capitan.app to the Applications folder
Before creating the bootable installer, you need to convert the InstallMacOSX.pkg file within the DMG to the Install OS X El Capitan.app.
If you have a compatible Mac, simply double-tap on the DMG file, then open the pkg inside and follow the installer to install it. This extracts the pkg file to the Applications folder.
If you have an incompatible Mac, using the above steps will result in the error "This version of OS X 10.11 cannot be installed on this computer." Nevertheless, you can utilize a free tool called Suspicious Package to set things straight.
- Download and install Suspicious Package.
- Open the app and you'll notice the DMG file appearing on the right.
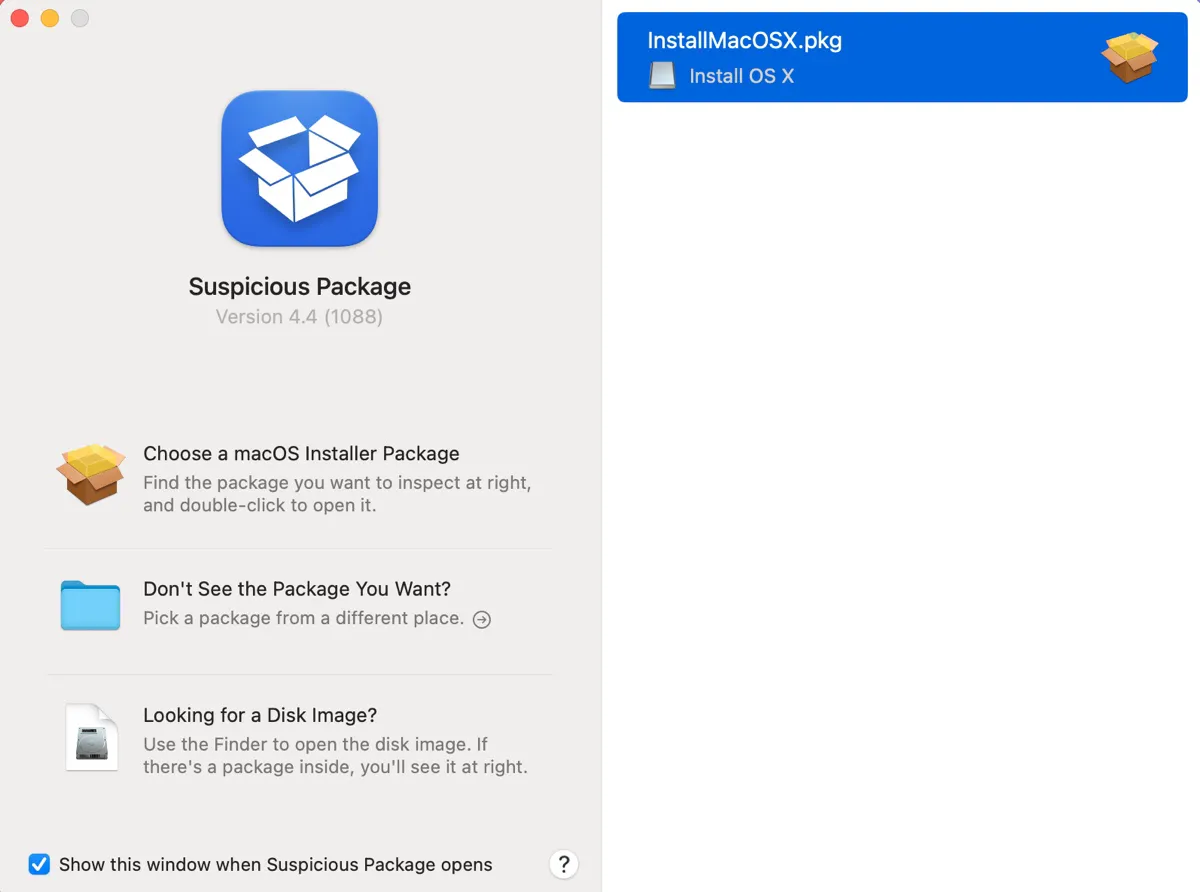
- Double-click to expand it, then select the "All Files" tab.
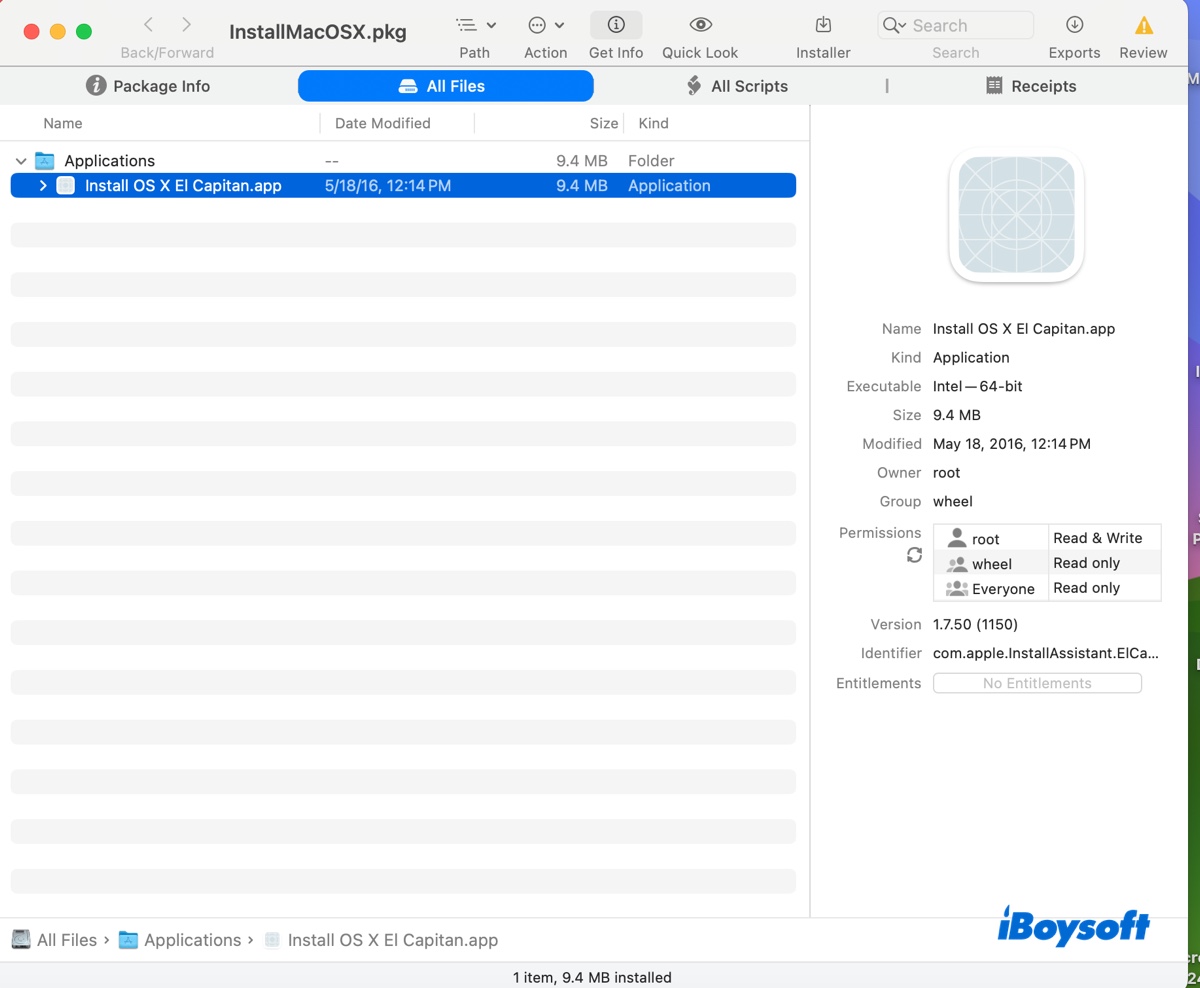
- Open the Applications folder in Finder.
- Drag and drop the Install OS X El Capitan.app to it.
Step 2: Create the El Capitan bootable USB installer
To make an OS X El Capitan bootable installer on a Mac, you must prepare a storage device with 14 GB or more of available space. The process will erase all data on the drive, so ensure it's backed up.
- Open Disk Utility.
- Click View > Show All Devices.
- Choose the physical disk of your USB drive (the one at the top).
- Click Erase.
- Name the drive.
- Set the format to Mac OS Extended (Journaled).
- Choose GUID Partition Map as the scheme.
- Tap Erase again.
- Once the erase process is complete, open Terminal.
- Replace MyVolume with the name of your USB volume and run the command below:
sudo /Applications/Install\ OS\ X\ El\ Capitan.app/Contents/Resources/createinstallmedia --volume /Volumes/MyVolume --applicationpath /Applications/Install\ OS\ X\ El\ Capitan.app --nointeraction - Type your administrator password and hit Enter.
- Quit Terminal after the bootable USB is created.
Step 3: Boot from the bootable installer to install El Capitan.
If your Mac has a T2 chip, you must adjust the Startup Security Utility to enable booting from external media.
- Make sure your Mac has an internet connection.
- Restart your Mac, then immediately hold down the Option key.
- Let go of the key when you see the bootable volumes.
- Select the volume containing the bootable installer and click the onscreen arrow.
- In the OS X Utilities window, click Disk Utility to format your Mac if you need a clean install. Otherwise, tap "Install OS X El Capitan" to install the OS.
For Windows PCs, take a look at this guide: How to Create a MacOS Bootable USB from Windows 10/11? [Full Guide]
If you also want to download the El Capitan ISO file, keep reading: Download OS X 10.11 El Capitan DMG & ISO Full Installer
Click the share button below to help others create a bootable USB with the El Capitan DMG file.