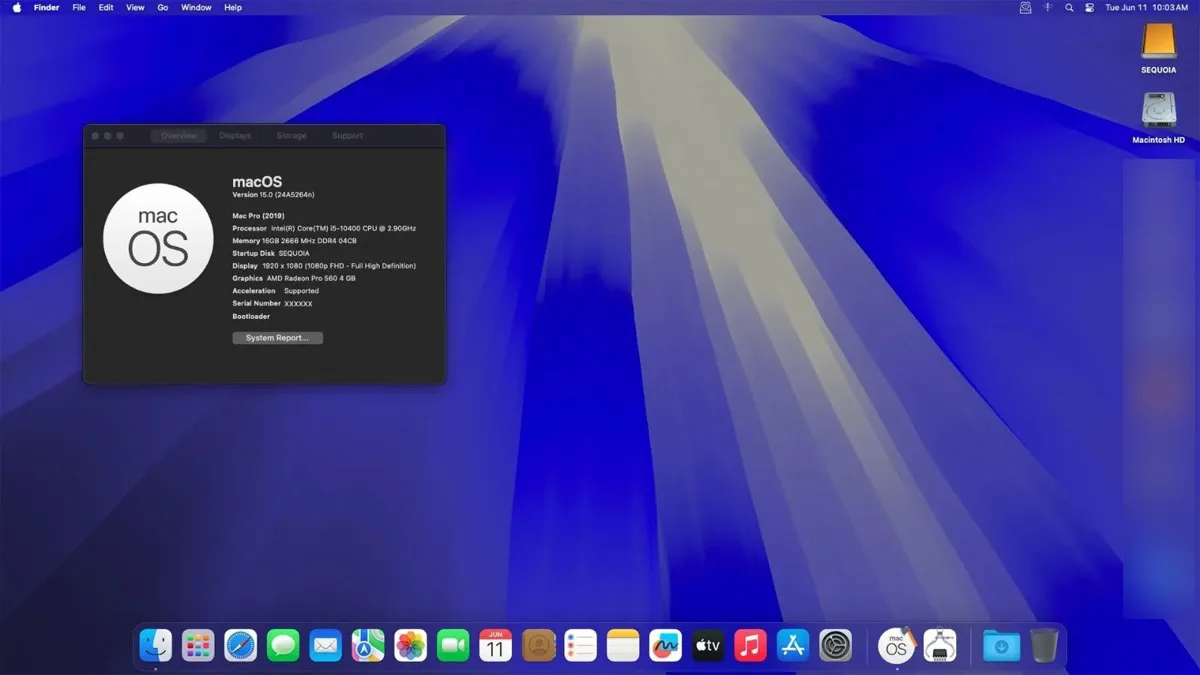
Tips: macOS Sequoia's successor, macOS Tahoe 26, has been released. If you wish to run the latest macOS Tahoe on your PC, install macOS Tahoe on a Hackintosh.
macOS 15 Sequoia has been made available to the public on September 16, 2024. Many users are looking to install it on their Windows PC to experience its new features. If that's also you, this guide is all you need. It covers both the upgrade and clean install processes.
So, whether you want to upgrade or clean install macOS Sequoia on your Hackintosh, you'll find the steps here.
- To ensure the installation runs smoothly, it's important to have enough free space on your computer, especially if you want to dual-boot both Windows and macOS Sequoia on Hackintosh.
- Instead of manually deleting the unnecessary files, which is time-consuming, we suggest you use a disk cleaner like iBoysoft DiskGeeker for Windows to remove junk files like logs, caches, preferences files, etc., hidden files, and other unnecessary files. It can analyze your disk space, allow you to overview storage usage, and quickly remove large files.
How to upgrade to macOS Sequoia on Hackintosh?
Here are the steps necessary to upgrade to macOS Sequoia on Hackintosh:
① Back up the important files on your computer
Although a successful upgrade won't impact your data, it's best to exercise caution and back up the important data on your Mac in case the installation fails and you need to reformat the internal hard drive. You can transfer needed files from your Mac to an external hard drive by dragging and dropping or Time Machine.
② Update the bootloader and kexts
Before the upgrade, you should ensure the bootloader or OpenCore bootloader you're using is the latest version. To update the OpenCore and Kexts:
- Launch OCAuxiliaryTools.
- Tap Edit > Mount ESP > Mount and open Config plist.
- Click the button " Upgrade OpenCore and Kexts" in the menu bar.
- Choose "Get the latest version of OpenCore.
- Wait for the upgrade to complete.
- Select all kexts and click "Check for Kexts updates."
- Tap "Start Sync."
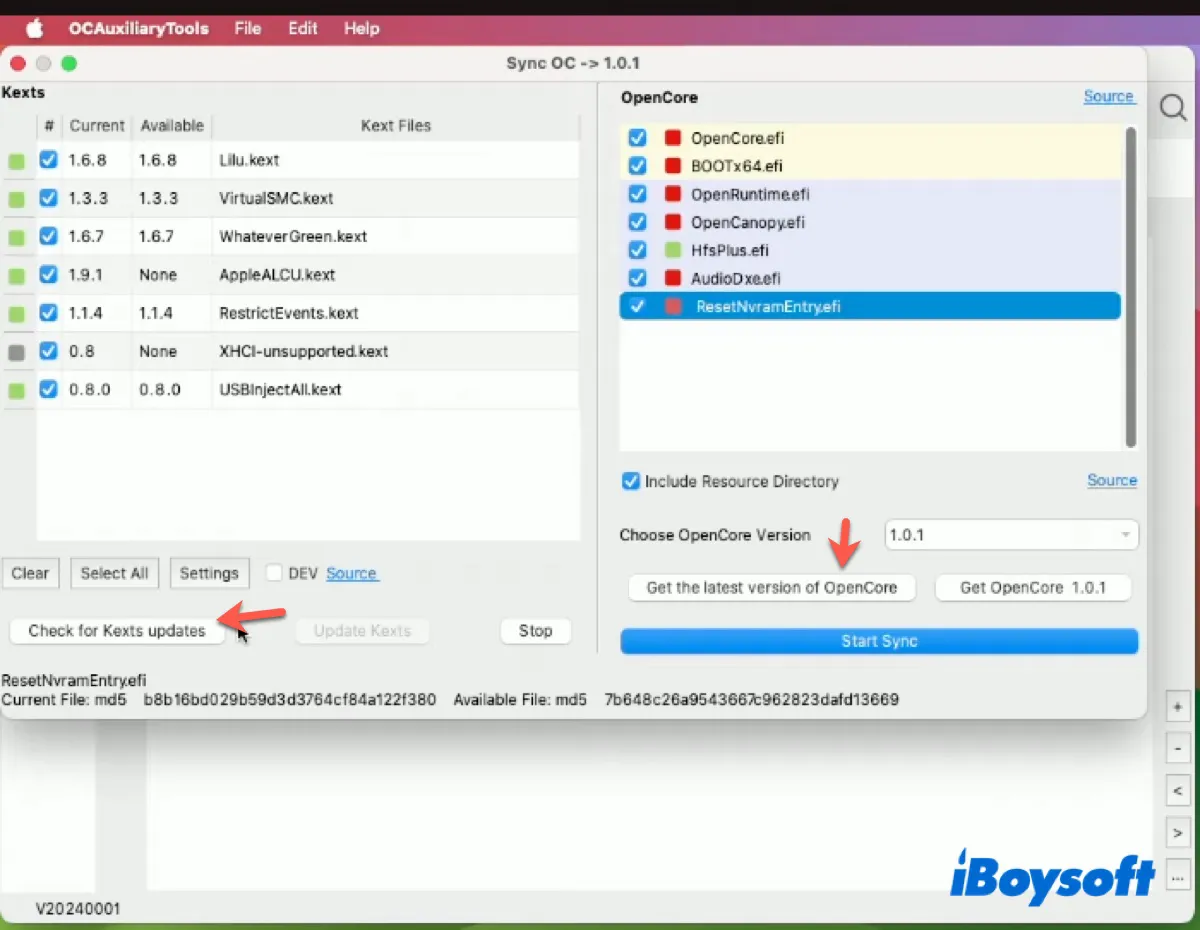
- After the updated files are synced, exit OCAuxiliaryTools and save the changes.
- Reboot your Hackintosh.
③ Update your current OS to the latest available
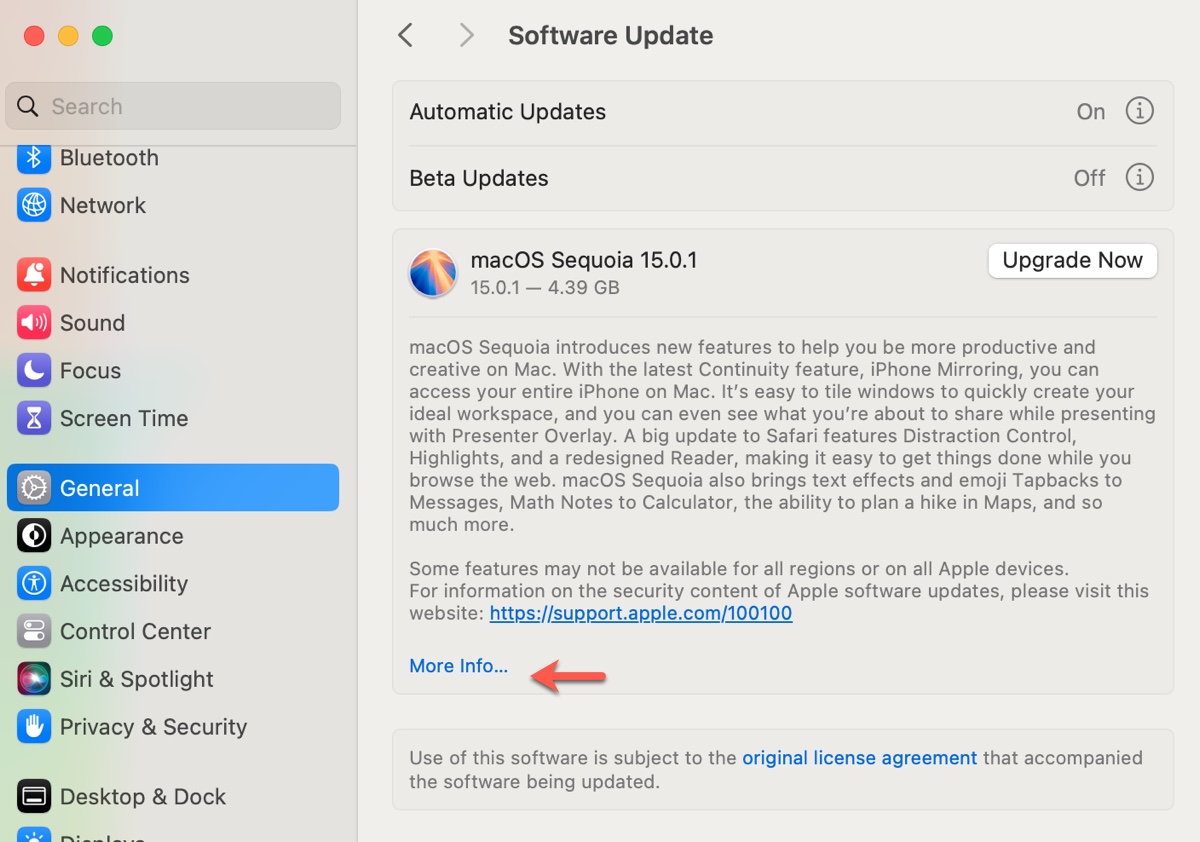
It's also recommended that you update the current OS to the latest version. For instance, if you're running macOS 14, you can update to macOS 14.7 first. Just open System Settings > General > Software Update then click "More info…" and select the available update and click "Update Now."
④ Upgrade to macOS Sequoia
After updating the current OS, you can perform the macOS Sequoia upgrade through Software Update. If you can't see the macOS Sequoia installer, download it from the Mac App Store.
Share this guide if it helps you upgrade to macOS Sequoia on Hackintosh!
How to clean install macOS Sequoia on Hackintosh?
If you don't have macOS installed on your Windows computer or prefer a clean installation of macOS Sequoia, follow the steps below.
Step 1: Check your computer's processors
The first step is to check your PC's processor to learn the correct OpenCore EFI you'll need if it's Intel-based. But if it's an AMD processor, it's not necessary.
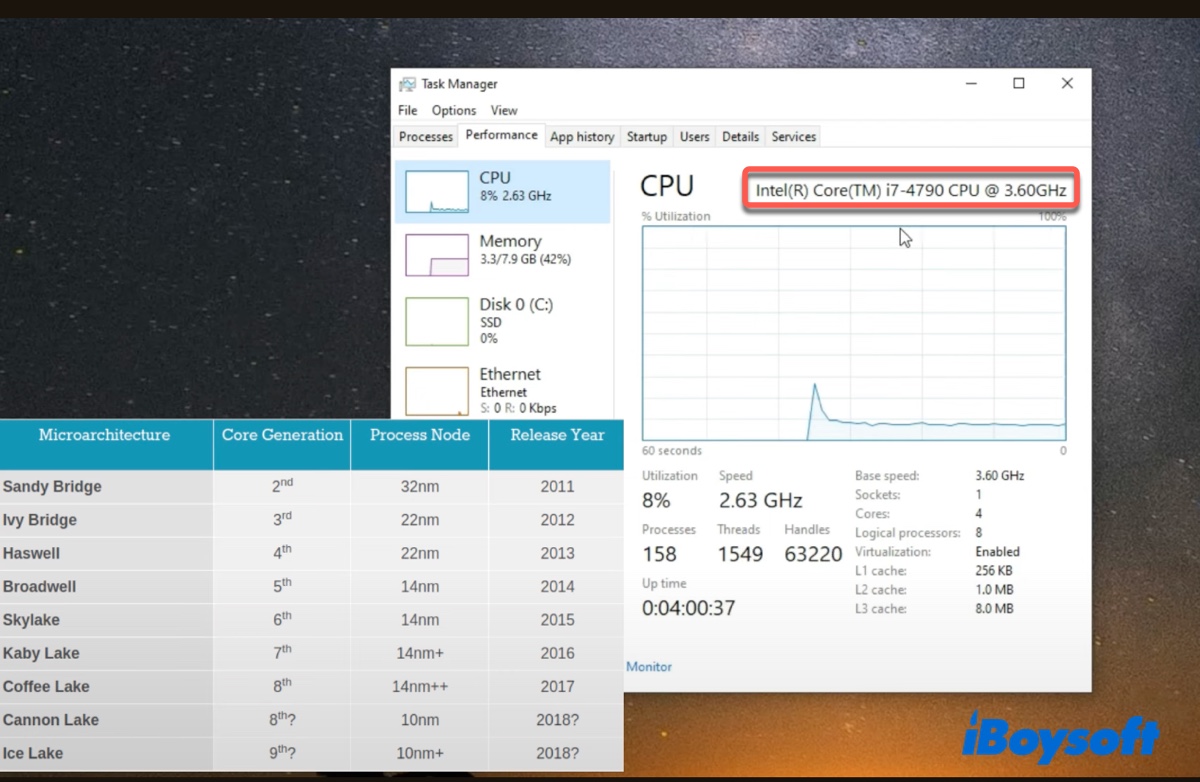
- Press Ctrl-Shift-Esc to open Task Manager.
- Select the Performance tab.
- Click on CPU.
- Check which generation of processor your PC has. For example, if it's i7-4790, it's the 4th generation (4790) called Haswell.
Step 2: Gather needed applications
Then, you need to prepare the files and tools required for the installation.
① Download the macOS Sequoia installer
There are two ways to download the macOS Sequoia installer. You can get it from the App Store by searching its name and following the onscreen instructions. Or download it directly from a third-party source.
② Get Balena Etcher, ProperTree, and others
To install macOS Sequoia on Hackintosh, you'll need the following tools:
- Balena Etcher: It's needed for creating the bootable macOS Sequoia installer.
- ProperTree: It's used to edit the config.plist file. (Open the link, click Code > Download ZIP.)
- Explorer++: It can delete the files in the EFI folder of your bootable media and allow you to transfer your customized EFI folder into it. (Get the 64-bit.)
- GenSMBIOS: It's for generating the compatible SMBIOS for your hardware.
- OpenCore Package: This is important for making the EFI folder. (Download the latest OpenCore package.)
- An external drive with at least 16GB of storage space, such as a USB stick or an SSD. (This drive will be erased during the process, so back it up beforehand.)
After downloading all the necessary apps, continue with the next step.
Step 3: Create a macOS Sequoia bootable Installer on Windows
In order to install macOS Sequoia, you must first create a Sequoia bootable installer on your PC. Here's how:
- Open Balena Etcher.
- Click "Flash from File."
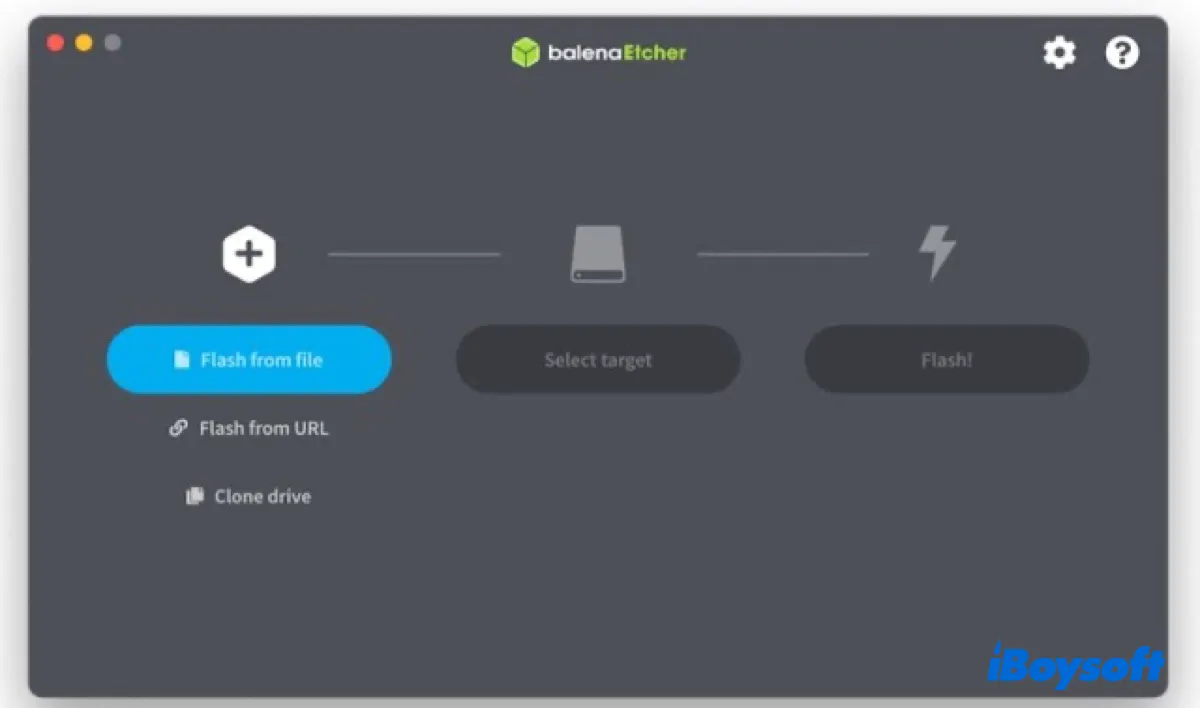
- Select the macOS Sequoia installation file and click Open.
- Click "Select Target."
- Connect the external drive you prepared.
- Select it.
- Tap Flash to begin writing the macOS Sequoia files into the external drive.
Step 4: Build or download the OpenCore EFI folder
While the bootable drive is creating, you can start making the OpenCore EFI folder manually. Or, download a prebuilt one for your computer and decompress it. This is a crucial component for the OpenCore bootloader used in Hackintosh setups, which contains the necessary files and configurations to boot macOS on non-Apple hardware.
Here's how to create the OpenCore EFI folder from scratch:
Double-click the OpenCore Package file to extract it.
Open the OpenCore folder.
Head to X64, then copy the EFI folder and paste it into your Downloads folder or another one.
Go back to the OpenCore folder.
Open the Docs folder and copy the Sample.plist file.
Navigate to the EFI folder you copied before, open it, and paste the Sample.plist file to the OC folder.
Rename the file Sample.plist to config.plist. 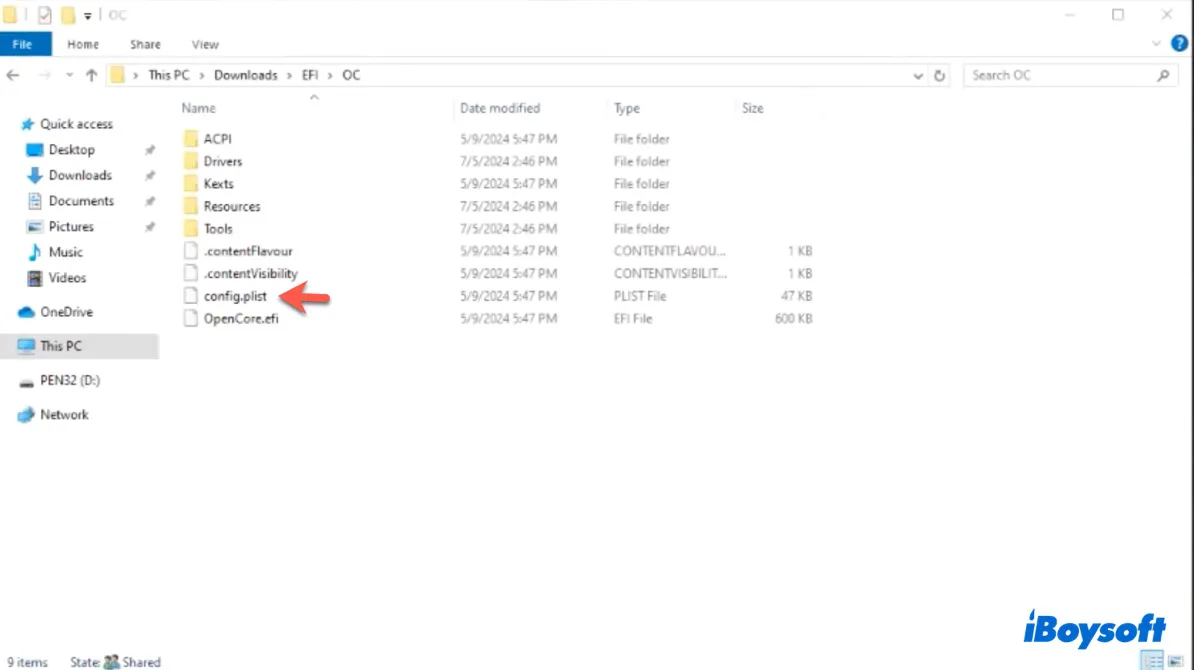
In the OC folder, open the Drivers folder.
Delete all drivers except for OpenCanopy.efi, OpenRuntime.efi, and ResetNvramEntry.efi. 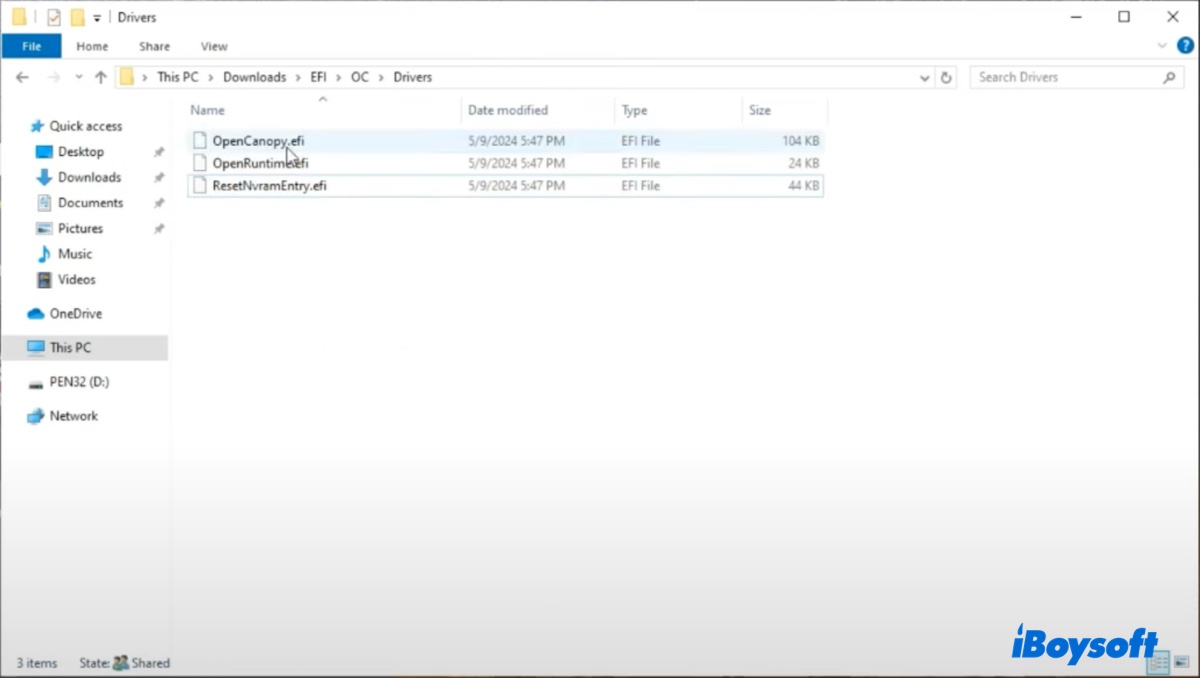
Download HfsPlus.efi and save it to this Drivers folder.
Customize the EFI/OC/Kexts folder based on your hardware.
Open this link in your browser, then download the release version of the "Must Have" kexts: Lilu and VirtualSMC.
Extract the VirtualSMC zip file, and add VirtualSMC.kext and other kexts needed for your hardware to the EFI/OC/Kexts folder based on the information on the link provided above.
Open the Lilu file and add Lilu.kext to the Kexts folder.
Continue to add necessary kexts for graphics, audio, and more. 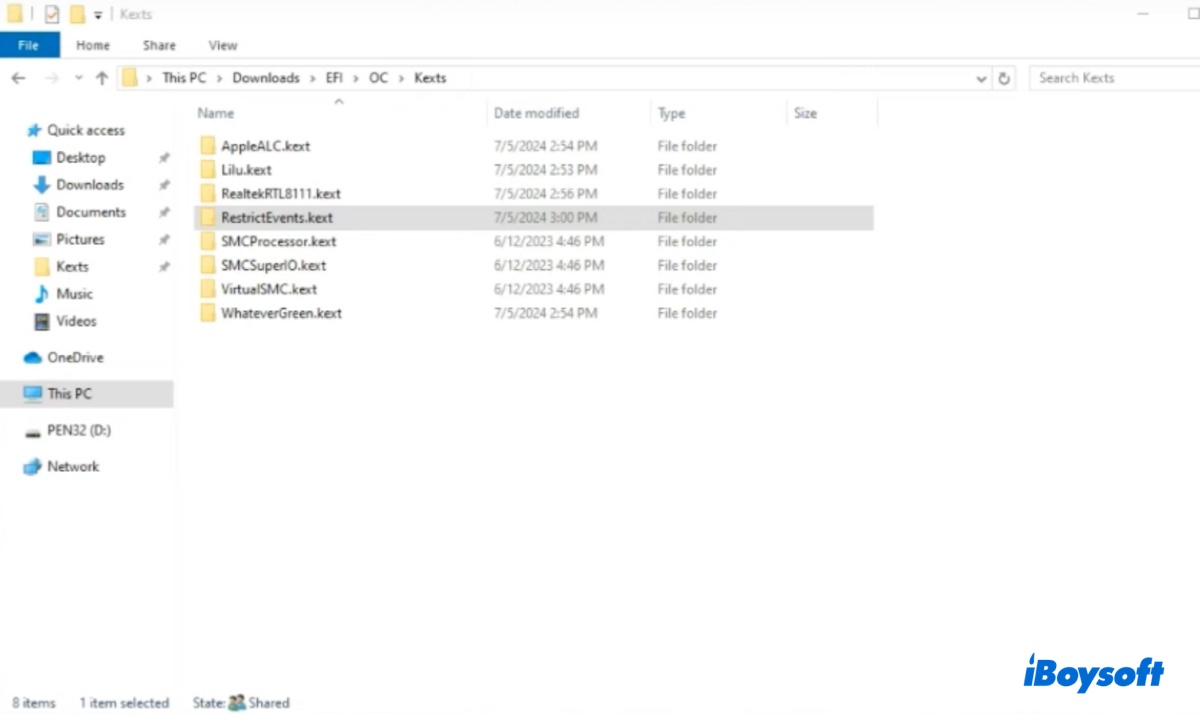
Open the EFI/OC/ACPI folder.
Open this page, select your hardware type and generation, and then download the associated files.
Paste the .aml files into the ACPI folder. 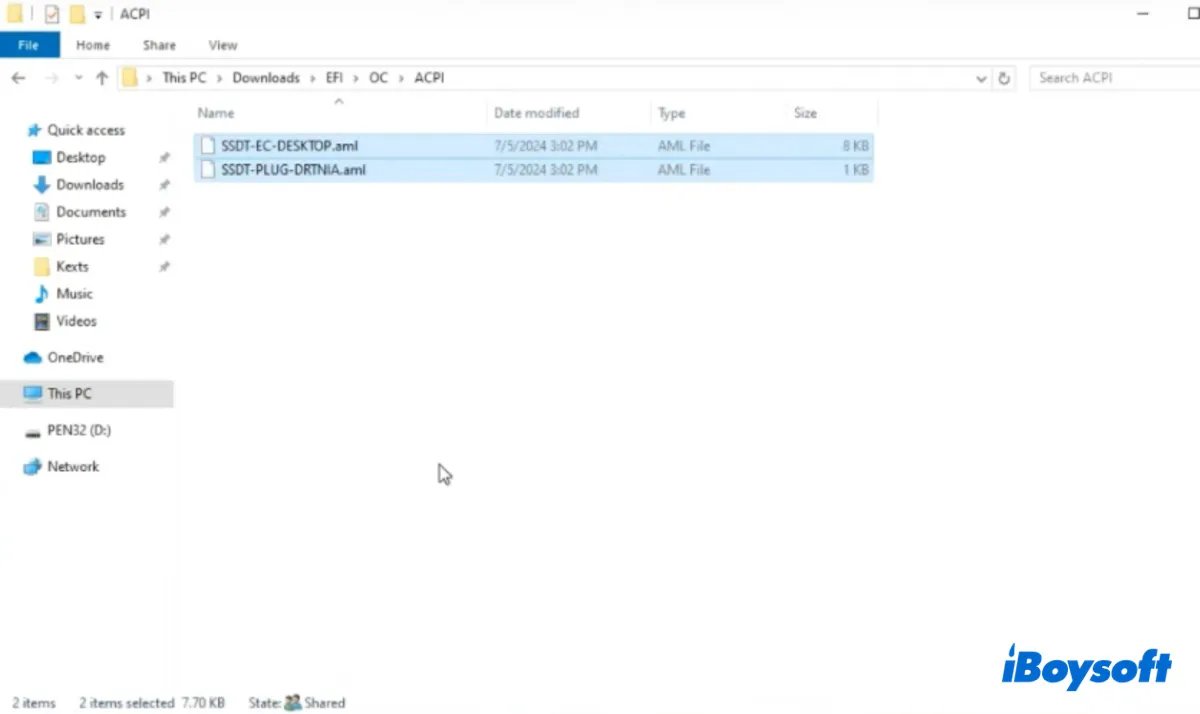
Download the OcBinaryData folder.
Open it and copy the Resources folder to EFI/OC/Resources. 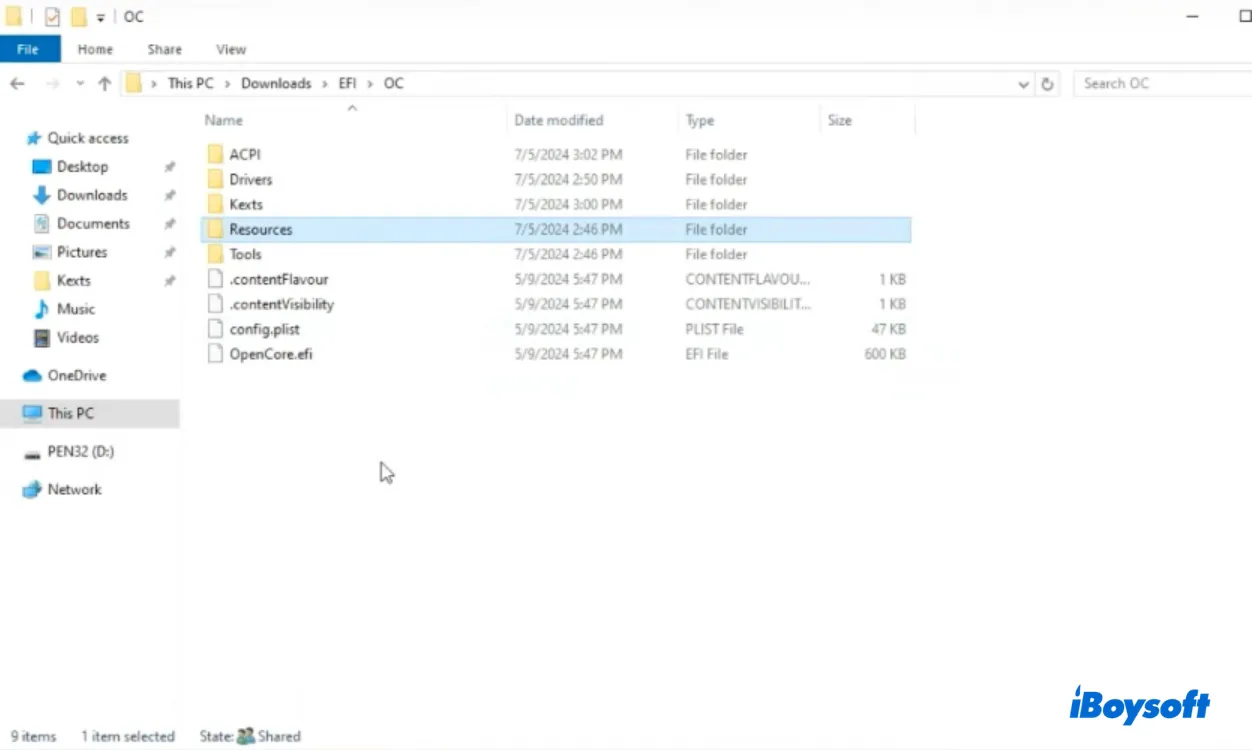
Delete all files in the EFI/OC/Tools folder.
Now the EFI folder is ready.
Step 5: Customize the config.plist file
After the EFI folder is customized or ready, you need to modify the config.plist file to make sure that macOS Sequoia runs smoothly on Hackintosh.
- Run ProperTree.
- Click File > Open, navigate to the EFI/OC folder, then select the config.plist file and click Open.
- Tap File > OC Snapshot, then click "Select Folder."
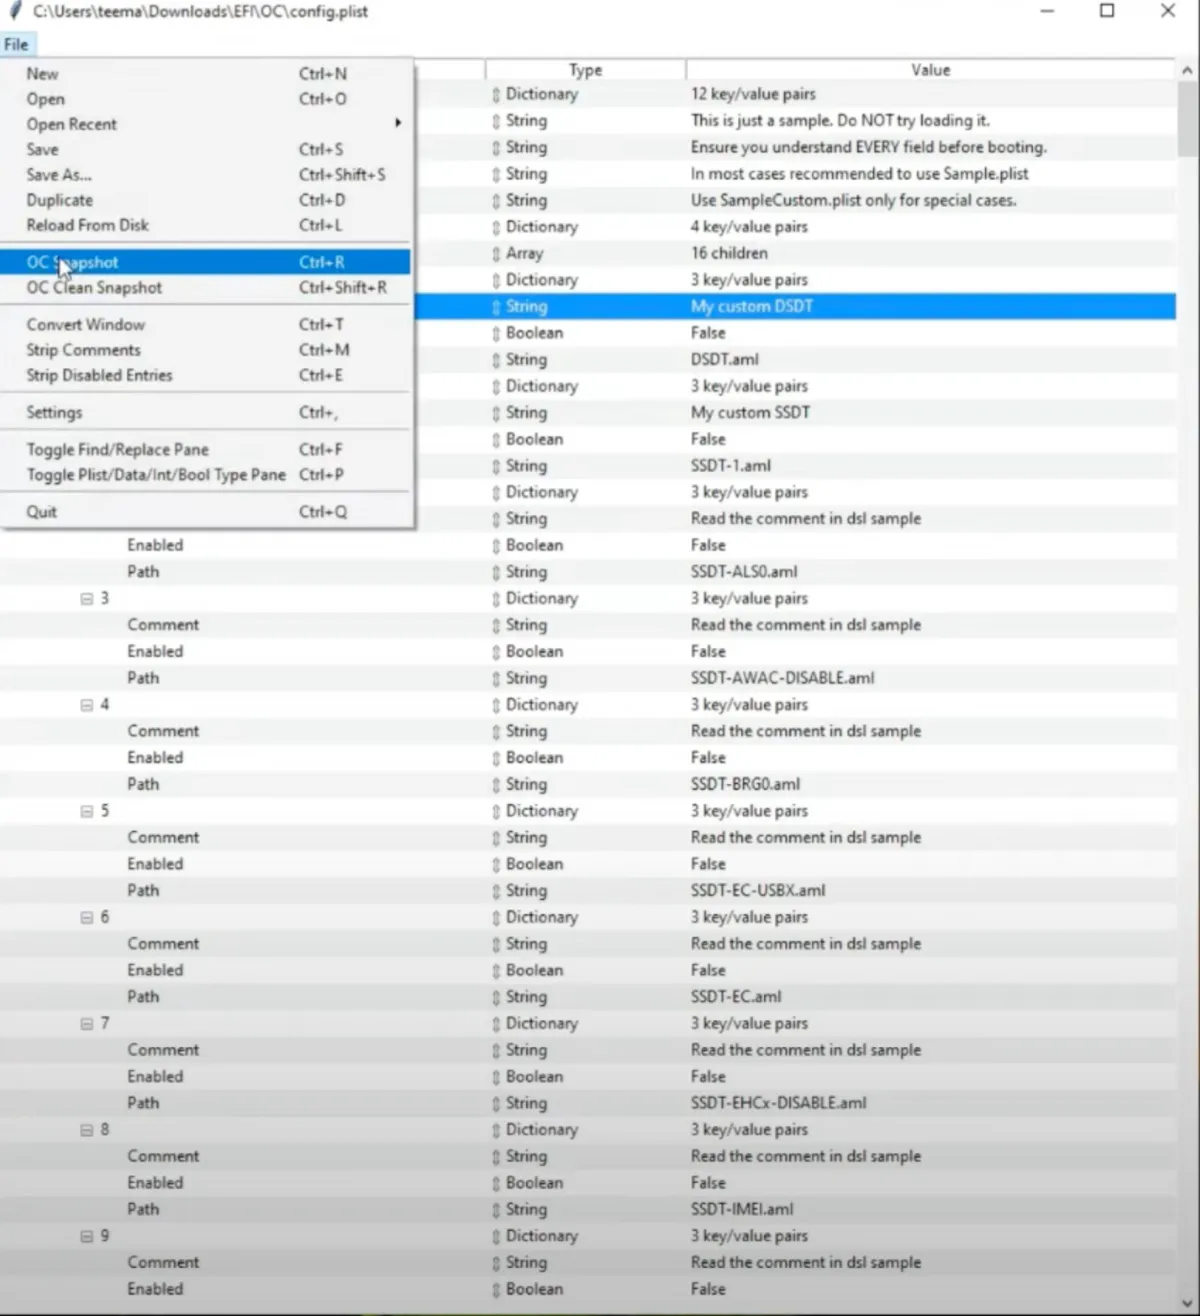
- Delete the four warnings.
- Click File > Save to save the changes.
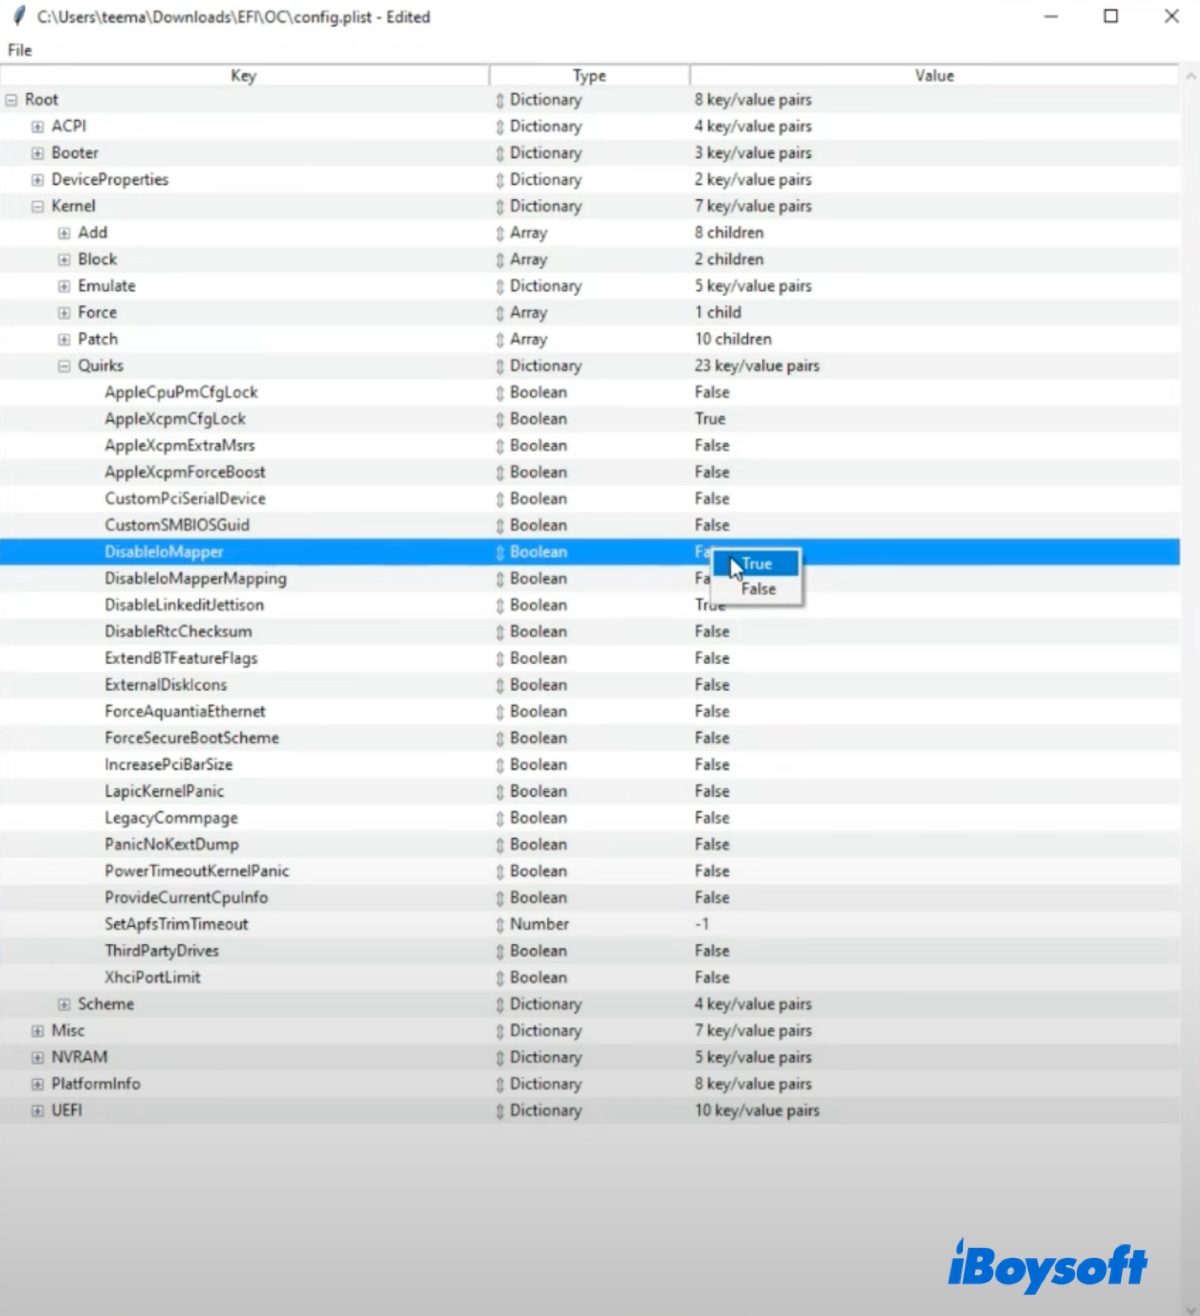
- Open this webpage, select your PC type from the left sidebar, and modify the config.plist file based on the information on your model.
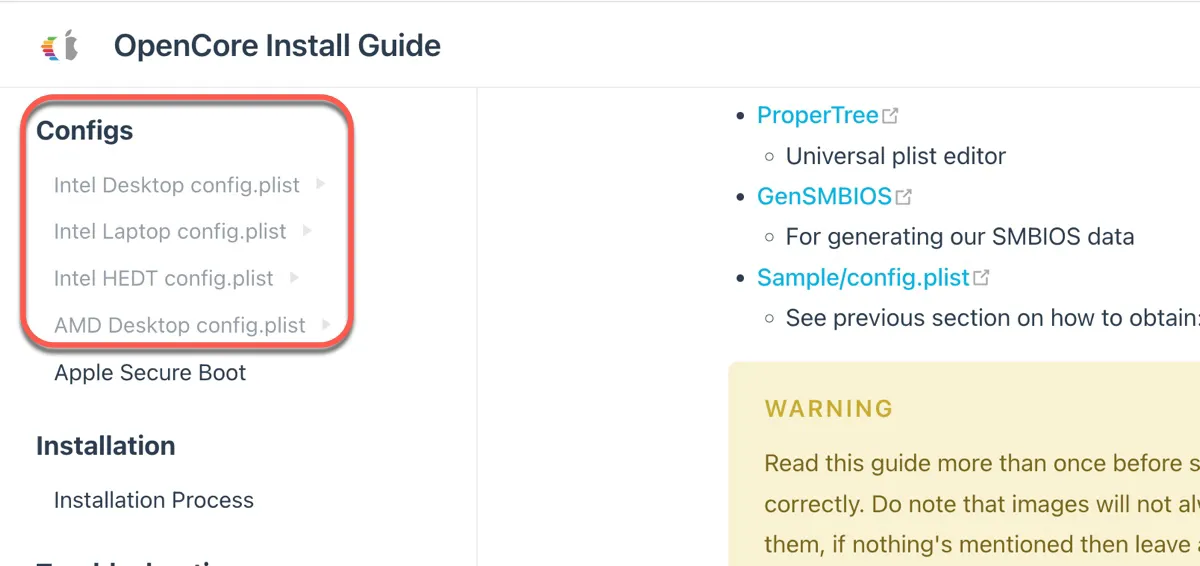
- For instance, if the info specific to your computer model says ScanPolicy should be set to 0, you change the same parameter in the config.plist file to 0.
Step 6: Generate SMBIOS
Next, you must generate a compatible SMBIOS (System Management BIOS) to help macOS Sequoia recognize your hardware as a specific Apple model.
- Extract the Gen-SMBIOS zip file.
- Open the extracted folder and double-click to run GenSMBIOS (the Windows Batch File).
- Ensure you're connected to the internet.
- Enter 1 and hit Enter to install and update MacSerial.
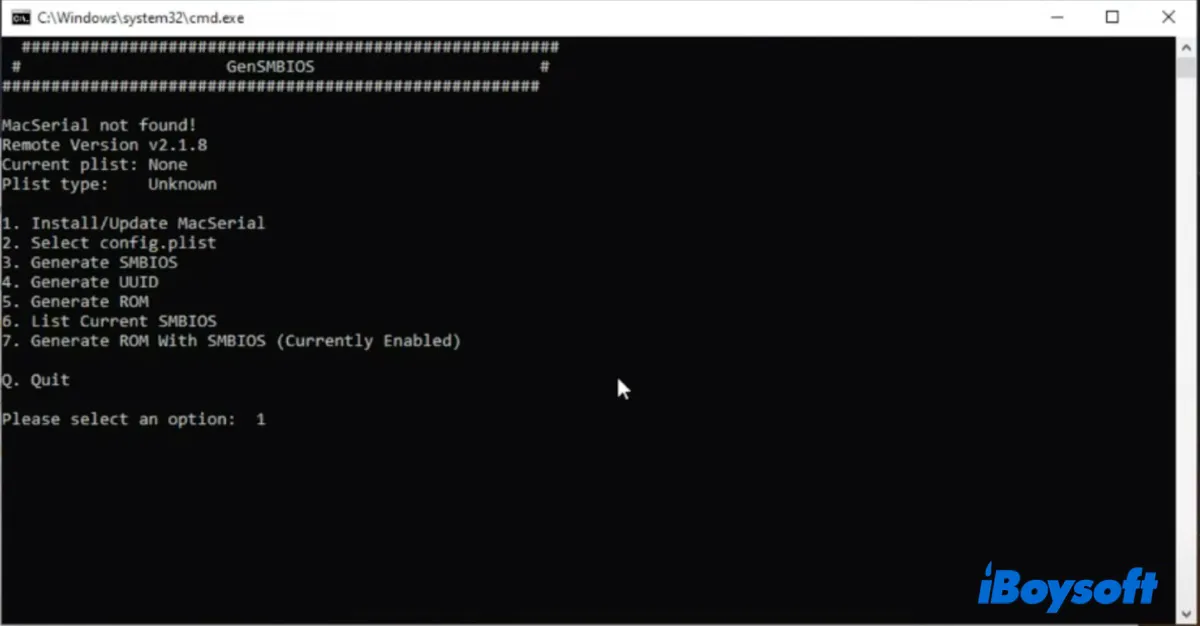
- Enter 2 and hit Enter to select the config.plist file.
- Head to EFI/OC and then drag the config.plist file to the command-line window.
- Hit Enter.
- Choose the right SMBIOS for your hardware based on this guide.
- Type the compatible SMBIOS, for instance, MacPro7,1 then hit Enter.
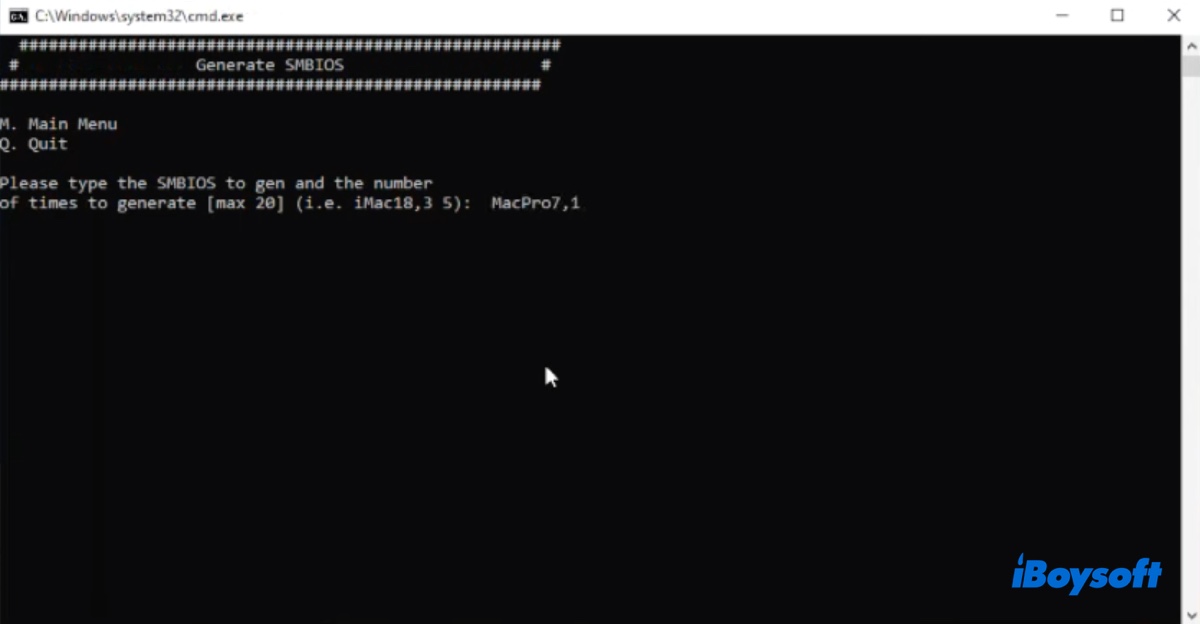
- Enter Q and press Enter to quit the cmd.
Step 7: Create a partition for macOS Sequoia
With the required folders and files prepared, you can now head to make a partition specifically for the macOS Sequoia installation. To do this:
- In the search bar, type partition and then open "Create and format hard disk partitions."
- Decide where you want to install macOS Sequoia. If it's on your PC, you need to shrink the C drive and create a new volume; if it's an external drive, just reformat this external drive.
- To create the partition on your PC, right-click on the C drive and choose "Shrink Volume."
- Enter the amount of space you want to shrink in MB and click Shrink.
- Right-click on the new unallocated space and select "New Simple Volume."
- Follow the instructions and keep NTFS as the format.
- Name the partition macOS Sequoia or your preferred name.
- Format it.
Step 8: Prepare the EFI partition on the bootable installer
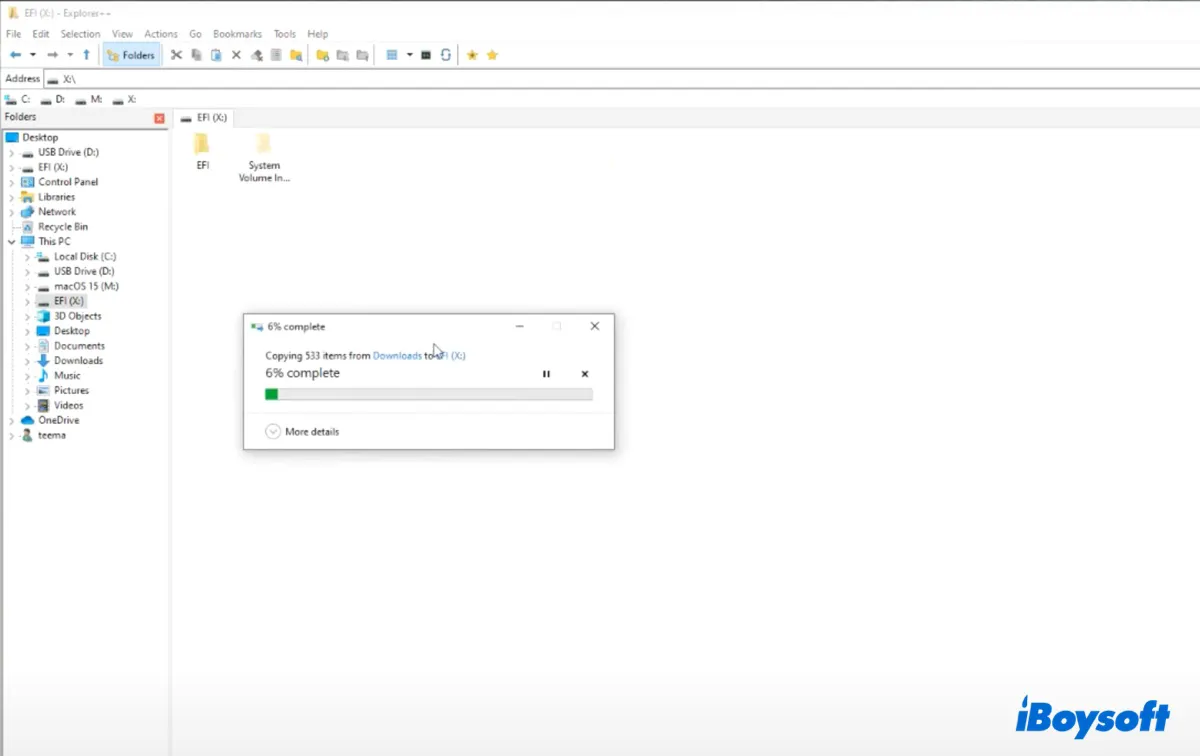
Before utilizing the macOS Sequoia bootable installer, you must replace the data on its EFI partition with the EFI folder you built earlier. To do this, you'll need to add a drive letter to the EFI partition with the help of Command Prompt or a tool like MiniTool Partition Wizard, then run Explore++ as an administrator to open the EFI partition, delete all its content and copy and paste the EFI folder to it.
Step 9: Install macOS Sequoia on Hackintosh
Finally, you can install macOS Sequoia on your Windows PC with the following steps:
- Restart your computer and press the BIOS key to enter BIOS settings.
- Go to the Advanced mode.
- Enable "Virtualization Technology."
- Open Boot settings and disable "Fast Boot."
- Enable "Above 4G Decoding."
- Open Secure Boot > Key Management > Clear Secure Boot Keys > Yes.
- This should disable Secure Boot.
- Set the Boot Option 1 to your bootable macOS Sequoia media and disable the rest.
- Save the changes and reset.
- In the startup disk selection windows, choose the bootable macOS Sequoia USB installer and click the up arrow.
- Choose a language.
- Open Disk Utility.
- Select the partition you reserved for macOS Sequoia and click Erase.
- Name it and set the format to APFS.
- Click Erase.
- Exit Disk Utility.
- Select "Install macOS Sequoia" and click Continue.
- Follow the instructions on the screen to complete the installation on your Hackintosh.
Step 10: Modify OpenCore Configurator
Last but not least, you should use the OpenCore Configure to set up the startup volumes if you want to dual-boot Windows and macOS Sequoia.
- Download OpenCore Configurator.
- Run it and if macOS can't verify it, click "Open Anyway" next to "OpenCore Configurator was blocked to protect your Mac" in Privacy & Security.
- Tap the OpenCore Configurator button at the top-right menu bar.
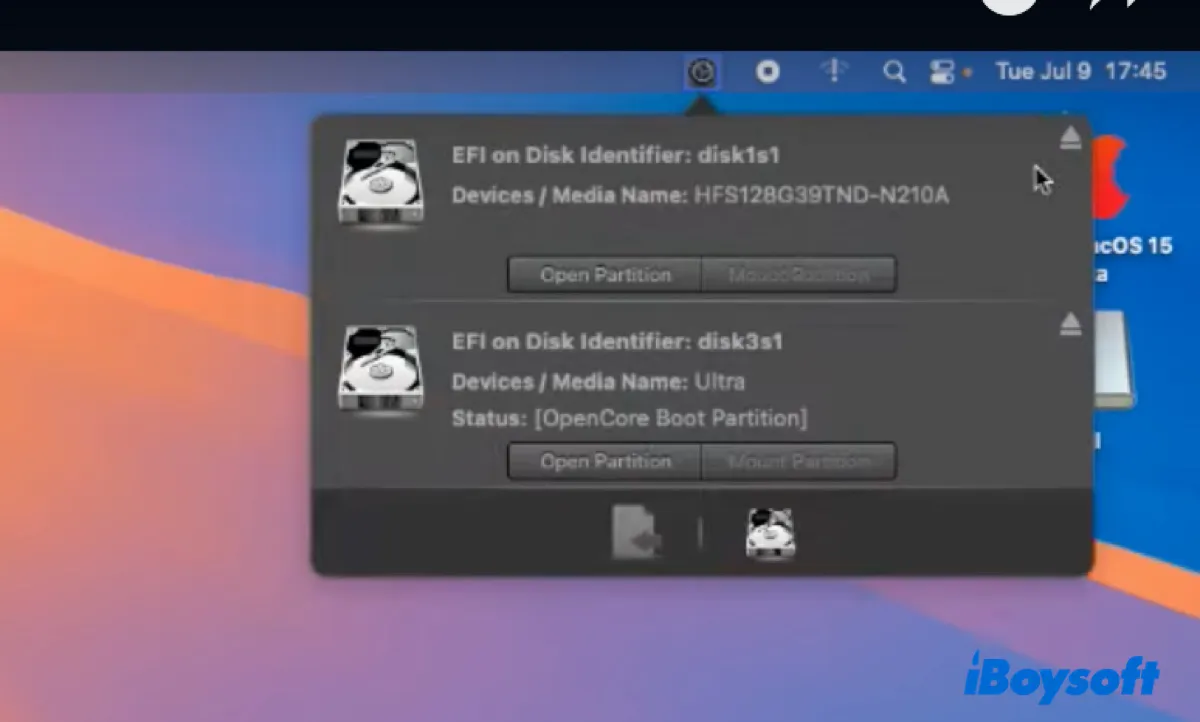
- Mount the EFI partitions of your external bootable media.
- Open both EFI partitions for the external drive and internal drive.
- Drag the Boot and OC folders on the EFI folder of the external drive to the one on your internal hard drive.
- Click Replace.
- Eject both partitions.
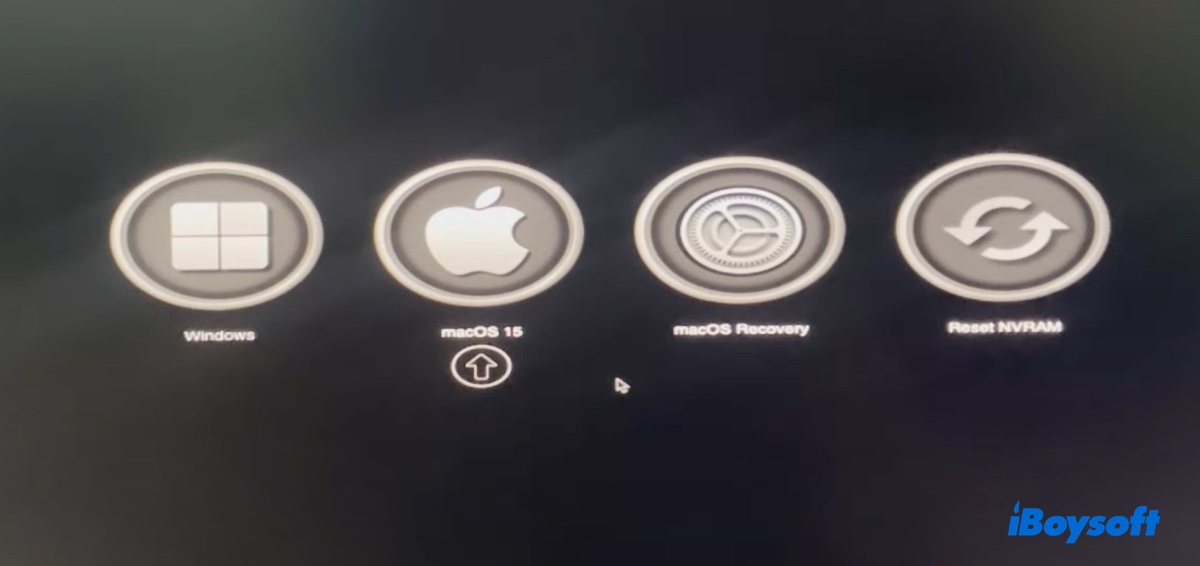
- Restart your computer.
- Choose to boot into macOS Sequoia or Windows.
Hopefully, this guide helps you install macOS Sequoia on Hackintosh. If it is, share this guide to benefit more non-Mac users.
