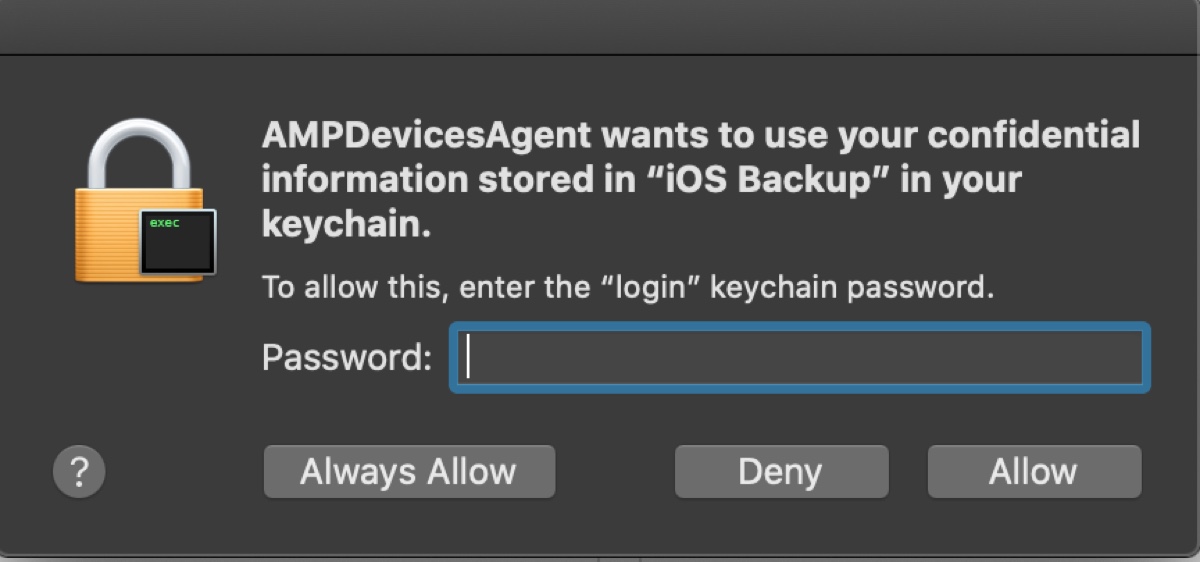
The message "AMPDevicesAgent wants to use your confidential information stored in "IOS Backup" in your keychain. To allow this, enter the login keychain password" has raised concerns among many Mac users.
They don't know what AMPDevicesAgent is and why it wants to use their information, worrying that giving access to the notification may cause harm.
So, despite the fact that it has three options: Always Allow, Deny, and Allow, most of them will click the Deny button to dismiss it. However, they will quickly find that it only temporarily gets rid of the message because the dialog box will keep showing up.
To help users understand this seemingly suspicious process, we'll explain the meaning of AMPDevicesAgent, whether you should allow it to use your information, and how to fix AMPDevicesAgent high CPU usage.
What is AMPDevicesAgent?
AMPDevicesAgent is a device manager that allows Finder to synchronize and back up iOS and iPadOS devices, such as iPhones, iPads, iPods, Apple TVs, and Apple Watches. It was previously managed by iTunes but was split from it on macOS Catalina.
It's located at /System/Library/PrivateFrameworks/AMPDevices.framework/Versions/A/Support/AMPDevicesAgent. If you pay a visit to this folder, you'll also find icons for these devices.

That said, AMPDevicesAgent is a legitimate Apple process that you can trust. It works with AMPDeviceDiscoveryAgent, which discovers connected devices over WiFi when the relevant feature is turned on.
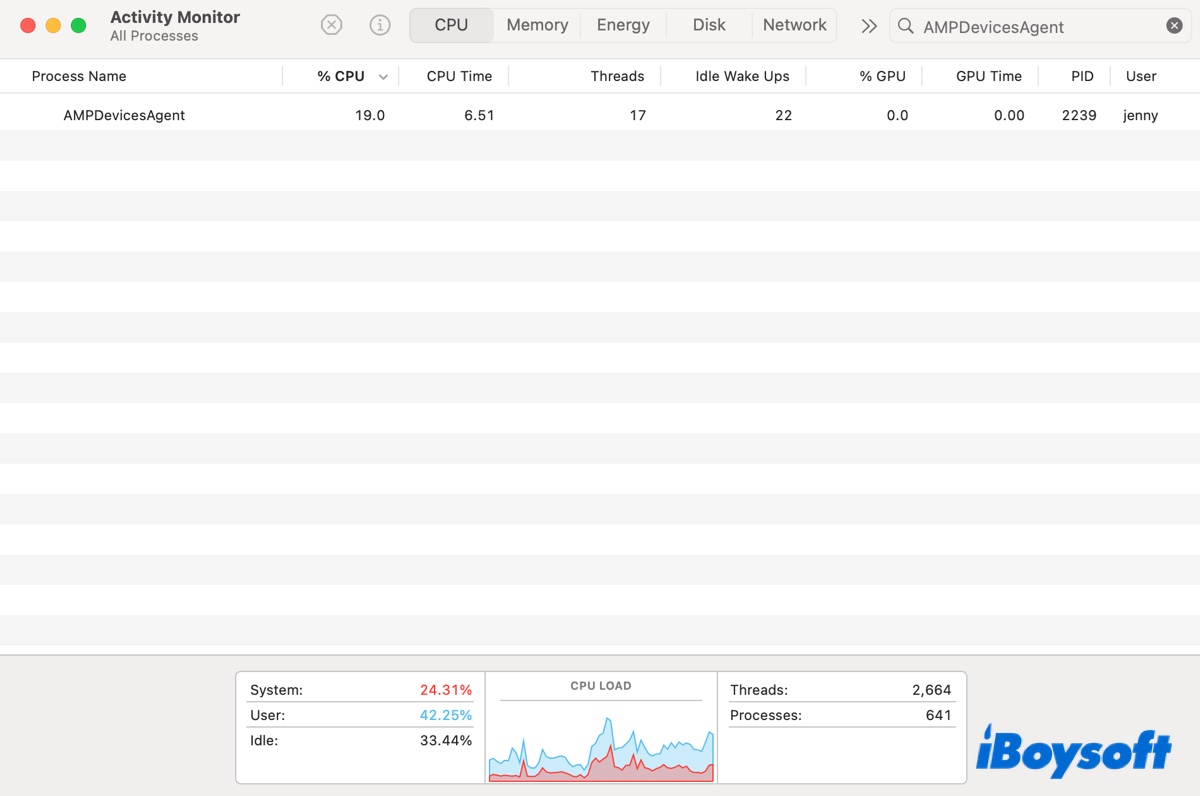
If you search for it in Activity Monitor, you'll get more information about its consumption.
How to fix AMPDevicesAgent high CPU?
When an iOS or iPadOS device synchronization or backup is ongoing, AMPDevicesAgent will use a significant amount of CPU power. But after the task is complete, the CPU usage will decrease until it gets to the usual level.
However, if AMPDevicesAgent continues to cause CPU overload, you can stop it by disabling automatic synchronization or wireless background sync.
Fix 1: Hide iPhone/iPad from being discovered by WiFi
- Open Finder.
- Select your device from the left sidebar.
- Uncheck the option "Show this iPhone when on Wi-Fi."
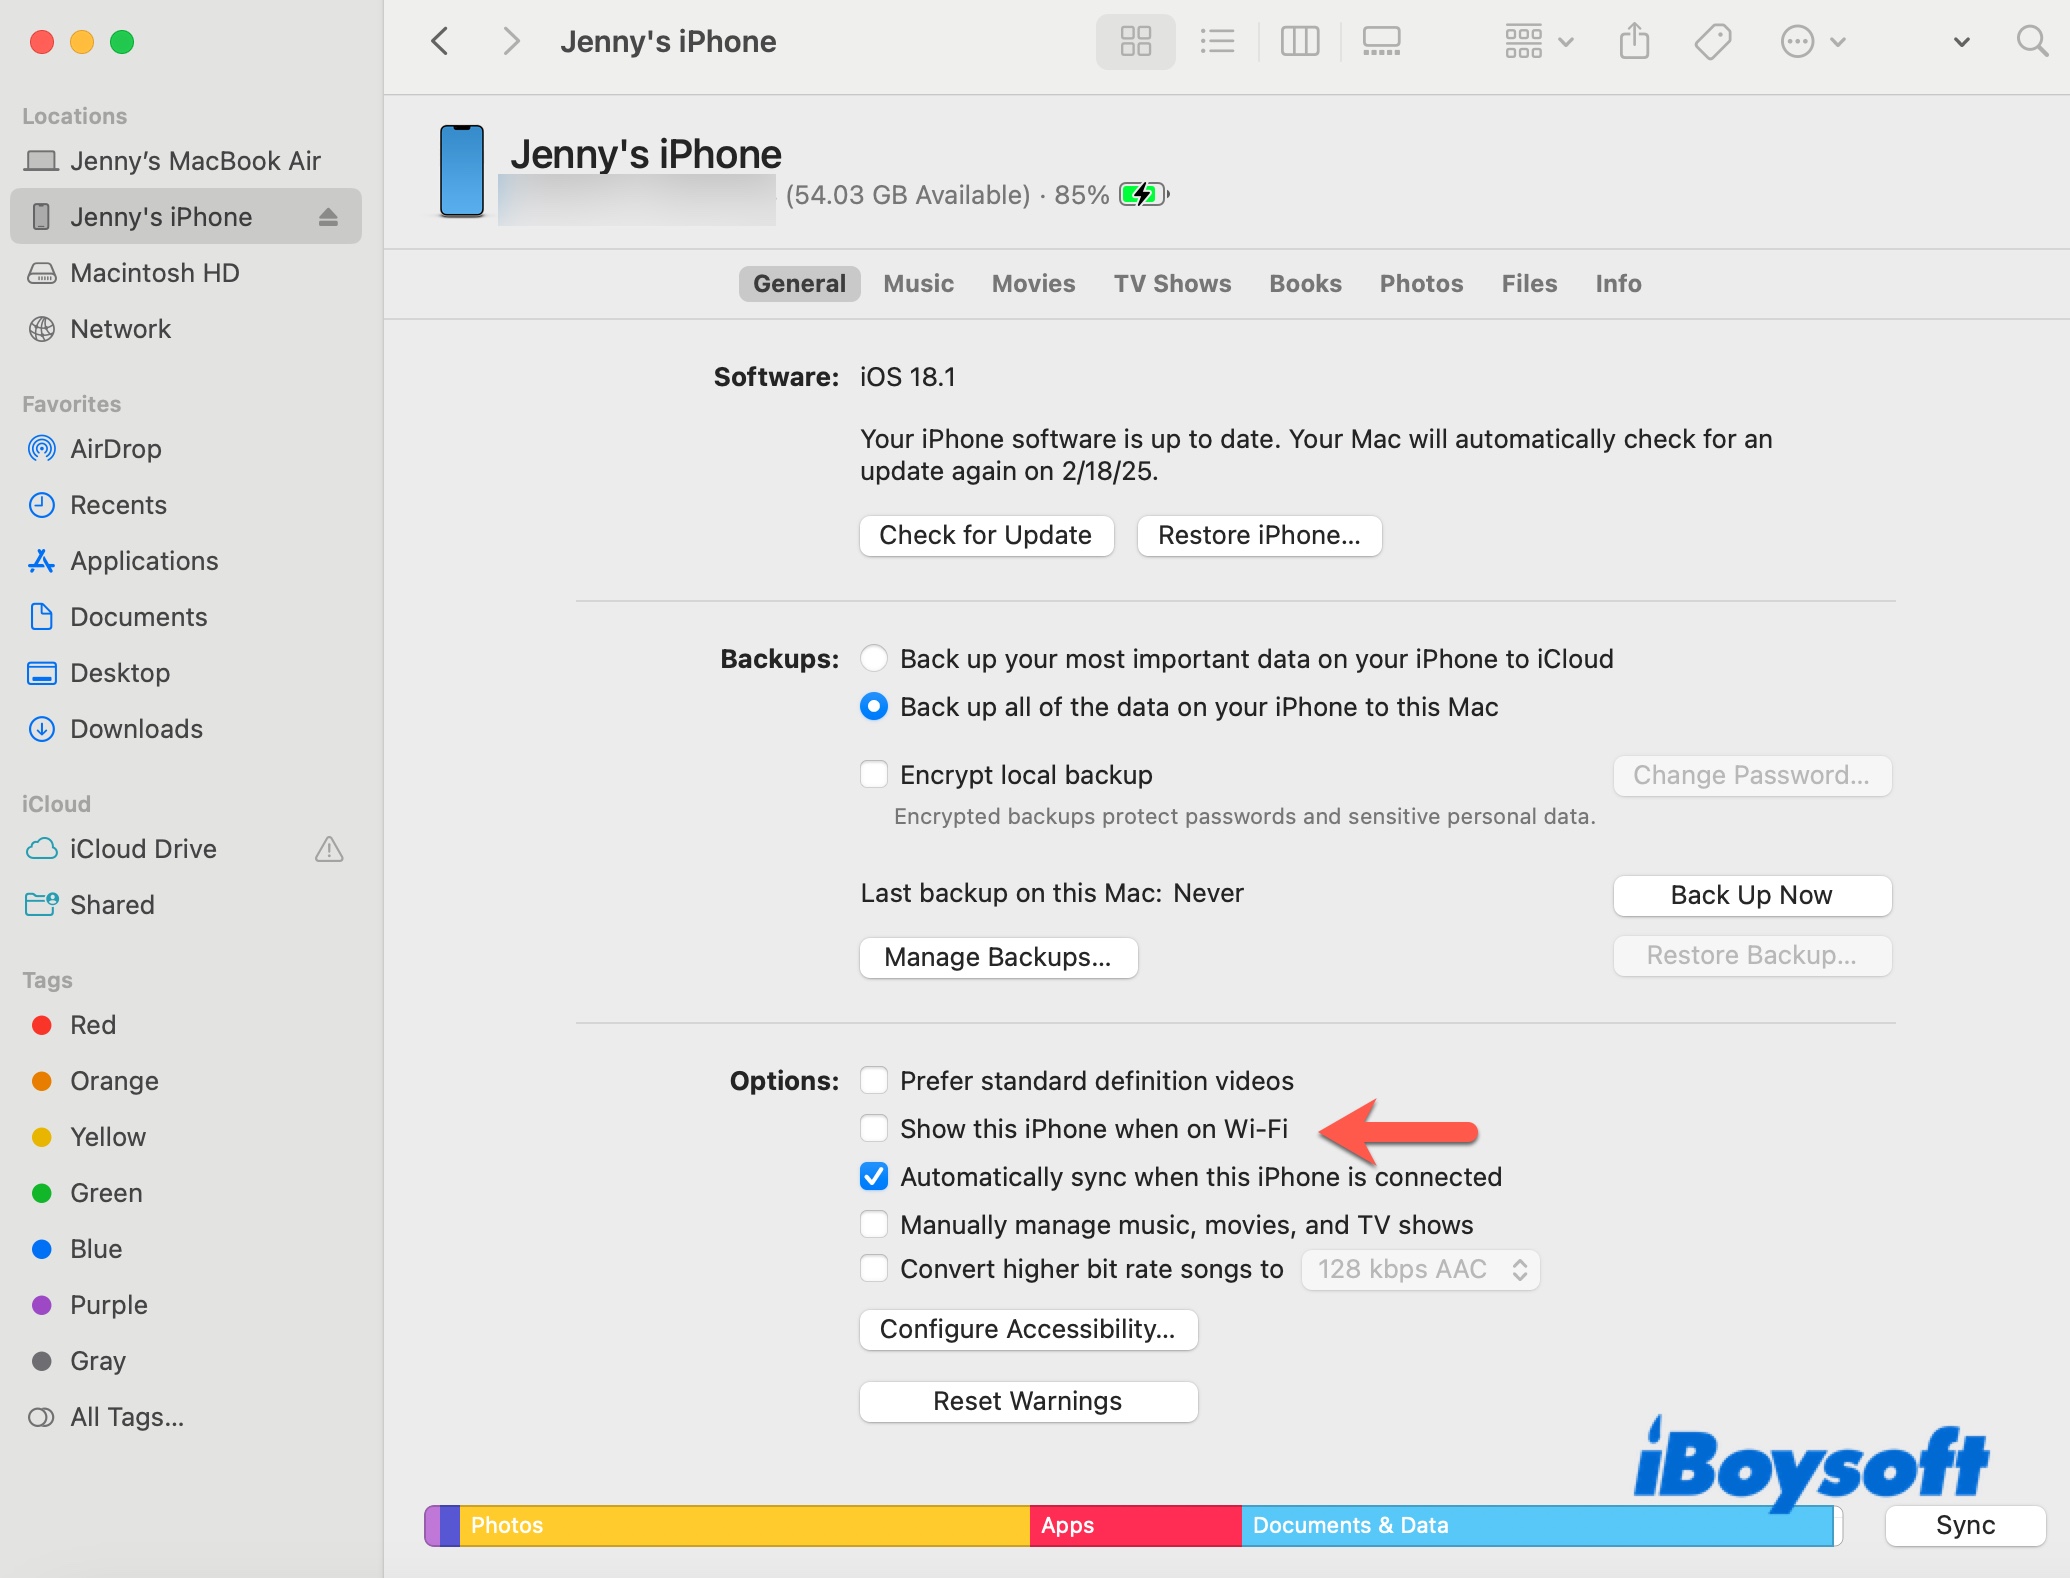
This hides the iPhone from WiFi but not from wired connections. If your device is physically connected, safely eject it.
Fix 2: Disable automatically syncing the iOS/iPadOS devices
You can also set the preference file com.apple.AMPDevicesAgent to disable AMPDevicesAgent from automatically syncing iOS devices. To do this:
- Open Terminal.
- Run the command below.defaults write com.apple.AMPDevicesAgent dontAutomaticallySyncIPods -bool true
If you want to undo the change, run the following command to delete the preference file.defaults delete com.apple.AMPDevicesAgent
Help others fix AMPDevicesAgent high CPU usage on Mac!
AMPDevicesAgent wants to use your confidential information?
The notification "AMPDevicesAgent wants to use your confidential information stored in "iOS Backup" in your keychain" may appear when you connect your iPhone or iPad to your Mac using a USB cable for the first time; when you perform a local backup of your iPhone or iPad; or when you sync your devices through WiFi.
It's a normal behavior. You can grant access by entering your login keychain password, which is also your login password, and then click "Allow" to allow the request once or "Always Allow" to allow it permanently.
If you've denied the access and can't click the button, follow the steps below to do it from Keychain Access:
- Launch Keychain Access.
- Search for "iOS Backup" or whatever in your message.
- Double-click the first entry.
- Switch to the "Access Control" tab.
- Enable "Allow all applications to access this item."
- Click the ( + ) button and navigate to /System/Library/PrivateFrameworks/AMPDevices.framework/Versions/A/Support/AMPDevicesAgent to add AMPDevicesAgent.
- Close the window.
- Repeat the steps with other items related to "iOS Backup."
Share this guide if you find it useful!