Having a useless application, driver, or extension on a Mac is not a pleasant experience since this sort of thing not only stacks loads of caches, preferences, logs, system files, support files, user data, etc., but also results in conflicts with your machine and OS, triggering your machine work improperly.
In this case, it's highly recommended to remove the barely used app, driver, or extension from your machine for a smooth performance of the Mac workstation. Today, this post walks you around to uninstalling Pioneer Drive from your Mac with stunning utilities from both third-party and native Mac tool libraries.

How to uninstall Pioneer Driver from Mac with CleanMyApp?
Do not hold a hostile stance to third-party software, as it always surprises you with its impressive features and functions that Mac cannot match sometimes.
Although Mac is configured with native app removers, CleanMyApp works excellently in removing the apps along with all their associated files simultaneously, freeing you from visiting every single file directory one by one to clean its related data. This saves time and effort greatly!
Here is how to remove Pioneer Driver from your Mac with the assistance of CleanMyApp:
Step 1: Free download and install CleanMyApp by clicking the download button below. You might be brought to the App Store page to complete this download.
Step 2: Once the download and installation end, launch this app uninstaller and select Pioneer Driver from the list.
Step 3: Click the Uninstall button on the main window.
Step 4: Tap Continue uninstall to confirm the uninstallation.
Step 5: Enter your password if you're asked for confirmation.
Step 6: When the Pioneer Driver is uninstalled, click Finish.
See? It's quite easy to remove Pioneer Driver from your Mac with the help of CleanMyApp. With it, you needn't access its files and folders hidden in different file directories and paths based on the truth that CleanMyApp gathers all the app's related files with a comprehensive disk scanning and comprehensively removes them along with the app uninstallation.
You'll love this app once you experience it for the uninstallation mission!
Share this post to help more people uninstall Pioneer Driver from Mac easily!
How to remove Pioneer from Mac with Mac Trash?
If you don't have a liking to the dedicated uninstaller for Mac we mentioned before, you can remove the Pioneer Driver manually through Finder, macOS's built-in file manager. However, this process can be a bit labor-intensive since you'll need to track down and remove any residual files from the uninstalled driver. Be sure to follow the instructions below carefully if you opt for this method.
Step 1: Completely quit Pioneer Driver on your Mac, or you will receive an alert that says the task cannot be completed since Pioneer Drive is still in use.
Step 2: Open Finder and open the Applications folder.
Step 3: Find Pioneer Driver, right-click it, and choose Move to Trash from the context menu.
Step 4: Then, use the Go to Folder option in Finder, and type the following paths one at a time, go through these folders and find any associated files of Pioneer Driver, right-click, and choose Move to Trash.
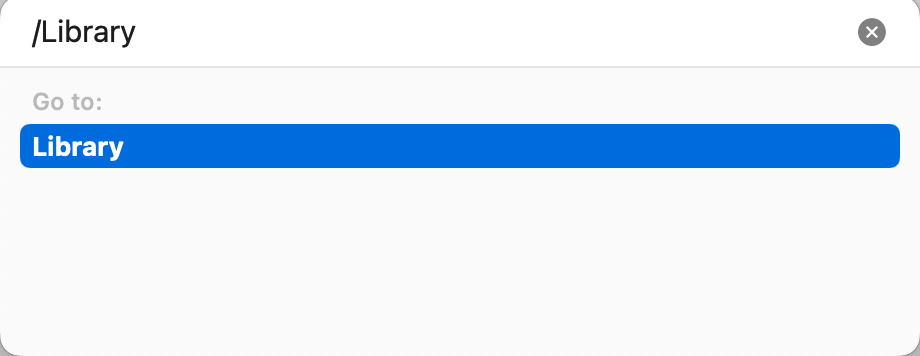
- ~/Library/Application Scripts/
- ~/Library/Application Support/
- ~/Library/Caches/
- ~/Library/Cookies/
- ~/Library/Group Containers/
- ~/Library/LaunchAgents/
- ~/Library/Logs/
- ~/Library/Preferences/
Step 5: Right-click Trash and choose Empty to delete the app and the associated files thoroughly.
If you're tired of finding the related files in different file directories one by one, scroll up to download CleanMyApp and let it complete the whole uninstallation with ease!
How to uninstall Pioneer Drive on Mac via Terminal?
If you're searching for an advanced approach to carry on this uninstallation, Terminal is a nice choice, which allows you to complete this task by communicating with the OS without a graphical interface, but just some commands. Yet caution is necessary, as any misoperation may result in an app removal failure and even put your machine at risk!
If you find this way sophisticated, please switch to the easier solutions we explored before. Or, just proceed:
Step 1: Launch Terminal from Finder > Applications > Utilities.
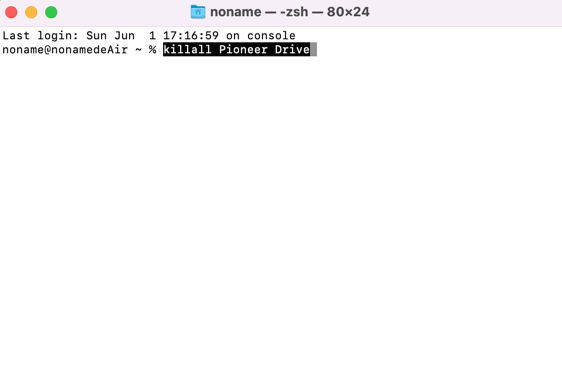
Step 2: Type the following command and press Enter to quit Pioneer Driver.
killall Pioneer Drive
Step 3: Type the following command and press Enter to open the Applications folder.
Step 4: Then copy-paste the command below with a space, and drag-and-drop Pioneer Driver from Applications to Terminal.
sudo rm -rf
Once you drop-and-drag the unwanted app from the Applications folder, the command line should be like this:
sudo rm -rf/Applications/Pioneer Driver.app
Step 5: Enter your admin password and press Enter.
Step 6: Empty the Trash, and you are all set!
Conclusion
An app uninstallation is not as tough as you imagine, actually, you can complete this mission with ease under the guidelines of this post. It offers you three approaches to remove unwanted apps and drivers from your Mac, and the related data and files are included, of course.
You can pick up one solution to proceed with the software uninstallation based on your liking. If you prefer an easy and all-in-one workaround, then CleanMyApp is highly recommended, which allows you to uninstall an app and its leftover files within a few clicks.
Whereas if you'd like to complete this task manually, then the default utilities -- Finder and Terminal are nice options. Note that Finder takes many more steps while Terminal requires certain knowledge of command lines in this mission, so please think twice before you pick up the final solution for a smooth and effective uninstallation.
Many thanks if you would like to share these uninstallation solutions with more people on your favorite social platform!