There are several occasions when a bootable USB can come in handy. For example, if your Windows PC won't boot and you have only a Mac available, you'll need to make a bootable USB on Mac for Windows 10 or 11.
One of the easiest ways to make a bootable USB on Mac is from ISO images. In this article, we'll show you how to create a bootable USB from ISO on Mac for Windows, macOS & Linux.
If you want, you could also create a macOS bootable USB from Windows.
Requirements:
- Prepare a USB flash drive or external hard drive with space larger than the ISO file. (Back up its files because it'll be erased in the process.)
- A working Mac running macOS.
- Download the ISO file for macOS, Windows, or Linux, or download the macOS installer pkg files and then convert the installassistant.pkg files to ISO files.
Way 1: Write ISO to USB on Mac using Disk Utility
The ability to create a bootable USB from an ISO on a Mac is embedded in Disk Utility, a built-in disk management tool on every Mac. You can use it to create a Windows 10 bootable USB from ISO on Mac, or a Windows 11, macOS, or Linux boot disk.
If you only have a DMG file, you can convert the DMG file to ISO first.
How to make bootable USB using Disk Utility on Mac:
- Open Finder, then launch Disk Utility from the Applications/Utilities folder.
- Connect the USB external drive to your Mac.
- After it appears in Disk Utility, click View > Show All Devices.
- Select the top-level physical drive of your USB and click Erase.
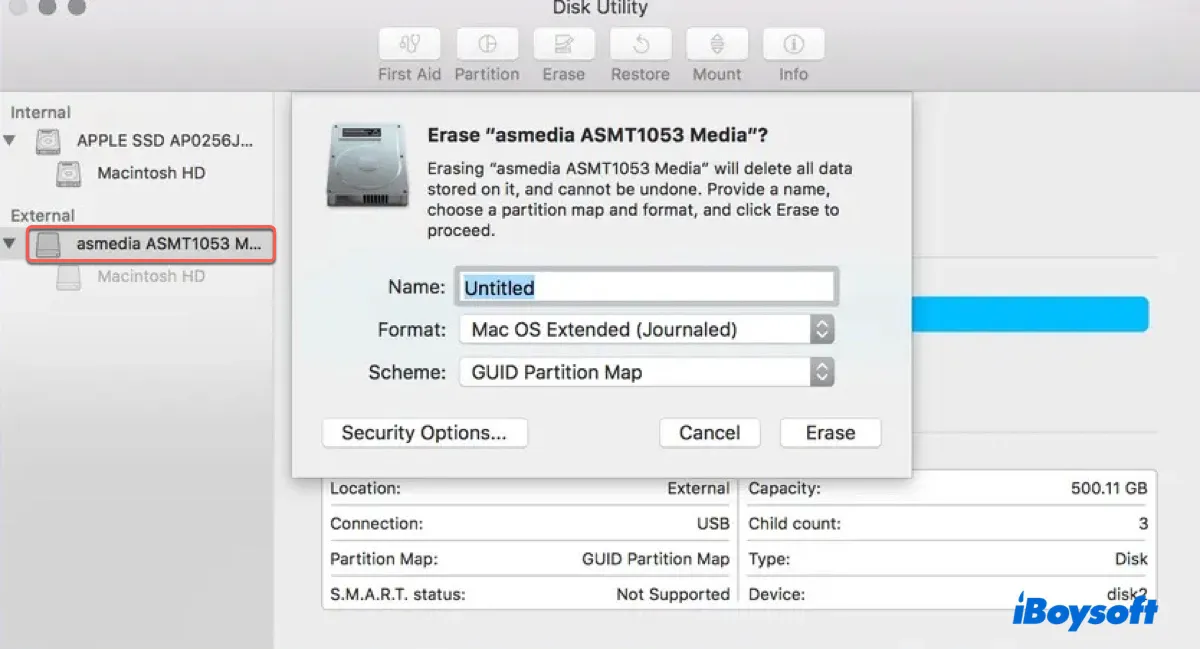
- Give it a name.
- Choose FAT32 if you want to create a Linux or Windows USB from Mac; if you need to make a Mac boot drive from ISO, choose Mac OS Extended (Journaled).
- Click Erase.
- After the drive is erased, select it and click Edit > Restore from the top-left menu bar.
- Select your ISO file as the Source.
- Click Restore and wait for it to finish.
Way 2: Burn ISO to USB on Mac with Terminal
Another native tool for burning ISO to USB on Mac is Terminal. It's the command-line interface of the Mac operating system, capable of performing all sorts of tasks, including creating bootable USB from ISO.
- Launch Terminal from the Applications/Utilities folder.
- Run the command below to list all connected devices.diskutil list
- Identify the disk identifier of your USB drive.
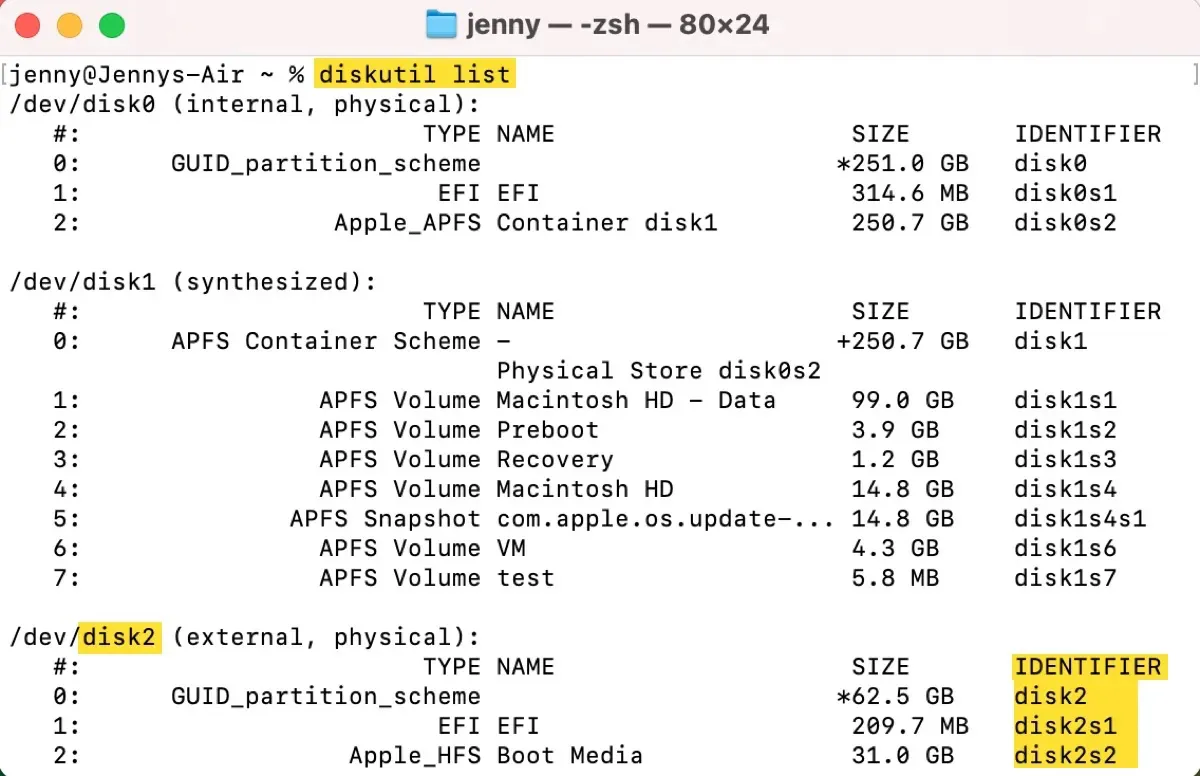
- Unmount it using the command below after changing disk_number.diskutil unmountDisk /dev/disk_numberdiskutil unmountDisk /dev/disk2
- Modify /path/to/iso-file and disk_number in the command below to burn the ISO image to USB.sudo dd if=/path/to/iso-file of=/dev/disk_number bs=1mType sudo dd if=, drag and drop the ISO file to Terminal to get its file path, leave a space, and then input the rest of the command: of=/dev/disk_number bs=1m. The final command looks like this: sudo dd if=/Users/jenny/Desktop/Windows10.iso of=/dev/disk2 bs=1m
- If it asks for a password, enter your login password and press Enter.
- After the bootable USB is created, eject it using the command below after replacing disk_number.diskutil eject /dev/disk_numberdiskutil eject /dev/disk2
Share to help others burn ISO image to USB on Mac!
Way 3: Create bootable USB from ISO on Mac via Etcher
You can also use the free third-party software balenaEtcher to burn ISO to USB on Mac for Windows 11, Windows 10, macOS, or Linux. It creates USB installation media from bootable ISOs and is free for the first 10 devices. Here's how to create a bootable USB from ISO on a Mac:
- Download balenaEtcher.
- Click the button "Select Image" and choose the ISO file you wish to burn.
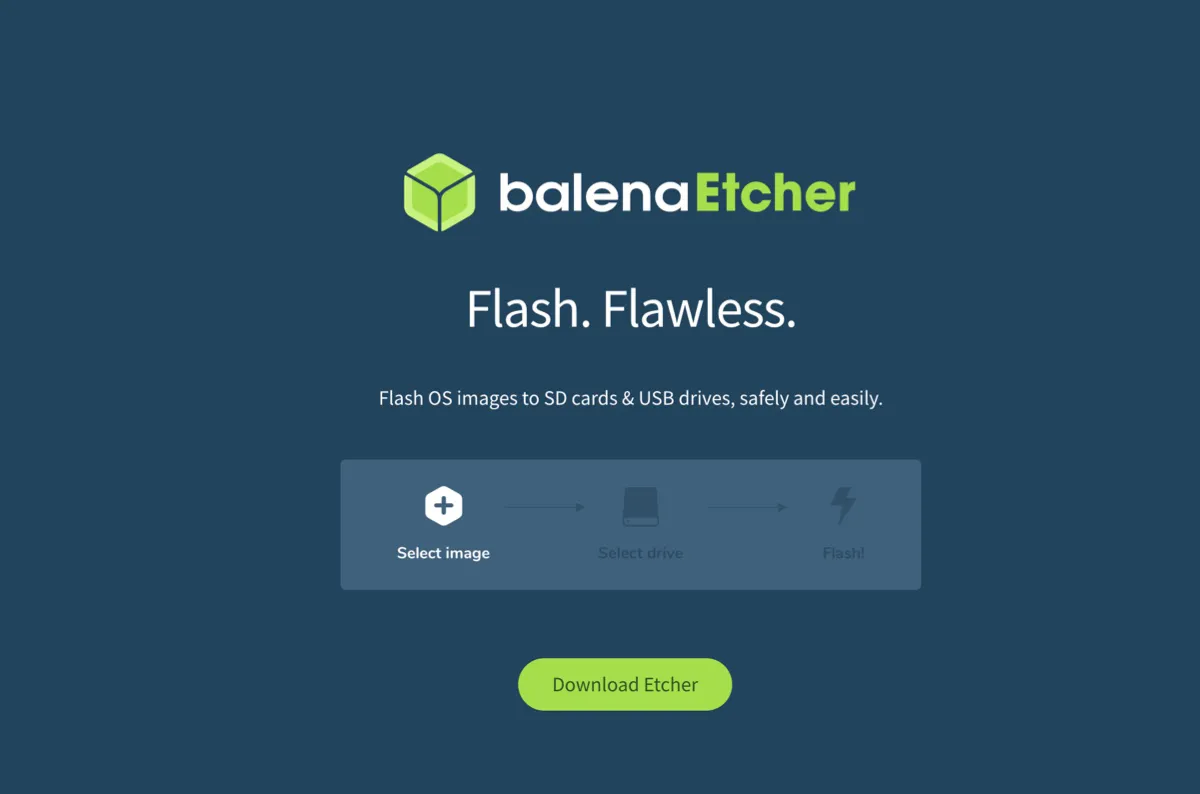
- Click "Select drive" and choose your USB drive from the list.
- Tap the Flash button and wait for the process to complete.
Way 4: Make bootable USB on Mac from UNetbootin
If you want to create a Linux USB from a Mac, UNetbootin is also a good choice. It's a free, open-source utility that can create bootable live USBs for Ubuntu and other Linux distributions without burning a CD. What's more, it has built-in ISO files you can download.
Found the methods useful? Share this post to benefit others who want to create bootable USB from ISO for Windows 11/10, macOS or Linux.
