
Written by
Vain Rowe
Full Guideline On How To Turn Do Not Disturb On Mac
You must have the same scenario that you're interrupted by constantly popping messages or notifications on Mac when you immerse yourself in business or study sorts, which are annoying and unpleasant.
In order to make your Mac quiet and only notify you of important messages, Apple develops a useful feature called Do Not Disturb. You can read this article from iBoysoft to turn it on when you're concentrating on something kind of important.
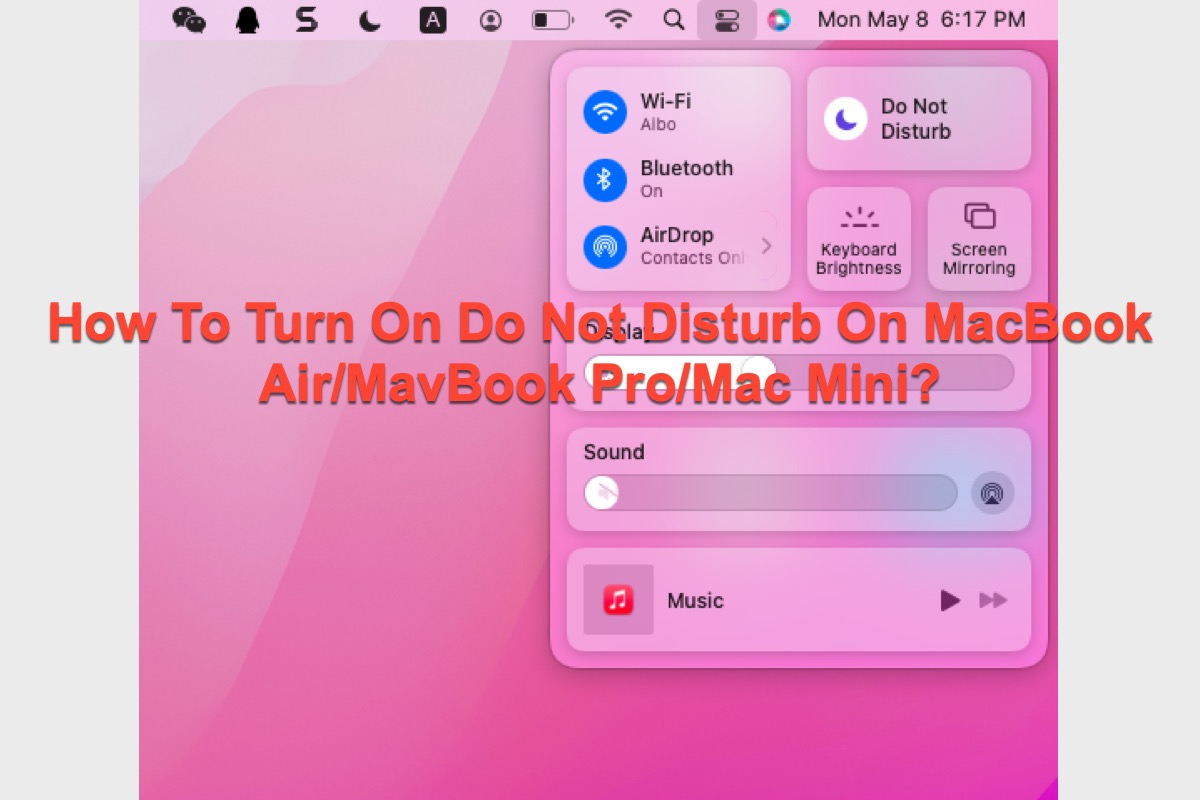
Table of Contents:
- 1. Do Not Disturb basics
- 2. How to turn Do Not Disturb on Mac?
- 3. How to turn on Do Not Disturb on Mac automatically?
- 4. How to create keyboard shortcuts for Do Not Disturb on Mac?
Do Not Disturb basics
The Do Not Disturb feature silences all your alerts, including calls and messages. Applications on your device are able to send notifications, but neither your device screen light up nor makes notifying sound. Moreover, you are allowed to set a schedule to determine this feature-enabled time.
Unlike the Focus mode, the Do Not Disturb feature offers you no support to select the interrupting applications to stop their pending notifications and make them silent. However, it gives you a completely clean and silent workstation to proceed with your business.
Many thanks if you'd like to share this useful post on your social platform with more people!
How to turn Do Not Disturb on Mac?
Enabling the Do Not Disturb feature is able to block any interrupting notifications and spam messages from your macOS devices. This post gives you detailing instructions on how to turn do not disturb on Mac and you can follow the steps below to complete such a task without a hitch.
- Locate the Notification Center icon in the menu bar (upper right corner of your Mac desktop).
- Click the moon icon to get into Do Not Disturb settings. You're allowed to enable the Do Not Disturb feature for an hour or until this evening.
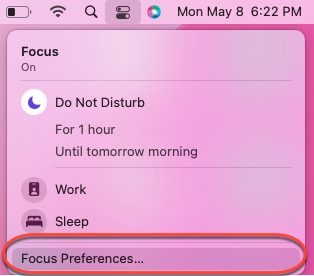
- If you want to determine a specific time for Do Not Disturb to activate, click the Focus Preferences option to modify further changes.
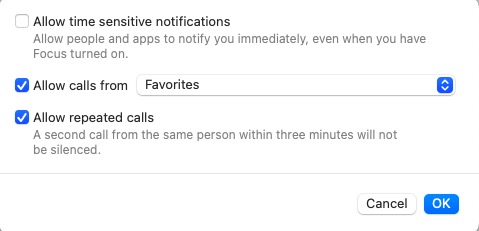
If you have some sensitive notifications or calls that need you to deal with, you can toggle on the relevant box after clicking the Options button:
- Allow time sensitive notifications: Allow people and apps to notify you immediately, even when you have Focus turned on.
- Allows calls from: You can decide whose call will be received even though you have enabled the Do Not Disturb feature.
- Allow repeated calls: This setting allows you to receive a second call from the same person within three minutes in case you can give an immediate response.
If you want to access the notification saved by the Do Not Disturb feature, simply click the date on the upper right corner of your desktop, where list you all the notifications and messages.
How to turn on Do Not Disturb on Mac automatically?
If you want to make your Mac come into the Do Not Disturb state automatically and then quit it by itself, just read the following guideline.
- Go to the Notification Center on your Mac, which locates in the upper right corner of your Mac.
- Click the moon icon and then select the Focus Preferences in the menu bar.
- Scroll down to the Turn On Automatically tab and right-click the set time already there.
- Click Edit, and then decide when your device enables the Do Not Disturb feature and stops it.
- If you want to make your device repeat the scheduled time, just check the weekday down there.
If you think this article is informative, why not share it to help more people?
How to create keyboard shortcuts for Do Not Disturb on Mac?
You're allowed to activate the Do Not Disturb feature in a more effective and faster manner, that is, by creating personalized keyboard shorts.
To create the personalized shortcuts to enable the Do Not Disturb feature on your device, please do the following:
- Click the Apple menu on the left upper corner of your Mac desktop.
- Select System Preferences from the dropdown menu.
- Locate the Keyboard bar and then click it to make it open.
- Switch to the Shortcuts tab and then select Misson Control from the left sidebar.
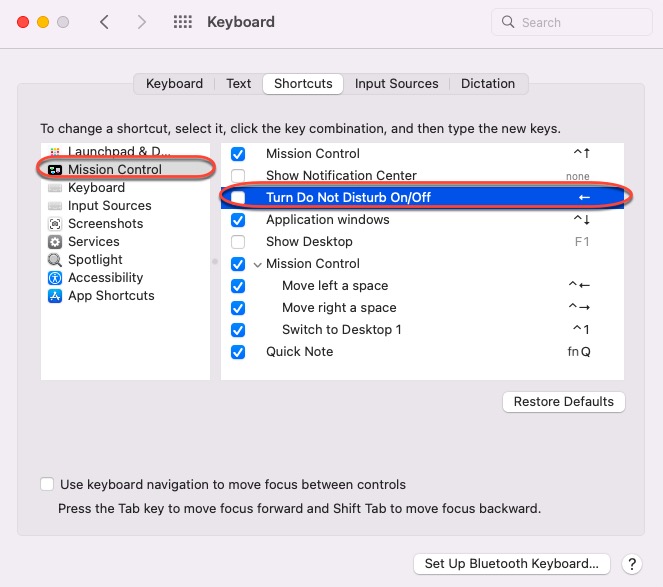
- Check the box for Turn Do Not Disturb On/Off with your mouse.
- Double-click the None option or the key next to the box.
- Press the key you want to use to activate the Do Not Disturb feature.
- Click Done to confirm your actions.
Then you can press the key that you set to make your Mac computer into the Do Not Disturb state. If you want to quit, hit the key on your keyboard one more time.
Bottom line
If you're annoyed with the constant notifications and messages popping up on your Mac, the Do Not Disturb feature fits you a lot. It is able to block every annoying popup except for the ones from the application that you allow.
You can even determine what time your device comes to and quit the Do Not Disturb state by itself, which is really convenient. If you're interested in this wonderful function, do not hesitate and have a try right now!
Additionally, this feature even syncs across your Apple devices. If you don't like that, go to cancel it directly.
If you meet the Do Not Disturb feature keeps turning on your Mac, please read the tutorial from our website to get it fixed!
Why does Do Not Disturb keep turning on? Here are the possible reasons and solutions to stop DND from turning on randomly.